Wednesday, November 28, 2018

Tis the Season for Gift Giving!

Hi, Maggi here, and I've got a fun challenge for you. I know at this time of the year, we are all VERY busy cooking and shopping. There's never a spare moment and we often neglect our crafting passion. However, if you are like me, crafting is so gratifying, and is a much needed activity that feeds and renews our soul.

Because it's that time of the year when we're all thinking about the perfect gift for our friends and families, let's combine our crafting passion with our "to do" list by creating a vintage or shabby chic gift for a special someone in your life. Your gift could be as simple as a handmade card or tag, or an elaborate piece of home decor. Maybe you like to place your gifts in handmade boxes? Your imagination is the only limit on this challenge!

The winner will earn the chance of a Guest Designer spot here at Frilly and Funkie, and everyone who enters and follows the rules will go into the draw for the chance to win a $25 spending spree at The Funkie Junkie Boutique. In addition, the Design Team will select three further outstanding entries and those creators will receive a Top Pick badge to display on their blogs!

The guidelines for entering are simple; create a new vintage or shabby chic project following the challenge theme, link it below to your post (not just your blog) and also include a link back to this challenge in your post. You can combine our challenge with up to 10 challenges (including this one) to be in with a chance of winning. If you are entering through a public forum (such as Instagram) you'll need to include the words Frilly and Funkie Challenge. Also, please be sure to turn off your Word Verification so our Design Team can leave comments on your blogs. Make sure you follow these rules as unfortunately we have had to eliminate entrants from the prize draws in the past.

As always our fabulous designers have created some wonderful inspiration for you. This week the Funkie gals share their gorgeous creations (click on each image for a closer look);

Jenny Marples - Pushing The Right Buttons

Sara Emily - sarascloset

Suzanne Czosek - Suzz's Stamping Spot
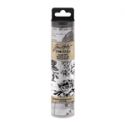
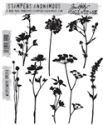
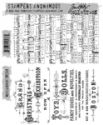
Stampers Anonymous Tim Holtz Festive Overlay Music and Advert Tim Holtz Layering Stencil Plaid Snowflakes For the Funkie Junkie Boutique

******************************************************
WEEK ONE

This week the Frilly gals share their wonderful challenge creations (click on each image for a closer look);

Kathy Clement - Kathy by Design

Cec Wintonyk - CW Creations

Maggi Harding - Scrap, Travel and Bark!

Now it's your turn to show us your handcrafted gifts here at Frilly and Funkie! Enter your projects below and remember to come back tomorrow to see what our latest Guest Designer has in store for us. There will be even more inspiration from the Funkie gals next week too so make sure you look out for those.


Monday, November 26, 2018

Challenge Winners - A Harvest of Gratitude

Hi everyone. Today we announce our top picks from the 'A Harvest of Gratitude' challenge. We loved seeing your beautiful and varied entries incorporating gratitude and the colors of Fall in a variety of ways. Thank you to everyone who took the time to join in the fun.


It was an incredibly closely run thing and having seen each entry the Design Team finally chose #18 Simona Rebbechi as our overall winner. We loved how Simona used die cuts and a variety of textures to create a wonderful Fall Thanksgiving tag. Congratulations to Simona on being our favourite and winning the opportunity to be a Guest Designer here at Frilly and Funkie for a future challenge. You will be contacted shortly with all the details.

And now for the three winners of our Frilly and Funkie Top 3 Badges for this challenge; the choices this time were, in numerical order; #7 Jess Madaglia, #9 Rox Boyce and #19 Lisa Hoel. Please email Linda at thefunkiejunkie@gmail.com for the codes for the Top 3 badges so that you can display them proudly on your blog.


And finally we have a randomly chosen lucky winner for the $25 gift certificate to The Funkie Junkie Boutique. Our congratulations this time go to #1 Tenia Nelson! Please email Linda at thefunkiejunkie@gmail.com for the gift certificate details.

A big thank you again from the Frilly and Funkie team to everyone who took part in this challenge and congratulations to all our winners. The current challenge, 'Tis the Season for Gift Giving' runs through Tuesday, December 4th and the Design Team will be back here this Wednesday November 28th with some more inspiration for you. We hope to see you entering this time around so that you too can be in with a chance to win.

Have a great week everyone!

Saturday, November 24, 2018

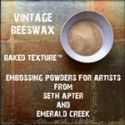
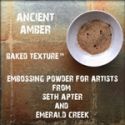
Saturday Showcase - Seth Apter Baked Texture - Vintage Beeswax & Tim Holtz Distress Collage Medium

Hi!  Happy Saturday!  Suzz here to share with you projects featuring the wonderful Seth Apter Vintage Beeswax and Ranger Tim Holtz Vintage Distress Collage Medium. I am a huge fan of encaustic art and anything with a lovely glaze, sheen or shine.

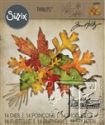
Seth Apter Vintage Beeswax Sizzix Tattered Leaves Stampers Anonymous Widlflowers Ranger Distress Oxide Inks For the Funkie Junkie Boutique

When I first saw the  Vintage Beeswax I knew I had to try it out and play with it.  Classic bees wax gives a lovely layer of texture with a cloudy effect.  With the Baked Texture you get the glaze without the cloudy effect.

Seth Apter Vintage Beeswax Sizzix Tattered Leaves Stampers Anonymous Widlflowers Ranger Distress Oxide Inks For the Funkie Junkie Boutique

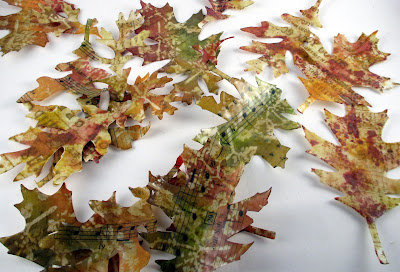
I love making fall leaves and this beeswax allowed me to make them shine even brighter.  A few steps to get my leaves ready to shine.

  1.  Die cut leaves from mixed media paper, old music sheets, white cardstock.
  2.  Stamp wildflowers using Versamark on some of the leaves.
  3.  Heat emboss using clear embossing powder.
  4.  Stamp text and script on variety of leaves using brown archival ink.
  5.  Smear Distress Oxide Inks over surface of craft mat.  (I used reds, oranges, and yellows)
  6.  Spritz with water.
  7.  Drag and dab leaves into inky mat.
  8.  Let dry.
  9.  Cover leaves with versamark.
10.  Sprinkle Bees Wax over surface and shake off excess.
11.  Heat embossing powder. (use a box or other enclosed space to keep cleanup to a minimum)
12.  Repeat.

This produced a beautiful selection of leaves:

Seth Apter Vintage Beeswax Sizzix Tattered Leaves Stampers Anonymous Widlflowers Ranger Distress Oxide Inks For the Funkie Junkie Boutique
The bees wax adds a lovely shine along with bringing out the richness of the colors.  I added gold edges to my leaves to go with my card.

Seth Apter Vintage Beeswax Sizzix Tattered Leaves Stampers Anonymous Widlflowers Ranger Distress Oxide Inks For the Funkie Junkie Boutique
To help highlight what the difference the beeswax made I created an inked background with half covered in bees wax and the other the original inky background:
Seth Apter Vintage Beeswax Sizzix Tattered Leaves Stampers Anonymous Widlflowers Ranger Distress Oxide Inks For the Funkie Junkie Boutique
The vintage bees wax adds a lovely vintage tone to the background along with pulling forward the richness of the distress ink. 

The bees wax is so thick that with two coats you can get the cracked glass effect:

Ranger Tim Holtz Vintage Collage Medium Ranger Distress Oxides For the Funkie Junkie Boutique

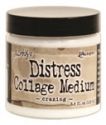
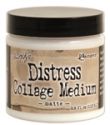
After I created my leaves I wondered what it would look like if I used the Tim Holtz Distress Collage Medium (Vintage)  so I used the glaze to try a few different ideas.

First I took a sheet of cardstock with the same distress inks and applied vintage collage medium on the right side.  It added a nice muted vintage tone to the  background.

Then I decided to use it to layer on some stamped tissue paper over a painted corrugated cardboard.

Stampers Anonymous Music  For the Funkie Junkie Boutique
 I die cut some leaves from the background after it was dry.

Stampers Anonymous Music Sizzix Tattered Leaves  For the Funkie Junkie Boutique

Stampers Anonymous Music Sizzix Tattered Leaves  For the Funkie Junkie Boutique

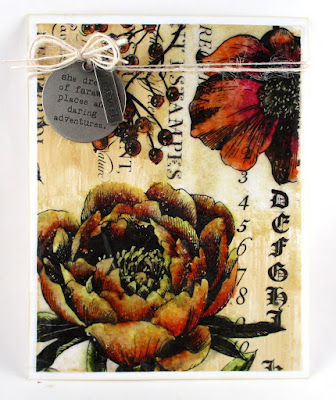
My next thought was to combine the two effects into one project. 


Tim Holtz Collage Paper For the Funkie Junkie Boutique
I started by coloring a piece of Tim Holtz Collage paper with alcohol markers.

Then I took that sheet and mixed the collage medium in the bottom right and top left corners and Vintage Bees Wax in the other two corners.

Seth Apter Vintage Bees Wax Ranger Tim Holz Collage Medium Tim Holtz Collage Paper For the Funkie Junkie Boutique

I painted the collage medium on the back of the collage paper in the two corners and laid it onto the card base.  I added the collage medium on top in the same two corners. 
Seth Apter Vintage Bees Wax Ranger Tim Holz Collage Medium Tim Holtz Collage Paper For the Funkie Junkie Boutique

After that dried I inked up the other two corners with versamark covering the flower areas and overlapping onto the glazed areas.  I then covered that area with the bees wax (shook off the excess) and heat embossed.  I repeated the process in the same areas with bees wax. 


Seth Apter Vintage Bees Wax Ranger Tim Holz Collage Medium Tim Holtz Collage Paper Idea-Ology Story Stick  For the Funkie Junkie Boutique
The finished card with just a few simple embellishments leaving the beautiful collage paper with it's finishes as the focal point.


Go check out the fabulous deals that are happening this weekend at The Funkie Junkie Boutique

Suzz

Products: 

Thursday, November 22, 2018

Guest Designer - Debbie von Grabler-Crozier

It is time to introduce our Guest Designer for the Tis the Season for Gift Giving challenge running currently.  Please say hello and welcome Debbie von Grabler-Crozier of Pretty Things.  Debbie was the winner of the Haunted Halloween challenge.


Hi everyone! I am so thrilled to be here – the surprise of having my card chosen still hasn’t worn off and I smile when I think of it. I am honoured to bring to you my interpretation of the Tis The Season For Gift Giving. Thank you to the design team for giving me this opportunity.

Like many of us, I have been crafting and making things for as long as I can remember and it has always been a big part of my life. By day I am a professional craft writer and I specialize in sewing patterns for bags and home accessories. I also occasionally draft a pattern for painting, jewelry and quilt making. I adore my job because it allows me to be a stay at home mum to my little Cocker Spaniel, Daisy.

I was trained as a scientist though and I love that too. I have a few degrees in Biology and medical sciences and I love physics – that is actually my main hobby now given that what I do for a living is the usual hobby choice! I crochet too; usually while listening to metal or an audio book.

In my spare time, I have a husband and a son and of course, my two adored fur babies Daisy and Checkmate.


I have created a card which can bear a gift at the same time. This is a great choice for people living a long way away from friends and family but who go into shock at the post office delivery charges (that would be me!). They seem to take a hike in December and forget to go down again in January. But that is another rant for another day!

This card could be the answer. The gift bag on the front can take a voucher or money (not ideal in the post) or even a small actual gift like jewelry.


This card is all about layers and details. There is a mat for the first layer and then a more detailed overlay with Oxides and stamps plus a bit of splattering to add texture. The little gift card pocket comes next and after sanding, this has an embossed message which means that even after the gift has been taken out and enjoyed, there is still a Christmas shelf worthy card!


The real show is the holiday greenery and little flowers. These are all made from sanded Kraft core paper and although the foliage is Christmas specific, the small flowers and filler blossoms are not - further proof that these dies are really versatile and you can use them year round. I have made some little holly berries with Nuvo drops and some flower centres too. Finally a gold bow completes the picture and provides a focal point.

I do hope that you enjoy this one and feel inspired to make something along these lines. Happy crafting!

* * *
To get all the details about Debbie's project, check out her blog and then come on back and show us your Christmas Gift Giving project. The challenge, which can be found HERE, runs through 11:55 pm Eastern time on Tuesday, December 4th so there is time to create and hopefully shrink your to do list.

Don't forget to check in with us often because we always have lots to share. One of our designers will be here on Saturday with a new Saturday Showcase and the gals on the Funkie side of the Design Team are working on their gift ideas and will have some fabulous inspiration for the challenge to show you next Wednesday.

Saturday, November 17, 2018

Saturday Showcase: Graphic 45 Glorious Garden Goddess

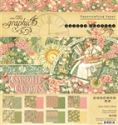
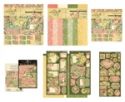
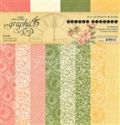
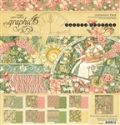
Hello, Friends! Kathy here with a brand new Saturday Showcase feature. This is where we take time to shine a spotlight on some of the products available at The Funkie Junkie Boutique. Graphic 45 has recently released their Garden Goddess Paper Collection, and I have fallen hard for it! This vibrant garden themed papers are accented with gorgeous Art Nouveau style images, beautiful sentiments and intricate patterns.


I love to create projects that showcase all that a collection has to offer, so I designed a very simple 7" x 5" card folio with a 1/2" spine. Distressed/painted edges, machine stitching, custom dyed seam binding ribbon, textiles, florals, and metal charms give this folio a wonderful shabby chic vibe.


Many of you have asked how I create these 5" x 7" card folio bases, and I answer that question during the video tour of this folio. So for now, we will just take a little peek at some of the inside elements.

This is a simple folio with waterfall feature on the left and a pocket/folio insert on the right.


The waterfall is made up of six 4 1/4" x 4 3/4" and is held shut with a magnetic closure.


The area behind the waterfall houses an interactive flap and insert page that makes room for even more photos.


The pocket page on the right contains a 4" x 6" folio with magnetic closure. I just love the sayings in this collection!


There are 8 panels in the folio, and I managed to work in some fun spots for journaling and inserts.

While I had the collection out on my work space, I decided to use my scraps to create some Mixed Media tags.


The base for both tags is a Graphic 45 Large Kraft Tag. The mixed media background is created with the Tim Holtz 3-D Botanical Texture Fade. I can't seem to get enough of that tool! This time, I tried a few new mediums on the embossed tags, and I'll share that process with you in the video below.


The generous size of these tags allowed me to score a pocket on my second creation. And of course, where there's a pocket....I will fill it!

I hope I've managed to share my love for this glorious collection with you. To take a closer look at these projects, please enjoy this short YouTube video.


Thank you so much for joining me! I hope you find time to get your craft on this weekend!

Cheerio,
kathy

Product Links to The Funkie Junkie Boutique