Monday, September 30, 2019

Challenge Winners - Terrific Tags

Today we announce our winners from the 'Terrific Tags' challenge. Thank you to everyone who shared their beautiful tags with us. We loved seeing them all.


This was such a close one with several really standing out but in the end the Design Team chose #2 Helen Hollinger who felt inspired to get her craft on and make this fabulous texture laden tag. Make sure to check it in more detail HERE. Congratulations Helen on being our favorite and winning the opportunity to be a Guest Designer here at The Funkie Junkie Boutique blog for a future challenge. You will be contacted with all the details.

And now our picks for the three winners of The Funkie Junkie Boutique Blog Top 3 Badges for this challenge. As already mentioned it was so difficult to choose between these entries and we recommend you hop on over to take a look at them all. In numerical order they are; #5 Esther (Shoregirl's Creations) #7 Nancy (oops.designs) and #10 Beulah Bee. Please email Linda at thefunkiejunkie@gmail.com for the codes for the Top 3 badges so that you can display them proudly on your blog.


And finally we have a randomly chosen lucky winner for the $25 gift certificate to The Funkie Junkie Boutique. Our congratulations this time go to #4 Fonda! Again, please do make sure you check out her amazing project for this challenge. Please email Linda at thefunkiejunkie@gmail.com for the gift certificate details.

Thank you again from all of us here at The Funkie Junkie Boutique Blog to everyone who took part in this challenge and congratulations to all our winners. The current challenge, 'Treats Not Tricks!' runs through Tuesday, October 8th and we look forward to seeing your entries!

Have a great week everyone.

Saturday, September 28, 2019

Saturday Showcase - Art Journal Page with Dina Wakley Paints

It is Cec here and I am presenting the Saturday Showcase today.  I thought I would share a fun art journal page made with Dina Wakley Acrylic Paints.

The paints come in two sizes and I have been collecting the little one-ounce bottles.  I love them for a couple reasons - they have the tiniest nozzle so there is no waste by accidentally squeezing out too much and they are highly pigmented so that little squeeze goes a long way.


I decided to make an art journal page and make it fun and somewhat funky (at least for me).


The first thing was to make a bunch of gel prints with lots of the bright colours in the collection.  There is a great selection of pale colours as well but for this project I wanted to stay bright since summer flowers are fading fast here and I am not ready for that.  The paints spread beautifully with a brayer and stay wet long enough to make marks and pull the prints.  I find with regular craft acrylics I have to add some retarder to allow for more open time but not with these paints.


I used various combinations of the bright paints I have on hand (Lime, Blackberry, Ruby, Olive, Peacock, Sedona and Tangerine) and some fun things for mark making - a couple of stencils, a piece of corrugated cardboard, some bubble wrap, some plastic leaf guard, some mesh ribbon and the core of a roll of tape.


As I was working I cleaned the brayer by rolling it on a couple pieces of card stock and set those aside.


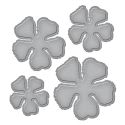
I used the Shabby Posies die (Tammy Tutterow) to cut a couple of flowers from the paint cleaned off the brayer and then used a Pigma Micron pen to add marks.


Next I stamped Jet Black Archival Ink (Ranger) on some of the gel prints with a couple stamps from the Daisy Art set (Wendy Vecchi) and the Fancy Florals set (Dylusions) to create flowers and then fussy cut them.


I wanted a couple more flower shapes so I added more paint to a new sheet of card stock with the brayer and used a poinsettia die to cut flowers.  The pen was used to add lines.


Next I made the background by painting three colours (Olive, Lime and Peacock) on watercolor card with a ratty old paint brush.  I decided it was a bit too bright so I went over it with some White Gesso to knock back the colour.


A big red heart was added in the centre with Red Geranium Archival Ink (Wendy Vecchi) and followed by a bunch of stenciling with a variety of stencils and archival inks.  I used a black Stabilo pen to add a border to the heart along with a white gel pen (Sakura) to add a few marks.

Finally I adhered my funky flowers and a computer generated sentiment.

I highly recommend these paints because they spread well and take stamping, marking and stenciling with inks beautifully.

Supplies list with links to The Funkie Junkie Boutique:

Gel Plate - Ranger (no longer available)
Dots and Stripes Border Stencil - Wendy Vecchi (no longer available)
Dotted Flowers 5x8" Stencil - Dylusions (no longer available)
Blocks - Small 5x8" Stencil - Dylusions (no longer available)
Dandelion Archival Ink - Wendy Vecchi (no longer available)
Mini Chicken Wire Reversed Stencil - TCW
Pigma Micron Pen - Sakura
White Gel Pen - Sakura
Poinsettia Die - Marianne Creatables
Plastic Leaf Guard
Corrugated Cardboard
Bubble Wrap
Mesh Ribbon

Thursday, September 26, 2019

Guest Design - Cathie Parreco

It is time to introduce our Guest Designer for the 'Treats Not Tricks' challenge.  Please say hello and give a warm welcome to Cathie Parreco (a.k.a. Beulah Bee).  Cathie was the top pick from the Let's Do It Again challenge.


My name is Cathie Parreco but I blog under the name Beulah Bee. It's the nickname my husband gave me years ago and it just stuck (most times he calls me "B" for short). I like paper-crafting, rubber stamping, mixed media and collage and spending time with this hobby is a great stress reliever. I'm grateful for the Funkie Junkie Boutique's creative inspiration (and supplies 😁) and also for this guest spot on their blog.


My "Treats not Tricks" project features paper-folded boxes (think origami) transformed into Asian-themed Christmas ornaments (I made six different ones). They can all be filled with treats (or perhaps a special note) for two gifts in one.


They were easy to make--just cut, fold, paste and glitter--and the paper I used is called Oriental Garden by Stamperia. Please stop by my blog (beulahbee.blogspot.com) to take a closer look and see more examples.

* * *

Do pop over to Cathie's blog and then come on back and share what you have made to contain treats.  The challenge can be found HERE and runs through 11:55 pm EST on Tuesday, October 8th so there is still time to create.

There will be a new Saturday Showcase this Saturday so don't forget to check that out too.

Wednesday, September 25, 2019

Treats not Tricks!

Maggi here to welcome you to a new Funkie Junkie Boutique Blog challenge. I'm happy to be leading the challenge 'Treats not Tricks' this time around. My challenge is to make Treats not Tricks! Chose a theme for your project and make a vintage or shabby chic something that holds a treat. It could be a Halloween treat bag, a Valentine's candy box, a birthday card for a special person that holds a treat (could be a gift card "treat" or a bit of chocolate), anything that can hold a treat.

The winner will earn a chance to be a Guest Designer at a future date here at The Funkie Junkie Boutique blog, and everyone who enters and follows the rules will go into the draw for the chance to win a $25 spending spree at The Funkie Junkie Boutique. There are also Top 3 Badges for three additional outstanding entries, chosen by the Design Team.

The guidelines for entering are simple; create a new vintage or shabby chic project following the challenge theme, link it below to your post (not just your blog) and also include a link back to this challenge in your post. You can combine our challenge with up to 10 challenges (including this one) to be in with a chance of winning. If you are entering through a public forum (such as Instagram) you'll need to include the words 'Funkie Junkie Boutique Challenge'. Also, please be sure to turn off your Word Verification so our Design Team can leave comments on your blogs. Make sure you follow these rules as unfortunately, we have had to eliminate entrants from the prize draws in the past.

Look at all this fabulous art created by the design team to hold a little treat:

Maggi Harding - Scrap, Travel & Bark


Sara Emily -- sarascloset


Cec Wintonyk - CW Creations


Suzanne Czosek - Suzz's Stamping Spot

Stamperia Oriental Garden Prima Christmas in the Country Idea-Ology Pine Cones For The Funkie Junkie Boutique

Ginny Nemchak - Polly's Paper Studio


Jenny Marples - Pushing The Right Buttons


We can't wait to see your take on this creative challenge. Link your project up using the Linky tool below before 11:59PM EDT on Tuesday, October 8th. And be sure to check back to see what our latest Guest Designer has cooked up for you. Until then, we wish you loads of joy and creativity!


Saturday, September 21, 2019

Saturday Showcase - Stampers Anonymous Tiny Toadstools

Happy Saturday! Suzz here with a post full of toadstools! I was inspired by the newStampers Anonymous Tiny Toadstools rubber stamps. We have been experiencing a bit of wet weather here in the Midwest and my yard has Tiny Toadstools popping up everywhere!


I started with the idea of creating tags using the funky toadstools for the current 'Terrific Tags' challenge.  But not just any tag but tags inspired by the tiny toadstools!


I stamped out a series of the tiny toadstools and used the general shape of the toadstools to create a tag template.

For this toad stool I started with spritzing all pieces with mustard seed distress stain spray. I let the backgrounds dry completely before stamping. The toadstool cap is stamped with the Fragments using black ink. The edges were sponged with black die ink. The center where the slit was also sponged to create the shading from the stem.

The toadstools were stamped on the inky background and cut out. The sentiment was stamped and cut out and a coordinating butterfly was die cut stamped, heat embossed with black embossing powder.

It was assembled with the tiny toadstools pop dotted to give dimension.


For this toadstool the same process was followed as above. The cap is stamped with the fragments using potting soil archival ink. The stem is stamped with On the Farm advertisement. The background was sponged with a brown dye ink. And the butterfly is sponged with red dye ink. A touch of red was added to the tiny toadstools and the background using watercolor pencils.

Once I had the template for the first mushroom and played around with it I decided to try another style and created a second template.


For this mushroom I was inspired by the texture on the tiny toadstools. I used black embossing paste and the doily stencil to add a layer of texture on the cap. The bottom has sponged and embossing paste using the coffee stain stencil.

The tiny toadstools are embossed to give the black caps even more texture. The background is sponged on with a soft antique linen and stamped with a tiny script.

To create and assemble the toadstools I created templates and cut out the tags. For my tilted toadstool:


I drew the general shapes inspired by the tiny toadstools. The top is around 3 1/2" x 2" and the bottom is around 2" x 1". After I drew the first one and cut it out I used it to to trace the top of the toadstool. Cut a slit in the toadstool top to put the stem into. Cut two stems.

Decorate your stems. (On this one I used Design Tape on this Mushroom)

Insert the top layer of your stem through the slit. Attach backside of stem to front after inserted through cap of the toadstool. Once the stem is attached you won't be able to remove it unless your slit is big enough to slide the bottom of the stem through the opening.

I also taped the stem to the back side of my cap to stabilize it. I attached the butterflies after I had completed my toadstools and they caused it to be a little tipsy because of the weight of the butterfly. So you might need to shave the bottom of your stems at the end.


The second template attaches the stem behind the cap of the toadstool. You decorate your toadstool first and then attach the two stems together at the top. Then attach the top of the stem to the backside of the toadstool cap.


I hope this has you inspired to create your own toadstools!

You still have time to join us in the 'Terrific Tags' Challenge until 11:55 pm Eastern Time on Tuesday, September 24th, 2019.

Suzz
Products from the Funkie Junkie:

Stampers Anonymous Tiny Toadstools
Stampers Anonymous On The Farm
Stampers Anonymous Fragments
Stampers Anonymous Stuff to Say
Stampers Anonymous Entomology
Stampers Anonymous Documents
Tim Holtz Layering Stencil - Doily 
Tim Holtz Layering Stencil - Splatters
Wendy Vecchi Black Embossing Paste 
Sizzix Die Flutter

Ranger Distress Stain Spray - Mustard Seed 
Eileen Hull Molten Black Magic
Ranger Archival Ink - Jet Black, Coffee
Idea-Ology Tim Holtz Quotations Metallic Stickers
Ranger Distress Ink - Vintage Photo, Antique Linen, Festive Berries
Watercolor Pencils
Idea-Ology Tim Holtz Designer Tape