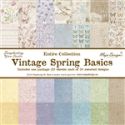
While these papers are wonderful for making cards they are also fabulous for making other projects and this time I decided to show you a trinket box that I made with the Once Upon A Springtime collection.
I figured out my own measurements for the box, which is made from 1/16" thick chipboard. I will post my measurements as I go along but your measurements will have to be altered depending on the thickness of your chipboard and the size of box you would like to make. I will also give you some tips in the event that you have never tackled a box before.
Start by cutting five pieces of chipboard to make the "tray" portion of the box. NOTE: I discovered the even with a firm hand holding the chipboard down in my guillotine cutter, it started to slide so I had to start over with a couple pieces and cut them using a steel ruler and my X-Acto knife. I am super fortunate that my husband has a laser cutter so the next time I will get him to cut them and I know they will be perfect.
Bottom - 1 piece 4 1/2" x 4 1/2"
Sides - 2 pieces 4 1/2" x 2 3/4" and 2 pieces 4 3/8" x 2 3/4"
Glue the pieces together to make the tray. Start by gluing one long side to the bottom, then one short side, then another long side and finally the last short side. The first piece will only have glue on the edge that attaches to the bottom, while the remaining pieces will have glue on that edge as well as glue on the edge that attaches to the adjacent side.
Either paint or use copy weight paper to cover the tray front and two sides. The back will be attached to the lid and will not show but you should paint or wrap at least one inch of it so the edges that will show are covered. You should also paint or cover the inside of the tray on all sides.
Next ink all the edges of the tray, inside and out. I used Vintage Photo Distress Ink. Don't worry if it looks a bit rough as this does because you are going to add some patterned paper that will cover almost all of the surfaces.
Cut patterned paper for the tray as follows and ink the edges with Vintage Photo DI:
Inside Sides - 4 pieces 4 3/8" x 2 1/2"
Inside Bottom - 1 piece 4 3/8" x 4 3/8"
Outside Sides - 3 pieces 4 1/4" x 2 9/16"
Adhere the patterned paper using double sided tape. I did the inside sides first, then the inside bottom followed by the three outside sides. Remember that one side and the bottom are going to be adhered to the lid so they will not show.
Next make the outside by cutting chipboard and covering it with paper with at least one inch folded over. Make sure you leave a space between each piece of chipboard at least 3 times the thickness of your chipboard so my space is 3/16". This is important so that your paper does not tear or crack when you bend it. This is the same method you would use if your were making an album cover.
The measurements are:
Bottom and Top - 2 pieces 5" x 4 3/4"
Spine - 1 piece 5" x 2 7/8"
Paper Cover - 1 piece 14 3/4" x 7"
The paper is adhered with double-sided adhesive on the folded edges and the corners are mitered. Be sure to score in the space so it will fold easily.
Next, add a piece of paper to line the box outside. I used double-sided tape and taped the spine (centre portion) down first, creased the spaces between the chipboard and then taped the rest down. This ensured that it would still fold. Ink all the edges, inside and out with Vintage Photo DI.
Outside Lining - 1 piece 12 1/2" x 4 7/8"
Cut a length of ribbon 17 5/8", fold each end over 1/2" and adhere to itself, then glue a thin magnet to each end and fold the ribbon over 7/8" and adhere to itself.
Add the ribbon across the middle of the inside of your outside with the folded edges facing up as shown.
Cut a piece of patterned paper 4 9/16" x 4 3/4", ink the edges and adhere on the left side as shown. Add some double sided tape to the ribbon hanging over on the right (this is the front of your box).
Glue the bottom of your tray to the right side of your outside, bring the ribbon up and adhere it to the front of the tray and then bring the spine up and adhere it to the back of the tray. The piece on the left is now the lid of your box and will open and close. The ribbon hanging loose on the left is what will close your box and will grab the other magnet to keep it closed
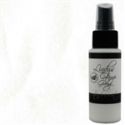
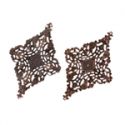
Make an embellishment to cover your ribbon and to act as the piece you lift up. In this case I took a filigree medallion and a metal button with the shank removed and I painted them with some Aqua acrylic paint and then I dabbed some snow cap mixative alcohol ink on them and glued them together. Glue your embellishment on top of the loose piece of ribbon. If your embellishment is metal as mine is, the magnet will grab it but to be safe I recommend that you glue it to the ribbon or it might slide off the ribbon when you try to open the box.
Next it is time to embellish the top of the box. Graphic 45 paper lends itself to fussy cutting if you have the patience so I did a lot of that to create my box top. I started by cutting a postcard from the paper pad, scored it in the middle and bent it to look like an open book. Then I cut some fairies and a couple of tickets.
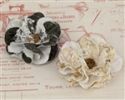
I also cut duplicates of numerous flowers and layered them with pop dots. Each of the open flowers was given a pearl for a centre. Finally I made 3 bead stick pins and while I wished I had some metal beads so I could have altered them to match the front embellishment, I didn't so I just dry brushed a bit of white paint on the aqua beads to tie them in.
I cut a few other element to put on the sides of the tray but in the end decided that they distracted from the top, which was where I wanted the focus to be so I set them aside for another project.
Here is another view of my finished box.
I hope you will try making a box - they make wonderful gifts and are such fun to create. To help you get started there will be an extra 15% discount applied to the Graphic 45 line of products for the next two weeks at The Funkie Junkie Boutique so it is a perfect time to give it a go.
Before I go, here is another look at some of the other projects I have made with Graphic 45 - I have included links to the original posts in case you would like to see how they came together:
(Gilded Lily Collection)
(Home Sweet Home Collection)
Greeting Card
(Time to Flourish Collection)
(Time to Flourish Collection)


