I hope you had a very pleasant Memorial Day weekend- not only taking the time to think of those who have paid the ultimate price for our freedom here in this country, but also took advantage of that to have a bit of relaxation. One of those hard-fought-for freedoms is being able to travel and see the wonders of our world - what a great blessing! Our family took to the road for a camping trip that included 8 campers altogether as most of our Indiana Besties joined us. I used some of that time to finish up this project which has been in the making for MONTHS! I started it while still in Florida, and kept adding to it as I traveled across the eastern US from Florida, to Indiana, to New York, and back to Indiana again. Out of the past 8 months, I have traveled/lived elsewhere for 6 of those months! This project really does fit the theme for this next to weeks here on TFJB Inspiration Ave: "Get Ready To Travel!" I've got a lot of photos here and have included a few tips for you as well. Travel along with me to see!
Wednesday, May 31, 2023
Lyla's Travel Folio
Friday, May 26, 2023
Suzz's Americana - Memorial Day Observation and Appreciation
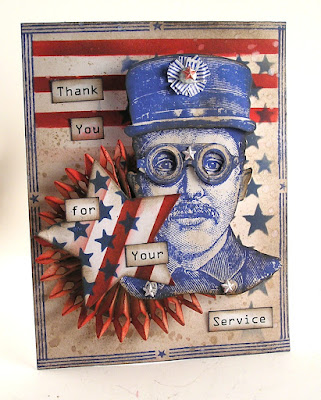
Hi! Suzz here! I used the Americana theme as an opportunity to say a thank you to all our veterans and active United States Military personnel.
The new Stampers Anonymous stamp set The Inspector has an image that reminded me of a uniform and I used it to inspire my card.
To create my background I started with stamping the border with the long stamp that had stripes and a star. It fit perfectly along the sides.
Next I sponged some stripes using the stencil and red dye ink across the top. I came back over the red ink and added a soft sponging of brown dye ink.
Then the stars were sponged over the background using the blue dye ink and then another coat of brown dye ink. I repeated this process on a die cut star to add to the front of the rosette.
The inspector was stamped twice in blue ink and the goggles and hat were fussy cut and layered over the bottom image.
I typed up the words and printed them out to cut up and place on the card. I used the rosette die cut and Idea-ology Tim Holtz backdrop paper. I sponged the surface with red and brown dye ink after assembling the rosette.
I stamped and tried the inspector with different colored inks and a different background while exploring the Americana ideas.Happy Memorial Day!
Suzz
Products:
- Stampers Anonymous Tim Holtz The Inspector
- Stampers Anonymous Tim Holtz Layering Stencil Stripes
- Stampers Anonymous Tim Holtz Layering Stencils Stars
- Ranger Distress Oxide Ink - Blueprint Sketch
- Ranger Distress Ink - Festive Berries
- Ranger Distress Ink - Ground Espresso
- Ranger Distress Ink - Prize
- Sizzix Alterations Rosettes
- Idea-Ology - Tim Holtz Back Drops Volume 4
Wednesday, May 24, 2023
Lisa's Idea-ology Americana
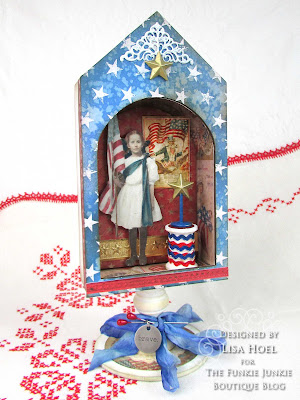
Hello Lisa Hoel here! Our current theme is "Americana". I thought this was a great opportunity to raid my stash and combine old and new Tim Holtz products into a patriotic red white and blue make.
The new Etcetera Facades are perfect to use with Vignette Boxes! There are a variety of sizes and styles in the pack.
Let's take a look at some of the how-to!
Step 1) I have a long retired 12 x 12 Paper Stash pad (Seasonal) that was perfect for lining the Vignette Box!
Step 2) Also in my collection is a Paper Stash pad called Motif that consists of white and kraft papers with resist patterns printed on them. I chose the 'star' pages and colored them with Distress Ink.
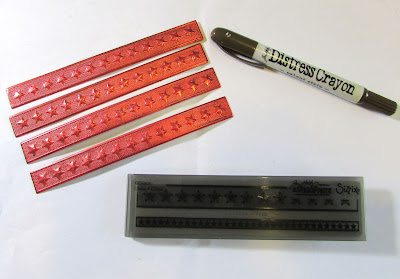
Step 3) I love all the Impresslits Embossing Folders that Tim has designed. I used the Star Trim and Medallion folders for this project. (both retired) Metallic Cardstock works really well!
 |
| I used a brown Distress Crayon to add a little grunge. |
Step 4) The base is a finial and the round cut out from the Etcetera Facades pack.
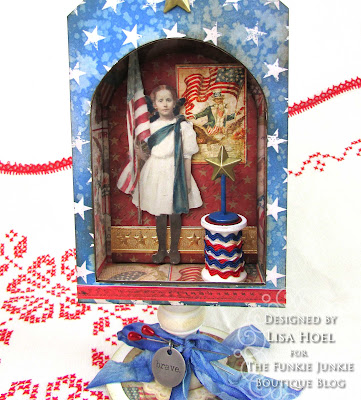
Step 5) Using Distress Watercolor Pencils is now my favorite way to color Idea-ology Paper Dolls.
Step 6) I took the cut out from the facade I used to create a panel to glue into the back of the box.
 |
Step 7) Another fun new Idea-ology product is the set of Figure Stands. Of course the star was perfect for this project! I used Gilded Foundry Wax to color the star gold and Distress Paint on the stand part.
Supplies used:
Tim Holtz Impresslits - Star Trim, Medallion (retired)
Tim Holtz stamp set - Typography
Kraft Stock - Metallic Colors, Metallic Classics
Paper Stash 12 x 12 - Motif, Seasonal (retired)
Grey Two-tone Woodgrain Cardstock
Vignette Boxes
Etcetera Facades
Figure Stands
Paper Dolls
Finial Set
Salvage Stickers - Seasonal
Crinkle Ribbon
Metal Adornments, Stars
Corner Filigree Metal Piece
Distress Collage Medium Matte
Distress Archival Ink - Black Soot
Distress Paint - Picket Fence, Prize Ribbon
Distress Ink Ink Pads - Blueprint Sketch, Antique Linen, Prize Ribbon, Vintage Photo, Lumberjack Plaid, Crackling Campfire
Distress Crayon - Walnut Stain
Foundry Wax - Gilded
Distress Watercolor PencilsDistress Spray Stains - Prize Ribbon, Blueprint Sketch


