Here are the finished flowers, on some projects to show you how they can be made to look quite different.
and then a more grungy look
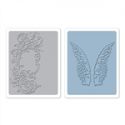
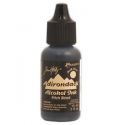
I started by die cutting the flowers using ranger foil sheets that I had stuck on to some manila cardstock. To make the dimensional flowers I used two larger and one smaller flowers, cut from the tattered floral die. I have cut enough here to make two dimensional flowers.Once cut and embossed the fun comes with selecting how to colour them up For the delicate flourish I chose to use paint dabbers and for the more grungy flowers I used alcohol inks. Both of these work wonderfully to colour the foil and slightly different looks and finishes.
This shows the flower coloured with paint dabber, then rub it on with your finger and I then lightly sanded the one on the right, depends which look you prefer. Sanding will remove some of the colour. I also colour the underneath as this may be seen when they are shaped.
For layer one and three, so for one large and one small flower I shaped the petals to create dimension. For the second layer, I made small cuts in between the petals to allow the petals to curl more.
Then stack the flowers and apply a small amount of glue between each layer. To complete I added an idea-ology washer and either brad or pearl for the centre, but you could use large pearls, buttons and anything else you fancy!
Well all the products I have used are listed below, hope you will have some fun making these flowers in any colour and style!
And just before I go here is a completed project using one of them.
have a fun and inky day!
trace x


So wonderful and inspirational, Trace, thank you for the tutorial
ReplyDeleteSoooo cool, love your flowers Tracy, fantastic! They look like they have been patina-ed (not a word I guess, but you probably know what I mean). Can't say which one I like best, they all look fab and I adore the finished project!!
ReplyDeleteOh these are stunning Trace, and would add a fantastic flourish to any project. Like Astrid I don't have a favourite as they are both superb for different styles. How good is your finished project too! Now there's a wall hanging to be treasured. Hugs, Jenny xx
ReplyDeleteYour flowers look absolutely stunning Trace and the tutorial is so very helpful and clear. Thanks for sharing how to make them and your project is just gorgeous.
ReplyDeleteHugs, Fliss xx
These are lovely,what a great end result.Thnks for sharing. Great tutorial.Jacqueline.S
ReplyDeleteHi Trace, you already know how much I love your work but this is amazing, great tutorial and it is good to compare the different methods of colouring the flowers. And what a fabulous result in your hanging. Hugs, Anne x
ReplyDeleteI just can't get enough of hand made flowers and also metal work. The combination of the two is utterly divine. Love these flowers to death. Super StepXStep, Trace. Thanks so much for sharing with us!
ReplyDeleteOhhh these are great Trace, thanks for the tutorial!!!
ReplyDeleteVery very beautiful Trace and thanks for the tutorial.
ReplyDeleteGreetings Janny
Love those foil flowers, Trace! The entire piece is gorgeous and I love the placement of the flower! Great SxS and thanks for sharing! Hugs!
ReplyDeleteFab tutorial Trace. Love these metal flowers :-) Will certainly have a go x
ReplyDeleteBrilliant step by step Trace, thank you - your metallic flowers look fabulous! I've spent the evening fiddling with paper versions - don't know how the flower makers have the patience!! Though maybe it gets easier with practice?
ReplyDeleteAlison xx
Both are beautiful, Trace! I haven't used embossing folders on my metal flowers yet. I'll give this step a go on my next bunch. Thanks for the tut.
ReplyDeleteGreat tutorial trace and I love what you have done with the flowers 2 different and stunning looks x
ReplyDeleteBrilliant flowers Trace, I'll have to try out this technique. It has a wonderful effect. Wonderful start to your Funkie journey. Michelle x
ReplyDeleteGreat idea Trace! I love both versions of the flowers! Can't wait to try this technique!
ReplyDeleteI love your metal flowers... I was just thinking about doing some again using my aluminum cans, but I like this idea for a change of pace! thanks for sharing!!
ReplyDeletewhat a great, beautiful idea! thanks for the step by step. Your flowers are spectacular
ReplyDeleteHi...I was wondering who won the "make a tag" challenge that ended 12/26? Did I miss the post?
ReplyDeleteAWESOME florals! Love the circular base as well!!!
ReplyDeleteTracy!!! These are wonderful! Imcant wait to try this technique out! Thank You!
ReplyDelete