Adhere foil tape sheet to card stock and smooth out with a brayer or
credit card edge! Once the foil is inked
with alcohol inks, Bottle, Stream, Gold Mixative and Blending Solution and dried, emboss and then highlight the raised area using Archival Coffee. Heat set and I will usually give a quick
spray with Krylon matt sealer. For the metal plate, I used a swab to rub in
some Archival Ink in the crevices and wiped off the excess. Now we are ready to use that "Word Play"
die which I just love! Not only does it
work well for "metal look" lettering, but you can add fabric mounted
to chip board or grunge paper for a more 3-D effect. Very cool and funkie! If you want to see how this dies works with
fabric, you can have a look HERE.
I wanted to mount my letters on corrugated card board, which
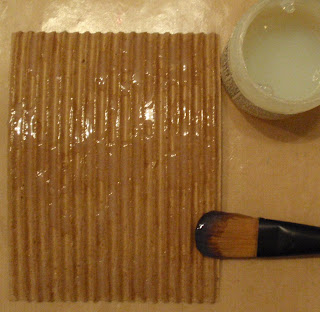
was backed with a red panel. I generously applied Rock Candy Crackle and let that dry
naturally. Now this does take some time,
so do it first thing! Once dried, I
inked it over with Vintage photo stain and let it dry and don't over saturate. You can use the heat tool, but don't heat! Once
dry, add a few coats of Picket Fence stain and also painted a little of the PF into the recessed areas.
I used Glossy Accents to apply the letters to the corrugated CB and two
way adhesive strips for the rest.
For the background tag, I stamped Dylusions number stamp
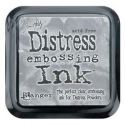
using clear embossing ink and then heat set. The numbers were stamped randomly to create the tag background.
Inked the background and wiped off the excess Distress Ink using a paper
towel. All tag edges were shaded with
Vintage Photo, along with the corrugated cardboard/red panels. The letters were shaded with Archival Coffee.
The sentiment is from Tim, was stamped with Red Stazon Ink
and embossed and then placed it on the top of the EF with a piece of card stock
and ran it through to remove the raised area.
I wanted a more subtle effect, but felt it needed just a little extra
interest.
I cut the CB to the oval shape of the metal plate and
adhered using Glossy accents. The Bingo
"39" was clear embossed and again attached with Glossy Accents! This tag will be for a
"Birthday." The Bingo Card was
cut from Tim's Lost and Found papers, edges distressed and shaded. As always, I hope that I have inspired you and provided some useful information. If you have any questions, just let me know. Thank you for stopping by and have a wonderful Saturday!









A fab tag...the letters are yummy!, that die is on my wish list!! Lovethe range of interest in textures and colours and the step by step is great trace x.
ReplyDelete...a wonderful step-by-step guide to this amazing Tag...like Trace above the wordplay die is on my wish list too...Mel :)
ReplyDeleteWow Terry !! This is a fabulous tag. So glad you provided the tutorial. Brilliant inspiration provided in creating this stunning tag. My head is now full of ideas. X
ReplyDeleteBrilliant Terry, thanks for explaining!
ReplyDeletexxx Margreet
What a blast to read that tutorial! Your tag is sensational and I love that you used the word 'play.' Super job and very inspiring.
ReplyDeleteLove the tag! Gorgeous! Great step by step tutorial!
ReplyDeleteGorgeous tag Terry ! Love the background and the letters and the colours, in fact all of it ! Sue C x
ReplyDeleteTerrific tag and tutorial Terry!!! Say that five times! Love the embossing here!
ReplyDeleteThis is wonderful and I just HAVE to copy, steal, borrow or what ever you want to call it. I love this and I love the colors and I do love shopping with Linda!!!! Great work Terry and I do appreciate the tutorial!!
ReplyDeleteSandy
Your Tag is just terrific Terry, and the tutorial very informative. I am loving these step by step sessions.
ReplyDeleteSmiles:)
Sue
Your tag is fantastic. So many elements about it. TFS with the TJ group, and here too of course :)
ReplyDeleteTerry, HOLY COW! What a wonderful piece! Thank you for the in-depth description for each element -- so cool!
ReplyDeleteWonderful tutorial. Will have to try some of these techniques. Thanks so much for sharing!!
ReplyDelete