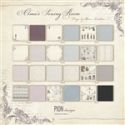
This project used a vintage image from the full size version (12x12") collection called 'Alma's Sewing Room' and the rest of the papers are from the 6x6" 'Alma's Sewing Room'. I really adore working with these fabulously vintage and romantic papers. I had seen a very interestingly folded card style on Marianne Skjelstad's blog a while ago and had to do some extensive hunting to find the project that had stuck so firmly in my mind's eye! Here is my card.

I wanted to work with all the wonderful papers and scaled down tags and ribbon or thread cards and those wonderful antique button cards that are included in this collection! Marianne's adorable card was my inspiration. Here it is below...

I just stared and stared at the card construction. Unfortunately, there was no tutorial, so I folded and fidgeted until I came up with something that looked like the basic design above. Here are some details from my card and then I will share how I did it...

This vintage image just captured me. In sepia tones, with a touch of pale blue, it worked so well with the Pion papers. I mounted the image onto a sheet of card stock in smokey blue and then white card stock that was punched for some undulating edges. Rather than placing this tag into the bottom folds of the card, I inserted the entire tag into the four corners...

The lower left corner is embellished with some fabulous antique button and sewing cards. As the 6x6 collection is identical to the 12 x 12" collection in every way except it's size, these little cards are perfect card embellishments! I found some tiny doll buttons and gave them some color with alcohol markers...

The lower right corner is embellished with two 'Spool Cotton' cards, wrapped with embroidery floss and 2-ply silk thread...

The upper right corner has two small sewing tags and a paper flower (again, colored with an alcohol marker)...

The forth corner has a shaped thread card, wrapped with 1/4" silk ribbon (colored with an alcohol marker) and an adorable, tiny wooden spool, wrapped in the same white silk ribbon. I made a 'butterfly' of some embroidery floss to complete this corner...

When the central tag is removed, this is how the card appears. The tag keeps the front flaps closed!...

The inside of the card is lined with a wonderful paper of blue roses, cut down to 5-3/4" square, to fit the 6x6" space of the back panel. There is a close-up of it below...

The back of the card was embellished with a 2" wide strip of card stock, adhered to the paper behind the punched edges to accentuate the design...

Now for the nuts and bolts! Begin with a 12 x 12" piece of card stock. Score it at 3" and 9" in both directions...

Next, select a 'Round the Page' set of punches, if desired. The photo below shows my second punched paper, which will go into another project. I used a simpler, more classic scalloped design for this card...

It's helpful to punch your corners first, before punching the straight edges...

The corners should be scored, lining up the horizontal and vertical score lines onto the same line on your score tool. A sharpie marker was used to create a contrasting line on my board. It makes it easier to follow the vertical line...

Fold the four corners to the same side and then flip the paper over and fold two edges to the wrong side of the card. The center section of the photo above, creates the back of the card. Flip your card over again and fold the two ends to the right side of the card...

The image above is the face of the card, waiting to be embellished and the 4 corners, ready to hold an image or tag. The possibilities are vast and I'm eager to make many versions of this card!
Don't forget, there's 15% discount on all Pion Design papers for this coming week at The Funkie Junkie Boutique.
Thanks for joining me today and I wish you all a wonderfully crafty weekend!
((hugs)) and Blessings,
Rebecca


You've done it again Rebecca! Love this clever design and of course, what better way to showcase it than with those delicious Pion Design papers. Jenny x
ReplyDeleteLovely card and great tutorial! Thank you for sharing!!!
ReplyDeleteWow, what a gorgeous card, well done for working out how it was done too! I love that beautiful Pion image, the delicate blues and your wonderful embellishments. Anne x
ReplyDeleteso beautiful - that image is gorgeous - super folding too - you clever lady xx
ReplyDeleteThanks for sharing, must try at some point. Beautiful card. Well done Rebecca and Jenny.
ReplyDeleteEnjoy your weekend,
Julie x
What a fantastic card! Thanks for the tutorial.
ReplyDeleteExquisite card Rebecca! Beautifully done and it showcases these wonderful papers at their very best. Thank-you for the how-to - have bookmarked this. Happy Weekend! Nicola x
ReplyDeleteBeautiful card Rebecca! Love the round the corner punching! Sue C x
ReplyDeleteI am loving your gorgeous card, Rebecca!! I have always loved Pion papers, and you've created a true treasure with your sewing themed beauty! I've never tried this card fold before, but thanks to your clear tutorial I feel like I can actually achieve it. Thank you so much for the inspiration!
ReplyDeleteHugs,
Nancy