Hello and happy Saturday to everyone! It's my favorite day of the week, and this one is even more exciting because I have the pleasure of bringing you the step by step here at the Frilly and Funkie Blog.
I should probably begin by telling you about my love of antiques. I volunteer as a docent at an 1808 Charleston mansion. One of my favorite displays is the hand written music book that belonged to one of the daughters. It holds a dear place in my heart, with its stains and mildew spots, a treasure that has withstood most of the ravages of the past 200 years. Today we will journey back in time, taking something new and creating a photo album that looks like it has been around for a couple of centuries.
Once your covers are removed they will look something like the above photo. Now it is time to start disassembling your books. Remove the blank pages at the front and back, carefully separating them.
Next rip out a section of your book that will become your album. I made mine about 15 pages for the purpose of this tutorial, but you can make them any size you like. When you pull them off, be sure the glue from the back is intact to your section. You don't want your album pages falling apart on you.
Let the aging begin! I do this by buying the cheapest store brand instant coffee available and mixing it with some hot tap water. Submerge your paper and book sections fully. I don't leave them in for long. Just enough time to be sure everything is saturated. Sometimes you need to separate a few of the pages to wet them down fully. I give the book sections a squeeze at the end to make them more wrinkled and remove the excess coffee.
After they are stained I bake them in the oven at 225 degrees on a foil covered baking sheet until they are dry, turning once during the process. The blank pages dry quickly. The thick sections take a bit longer. I open those up in the center and spread them out to facilitate drying. Keep checking on them and don't walk away from your kitchen while baking paper. The photos below are the end product of the staining technique. They have blemishes and imperfections, which is exactly what you want. I add even more character to my blank pages by running the Tim Holtz distress tool along the edges.
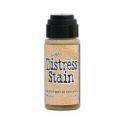
Gather up some pretty laces and distress stains. Linda has a marvelous selection at the Funkie Junkie Boutique. I find that lace accepts the distress stain better than the coffee I use on the paper. Wet your lace down with plain water and liberally apply distress stain. I use antique linen and old paper. Once your lace drys you will adhere it into the edges of your album. It will look something like the photo below.
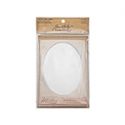
I found the perfect way to display my photos! Tim Holtz cabinet cards! I love them! Below are a few photos of my completed pages. I kept my album simple, but you can be as elaborate as you like.
I distress stained and adhered some rosette lace to the spine of my album. I decided I wanted a few more embellishments on my cover. I made a small tag using a stamped image and Maja papers, added a vintage cluster earring, tied it all together with some additional stained lace, and tucked in these sweet vintage images to finish it all off.
Thank you so much for visiting the Frilly and Funkie Blog today. With my fingers now happily covered in ink and stain, I send my wishes to you for a wonderful and crafty weekend!
Hugs,
Nancy




Wow wow and wow ...Nancy I am blown away by this wonderful step X step ..your project is absolutely gorgeous and great details of how to achieve this ..It's absolutely gorgeous xx hugx Trace x
ReplyDeleteThank you so much, Trace!!
DeleteLike Trace I am completely in love with this Nancy. The way you've conjured a time-worn delicacy from an unwanted book is incredible and proves baking isn't just for rock cakes! Jenny x
ReplyDeleteThank you, Jenny!! The rock cakes sound delicious. I am going to have to get you recipe!
DeleteHugs,
Nancy
A truly stunning project ox
ReplyDeleteThank you for your kind words!
DeleteNancy, once again you've blown me away with your gorgeous creation...makes me want to get busy with some of my vintage photos...Love this!
ReplyDeleteThank you so much, Kathy!
DeleteWhat an amazing, fabulous work of art! Thanks for the wonderful step out....I love that you bake the book pages in the oven. This looks like it came right out of great grandmother's trunk! Gorgeous!
ReplyDeleteThank you so much, Kathy!
DeleteWow Nancy, I have just had to pick my jaw up off the floor - this is stunning! You have aged the pages to perfection and how lovely do they look with the gorgeous Maja Design papers too. This gorgeous creation would not look out of place in the Mansion where you volunteer! Anne xx
ReplyDeleteThank you so much, Anne!! You are so sweet and kind. Sending hugs across the miles!!
DeleteNancy
What a fabulous book! I love the coffee stained covers and pages. The papers are perfect for an antiqued effect!
ReplyDeleteThank you, Maryanne!!
DeleteThank you, Maryanne!
DeleteStunning!
ReplyDeleteThank you, Suzanne!!
DeleteThis project is absolutely fabulous. I love how you have used the coffee to stain your pages and then created a lovely vintage piece with the beautiful lace, stamping and the papers. It has such a romantic feel to it. I wish I could find a used bookstore that had such a bargain price - maybe a trip to visit you should be on my agenda. I definitely need a break as you know and now the weatherman says we will have below normal temps for at least another month - grrr.
ReplyDeleteHugs!
Cec
Thank you so much, Cec!! Okay, you need to book the trip NOW!! It is going to be in the 70's here. You don't even need to bring crafty supplies. I have plenty to share. We will craft to our hearts content and I'll take you around Charleston. Seriously, we would have so much FUN!!!
DeleteHugs,
Nancy
This is fabulous! I love every part of it!
ReplyDeleteThank you so very much!
DeleteHugs,
Nancy
This is fabulous! I love every part of it!
ReplyDeleteAbsolutely gorgeous Nancy! I love how you've ripped everything apart and then created this beautiful album. Dyeing your paper in coffee is a fantastic idea! Sue C x
ReplyDeleteThank you so much, Sue!!
DeleteHugs,
Nancy
This is so beautiful Nancy. I love everything about it. Thanks for sharing, Julie x
ReplyDeleteThank you so very much!!
DeleteHugs,
Nancy
An absolutely beautiful "antique" album. Thanks so much for taking us through the process ... ripping, dyeing, baking - it all sounds like such fun, and what a stunning result!
ReplyDeleteAlison x
Thank you, Alison!!
DeleteYou're AMAZING! This is incredible. Thanks so much for sharing this tutorial.
ReplyDeleteThank you so much for your kind words, Kathy!!
DeleteWow!
ReplyDeleteThis is so dang gorgeous! I just can't stop looking at it.
Beautiful!
diane @ thoughts and shots
Thank you so much, Diane!
DeleteThank you, Joanna!!
ReplyDeleteWowzers! Thanks for the stepXstep! Love the finished project...too perfectly creative! Ok, what are those twp stamps ypu favor? I should recognize them, but don't Can you help me out with the line of stamps they come from? (Sucker for script stamps ;) thanks~Terry Y.
ReplyDeleteThank you so much, Terry!! I am hooked on the script stamps too. I buy every one I see. The one I used for the book is from Stampers Anonymous. It's a few years old but they probably still sell it. The stamp I used to add the stained, mildewed look was won on ebay and doesn't have a title or company markings. If I see it elsewhere I will email you to let you know.
DeleteHugs,
Nancy
Stunning!!! And what a helpful step by step! Thank you so much for sharing! Julie Ann xxx
ReplyDeleteAbsolutely gorgeous Nancy - thank-you for brilliant tutorial too! Nicola x
ReplyDeleteWowwww Nancy your album is absolutely amazing it must have taken ages to make and looks worthy of a place in on of the display cabinets at Charleston Mansion as a real keepsake. All the distressing and embellishments are beautiful and I especially love the way that you made all those delicious layers on the front cover and the tiny roses too. You step by step is wonderful THANK YOU for sharing this beautiful project with us all.
ReplyDeleteWarmest best wishes,
Susanne
-x-
Wow! Hello from London & thank you so much for your post Nancy! I love your antique look album, and am grateful to your sourcing links as many of these products are hard to find in the UK. Please can you tell me where your stamp of handwriting is from? Best wishes, Héloïse x
ReplyDelete