I was amazed at how simple it is to use, yet how effective the results. Here’s my first play with it...
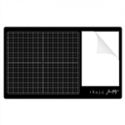
- I put a few drops of alcohol ink onto the glass section of my glass media mat. Added a few drops of blending solution and dragged a piece of white yupo heavystock through.
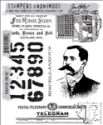
- Once the background was dry I inked up my stamp with lift-ink and stamped.
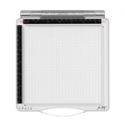
- I used the travel stamp platform so I had the option to stamp a second time if necessary, (it wasn’t).
- I dabbed away the lift-ink with kitchen paper and finally buffed the image to expose the negative.
- I love how clear even tiny detailed stamps are when using the lift-ink.
- I stamped a second time into distress mixed media heavystock. LOVE the faded print I got.
- Using the non stick mat portion of the glass media mat, I spritzed several distress spray stains and misted with water. The ink really beads on the mat, which is exactly what you want.
- I dragged my piece if heavystock through and dried with a heat tool. I swiped the edges through vintage photo distress spray stain and let them wick a little before drying with a heat tool.
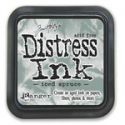
- I blended a little iced spruce distress ink though a mini stencil.
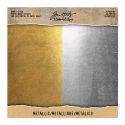
- Stitched the edges with my sewing machine and mounted onto classic and metallic kraft stock.
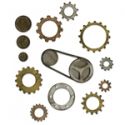
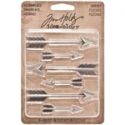
- I added a die cut number and gear, as well as an adornment arrow with a fuse wrapped around it.
The second card is definitely the one I prefer and I even had enough ink left on the stamp for second print. I’m
so impressed with the lift-ink, it’s given me a new appreciation for
alcohol inks and it’s a technique I plan to play with further.
I hope you have a great and creative weekend.
Zoe









Amazing! You are such an inspiration to us all. Thanks for showcasing this technique :-)
ReplyDeleteThis is such a cool technique Zoe! I agree with you, the second card where you stamped with the lifted ink is my favorite as well. The little details you added really make it wonderful! Thanks for this inspiring Saturday Showcase!
ReplyDeleteI love them both!!This technique is really amazing and also seems very funny. Thank you so much Zoe!
ReplyDeleteGreat tutorial Zoe, I love how different both the cards are! And the subtle wash on the second one, is perfection!!!
ReplyDeleteI always enjoy your tutorials Zoe because I always learn something new! This is a great project and now I need to go and play with my new lift ink that just arrived! Fantastic girlie!
ReplyDeleteMagnificent Zoe! Love the thorough tutorial! You’ve inspired me to spend my studio time today playing with Alcohol Inks and Lift Ink!!
ReplyDeleteWOW! THANK YOU for showing us how this ink works! LOVE the results & I WILL HAVE TO get some of this ink! I look forward to seeing what you do next with it!!!!!!!! ;)
ReplyDeleteFirst, both cards look great. I really appreciate your showing how to use the Alcohol Lift Ink and the fantastic result. I just got it and am anxious to try it out. I do have a question though - What did you use to clean your stamp? I notice the one you used is red rubber. Any difference with clear stamps? Thanks. Kathy
ReplyDeleteI used the Archival ink cleaner by Ranger ink (link below). I haven't tried it with a clear stamp yet, but I don't imagine it will be any different.
Deletehttp://www.thefunkiejunkie.com/Ranger_Archival_Ink_Cleaner_INK58939_p/archival_ink58939.htm
Fantastic! love the results.
ReplyDeleteAmazing!!!
ReplyDeleteHow inspiring! I really thought I could live without the Ink Lift, but you have demonstrated how this will become such a useful crafty product in my collection! Great tutorial, and fabulous results! Hugs!
ReplyDeleteHi Zoe, I haven’t joined the craz yet as I wasn’t sure I wanted to invest in one more ink type. What are you favourite alcohol ink colours to work with? If you could only get 3-5 what would the be? And what is the blending solution you are referring to above? Is it rubbing alcohol? As always, you inspire me and I might just join the craz. Thanks ~ Joanne
ReplyDelete