I spent quite a few hours playing with the alcohol inks and then cutting some of the backgrounds out to use on a few projects.
I started with the Translucent Yupo Paper and the reds, greens, yellows and blending solution.
For any of my backgrounds I like to first layer on a light alcohol ink. To do this I put three drops of the color first on the felt and then add a few drops of alcohol blending solution. I smear this up and drown across the entire surface. After I cover the surface, if I want to remove the streaks I just dab across the surface to let the blending solution bubble up the color.
Once that is done, I let the surface dry. Next for the background I was trying to create with the drops and circles I start by dripping directly from the bottles onto the background. I drip as single color in multiple places across the surface. While it is wet I will drip blending solution over the circles I have created. I then like to let them dry before I add the next set of circles. I add them by dripping more circles and more blending solution.
If I don't like where the colors are blending I will bring in large amounts of the blending solution and let it spread to lighten up the background. You can see I did that on this background after I added the green as it was getting muddy.
I let the green dry and came back with yellow dots. The more blending solution on the background that is not dry will help expand the circles. After it dried I added the red dots back into the surface.
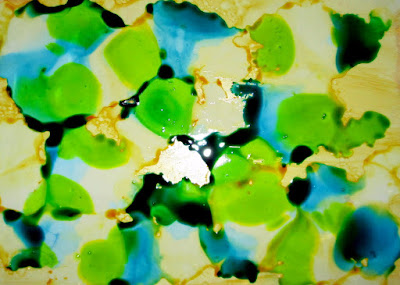
My next attempt was still on the translucent background with greens, blues and yellows.
You can see the blending solution and inks pooling off the edge of the paper.
When it dried you can see how it pooled colors around the edges and how the white cardstock helps keep a much richer color.
I then added some drips of blending solution.
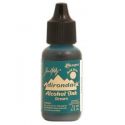
I then started adding a hint of brown ink with a few drops of blending solution and dabbed it on the right side of the paper.
I repeated with a fresh piece of felt with a blue alcohol ink mixed with the blending solution. I didn't re-apply and ink and kept dabbing all the way over to the left.
I then added a bit more brown. I left drying time between each color and replaced my felt each time I put a new coat of color.
I also at the end just used a clean applicator with just blending solution. Most of all the important thing with the alcohol inks is to just try out new ideas. The medium is fun and forgiving!
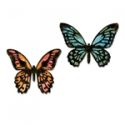
I did die cut a bunch of butterflies and leaves from the other backgrounds:
I quickly put together a tag and a card using the butterflies:
The yupo paper allows the alcohol inks to shine and the alcohol inks come in a variety of colors to allow you to pick your color combinations. The Funkie Junkie Boutique has the papers and inks available to purchase. There is still time to play in the Inspired By Challenge!
Suzz







Oh Suzz I've learned so much from seeing this wonderful tutorial and love the way you've used the various backgrounds with your dies to create stunning cards xx
ReplyDeleteSuzz, you just made my Monday! What a fabulous tutorial and eye catching results you got with these inks! Your tag and card are beautiful with their striking die cuts floating over the fresh white backgrounds. Gorgeous!
ReplyDeleteWowwwwwwww! I learned a TON from your fabulous experiment with Yupo and alcohol inks. I absolutely love the organic look of your leaves and butterflies. thank you so much for sharing this wonderfully inspiring tutorial! xo
ReplyDeleteThank you for the wonderful tutorial! Love your explanations and the tag and cards are gorgeous! Such a fun creative way to start this week with! Great idea to set the images against white to show off their brilliance! Love the organic look of each! All unique!
ReplyDeleteThis was well worth waiting a couple of days. The tutorial is so informative and the die cuts from your backgrounds are so pretty. This is certainly a must try.
ReplyDeleteOh my goodness! GORGOUS alcohol ink backgrounds! I especially love the last green background! Pretty butterfly card!
ReplyDelete