Welcome to our Saturday Showcase, where we focus on a product or product range available at
The Funkie Junkie Boutique. It's Sara Emily here, and today I'm shining the spotlight on Tim Holtz Tattered Butterfly Bigz die released at Creativation 2019, along with some of his new Distress Oxide Sprays and Alcohol Pearls. Grab a snack and beverage; we've got a lot of ground to cover!
There are two different sized butterflies on the die, and they are meant to be layered or they can be used each on their own. I love the size variation, allowing them to be used on just about any sort of project from home decor to something as small as an ATC. I'm starting with the larger of the butterflies. I used mixed media paper to cut from, but because this is a Bigz steel rule die, you can cut just about any substrate, including cardstock, felt, fabric, foam, magnet, leather, craft aluminum and many other materials.

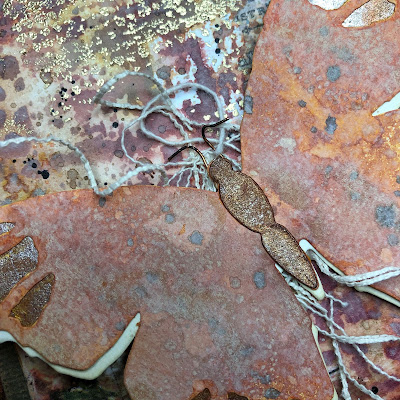
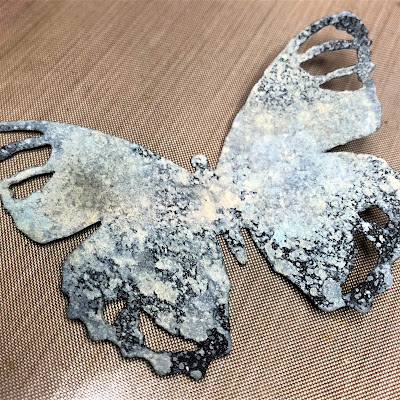
I die cut the butterfly and sprayed it with Distress Oxide sprays in Fossilized Amber and Spiced Marmalade and Distress Spray Stain in Rusty Hinge. I did not dry between colors, but just kept spraying each color. I set it aside to dry on it's own. After it was dried, I spritzed with water and dryed with a heat tool. Then I flicked on watered down Ground Espresso ink. Sadly, the water from that oxidized the colors even more, and a bit more than I would have liked. The trick to Oxides is knowing when to stop throwing water on them! I wasn't totally bothered by the chalky look in the end, so I decided to embrace imperfection.

I dripped Mineral Alcohol Pearl on the body. It leaves a beautiful sheen, but when I flipped it over, the other side was darker and matte. Just to see what would happen, I dripped more of the Pearl on this side. The result was a variegated rusty look, which is the body you see in place in the right photo above. I cannot express how much I love these Pearls; they are a game changer for me.
I decided to 'fill' the holes in the wings with this same rusty look. I used the Mineral Pearls on some scraps, the same way I did the body and adhered them in place on the back side. Pretty nasty looking at this point. I cut another butterfly from watercolor paper and inked the edges with Antique Linen Distress ink.
I adhered the two butterflies, off setting a bit and gave him a set of antenna fashioned from copper wire brushed with Black Soot Distress paint.
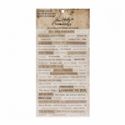
I colored 4 Hex Fasteners in pewter with Mineral and Black Soot paint, and used this same combination to color the edges of a sanded panel and a scrap (not shown) of Metallic 2 Kraft Stock. I love the authentic copper-patina-before-it-oxides look. I adhered a Clippings Sticker to the scrap for my quote.
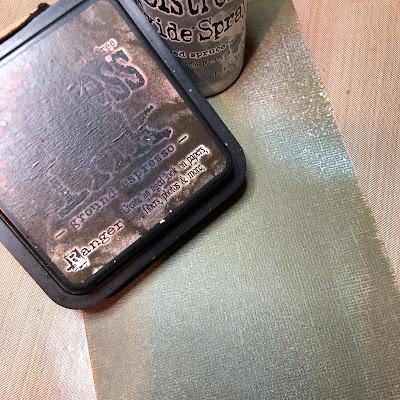
I cut and sanded a panel of Classic Kraft Stock, blended edges with Ground Espresso and gave it a couple spritzes of Iced Spruce Oxide Spray.
I chose a panel I had in my stash that I considered a failed mixed media attempt, but might come in handy for a die cut. I'm pretty certain it was a stencil monoprint with gold embossing powder sprinkled on the wet Fired Brick Distress Oxide. It looks like I also stamped and embossed in gold. More recently, I added Floral Collage paper and blended with Frayed Burlap. I still didn't like it, so back in the bin it went. For this project, I saw it's potential as a background and gave it a spritz of Iced Spruce Oxide spray in opposing corners. After assembling the panels, I splattered it with Black Soot paint. I adhered strings pulled from a scrap of canvas, and layered the butterfly over them. A scrap of vintage cotton lace from my stash backs the quote. Linda carries a wide variety of beautiful
lace trims in
her shop that can easily be made to look vintage with Antique Linen or any of the brown inks or sprays.
Following are some photos of the completed card and closeups.
* * * * *
Next, I wanted to try out Celestial Alcohol Pearl that comes in Kit 4 along with Mineral shown above and Smolder.
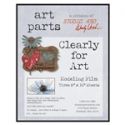
I cut just the small butterfly from a scrap of Wendy Vecchi's Clearly for Art Modeling Film. I splashed it with Mermaid and Wild Plum alcohol inks. In the second photo, you see a puddle of 'run off', which can be used again. I wasn't happy with how the butterfly looked at this point, so I sprayed it with rubbing alcohol to mix and lighten the colors. I quickly blotted it with a paper towel, and this is my result. The great thing about alcohol inks is they are very fluid and forgiving on nonporous surfaces such as Yupo, metal or plastics. You never know what you're going to get and you can always start over.

While I liked my result, I just couldn't resist that puddle. I dropped on a bit of alcohol to reactivate it and placed my butterfly face down into the puddle. Next, I poured a couple of drops of Celestial Pearl onto my glass surface. I picked up some of the ink on the dumb end of a paint brush and used it to make dots on the wings. Lastly, I just dropped some Celestial directly on the wing tips and used a pipette to drop tiny drops of alcohol into the Pearls while they were still wet.
I do have Alcohol Blending Solution (linked below), and I do use it, but I also like to use 91% rubbing alcohol in a spray bottle to work my inks. It has similar effects, and I can get really cool effects by just spritzing it onto my alcohol inked panels.
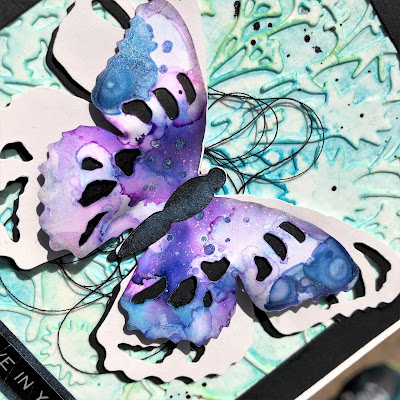
I heated the butterfly with my heat tool and shaped the wings. I love how Clearly For Art goes limp and is totally pliable when it's heated. If you don't like the result, simply heat again and re-shape. In the first photo, I'm showing the reverse side, because it's so pretty. The inks and alcohol traveled through the holes and around the edges. I adhered black paper to the back using Distress Collage Medium after heating and shaping the butterfly. I colored a black body with Celestial and blended the edges of both pieces with Black Soot ink.
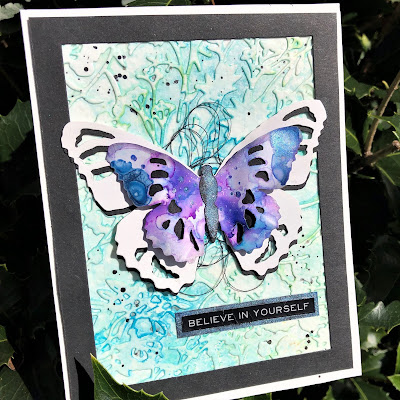
I cut the larger butterfly from white and black card and layered them, adhering at just the center. I layered the inked butterfly and body and adhered a thread bundle to the back side and set it aside to work on my background. Look how shimmery those Pearls are!
I cut a 140 lb. watercolor paper panel using the new Organic's Thinlit die. I just got the Chrome Precision Base Plate for Thinlits (linked below) recommended by Stacy of
Tattered Nest Designs. It cuts these intricate designs like a dream, even through these heavier papers. Thanks, Stacy! I trimmed the edges and adhered the die cut to a second panel of watercolor paper using Collage Medium. I made sure it was completely covered in medium and allowed it to dry just til it was dry to touch.
I sprayed the panel with Mermaid Lagoon and Cracked Pistachio Oxide sprays. I let it sit for a couple of minutes and then gave it a spritz with water. I blotted with a paper towel to remove some of the ink until I was pleased, and allow the panel to dry on it's own.
I cut a black frame using Stitched Rectangles Thinlits die, and an additional watercolor paper panel to provide yet another frame. The sentiment is a Metallic Quotations sticker layered over a scrap of black card colored with Celestial. When everything was assembled, I masked the butterfly and quote and splattered with watered down Black Soot paint.
Following are some photos of the completed card and closeups.
* * * * *
While I had the butterfly die out, I played a little more. I made this one on a black card scrap early on in my play with my new Oxide Sprays, but didn't take any photos to document the process. I could not for the life of me duplicate it to use it in my tutorial (and you can see in the first photo below I tried numerous times). I used up a lot of spray trying to duplicate the look, but thankfully that didn't go to waste -- I used the spray remaining on my mat on a masterboard to make my Artist Trading Coins and booklet
HERE.
So, I got to thinking maybe the scrap of black card I cut this butterfly from had some sort of coating on it. Perhaps if I gave the butterfly a coat of collage medium before I sprayed it. Well, you can see that didn't give the result I was looking for. But I kind of liked the way Fossilized Amber looks on the butterfly with a splash of Antique Linen Spray stain and drips of Smolder Alcohol Pearls and layered it with one of my failed attempts. By the way, I purposefully left the bits in the wings, because I wanted to see how the sprays would pool in the cracks.

For my final play, I did not take process photos, but perhaps I can talk my way through it. To make this grungy steampunk butterfly I cut a set of butterflies from Metallic 2 Kraft Stock. The small butterfly is embossed with Kaleidoscope 3D Texture Fade and both were sanded after cutting. I painted both with Black Soot paint, dried it somewhat and wiped off the remainder. I dripped the large butterfly with Smolder and the small one with Celestial Pearls. The body was cut with black card and colored with Smolder. Now that I see the photos, I think this would even look better with a squirt of Mineral, and I would have like to have used it on the monoprint background above. But I made this after that card was complete, and I wanted to give Smolder a try on it's own. There's always another time. I'm sure both of these will end end up on a project sometime, but for now, I've set them free in my garden.
The sun finally poked out, and this one was able to show off his shimmery spots.
The steampunk butterfly was initially attracted to rusted garden ornaments, but found his way to the ferns.
Thanks for hanging in there with me! I hope you're inspired to play with Distress Oxide Sprays and Alcohol Pearls and picked some ideas for using the Tattered Butterfly die. A list of the products I've used is listed below, all available from
The Funkie Junkie Boutique. And remember you still have a few more days to enter our current Frilly and Funkie
Artist Trading Coins challenge.
Happy Crafting!
Sara Emily
Tim Holtz Sizzix Bigz Die - Tattered Butterfly 20% off - use coupon code DIEDISCOUNT
Tim Holtz Sizzix Thinlits Die - Organic 20% off - use coupon code DIEDISCOUNT
Distress Oxide Sprays
Ranger Tim Holtz Alcohol Pearls - Kit #4
Ranger Tim Holtz Alcohol Blending Solution















Sara Emily, this post has me yearning for all the new pearls and sprays! The butterflies you have created are absolutely gorgeous and take center stage! I love the rusty look of the first card, it’s truly beautiful and then the more colorful one of the second is just as beautiful in a different way! Your tips and combinations will be a great reference for when I am able to get these supplies! I am kind of wishing that steampunk butterfly will flutter right over to my house- it’s stunning! xx
ReplyDeleteWhooHoo!!! The last of my Oxide Sprays will be here on Monday, and I have the set #4 Pearls--it's the only one I have so far...Love all the different variations on your butterflies...will be having a play myself before too long...can hardly wait!
ReplyDeleteWonderful projects!
ReplyDeleteBeautiful projects, the butterflies look amazing!
ReplyDeleteSuper cool mixes of all those fab new goodies. I love all the butterflies you made.
ReplyDeleteOh Sara Emily, you have achieved the most amazing effects here, and I bet in real life they look even more amazing! The pearl AI and Doxide Sprays seem like a match made in heaven in your clever hands! Stunning work all round!
ReplyDeleteSo many different looks and possibilities with the new sprays and Pearls! Each of these butterflies look spectacular Sara Emily! xx
ReplyDeleteOh, Sara, I love your tutorial. What fantastic results you've gotten on the butterflies combining these products. Just gorgeous!!! Love, LOVE!!!!
ReplyDeleteHow beautiful Sara Emily, each one with it's own individuality. I have yet to try the new sprays to see what they can do but you have showcased them all so wonderfully.
ReplyDeleteThank you so much for the inspiration and stunning designs.
Creative wishes Tracey xx
Stunning, Gorgeous and Beautiful all rolled into one fantastic showcase! My butterflies are on their way and I can't wait to play with them because of your inspiration!
ReplyDeleteI'm now slightly regretting only getting some of the Oxide sprays rather than all of them. That rusty butterfly is amazing! Love all the ideas and techniques here, and so many fabulous finished cards. A great inspiration showcase.
ReplyDeleteAlison x