Monday, March 14, 2022

Challenge Winners - For the Love of Mixed Media

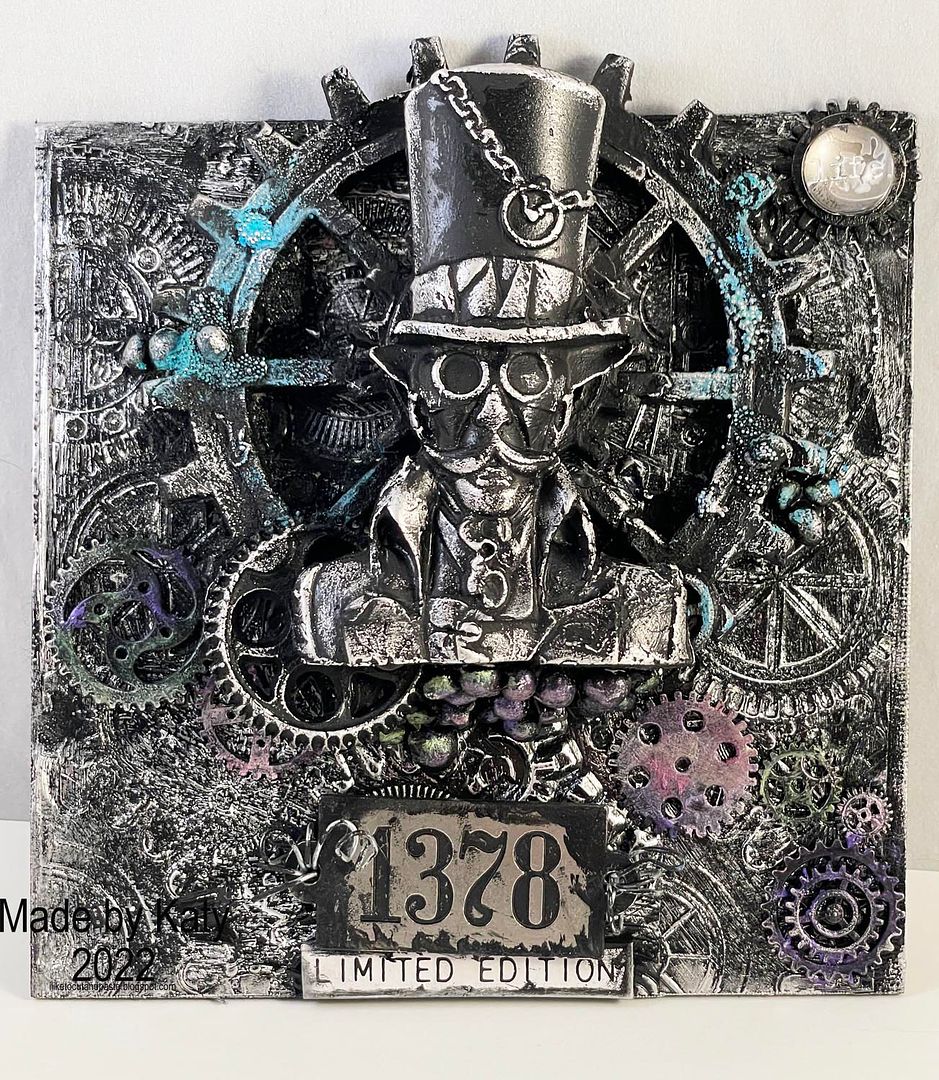
The "For the Love of Mixed Media" challenge resulted in an amazing variety of projects, and our Design Team looked carefully at each entry before coming to a decision. In the final tally, the overall winner is Katy Drogos. Her love of mixed media was beautifully expressed in her grungy canvas magnet. You'll want to follow the link to her blog to get closeups of the amazing details.


Congratulations to Katy for once again winning an opportunity to be a Guest Designer at a future date here on The Funkie Junkie Boutique Blog. You'll be contacted shortly with all of the details. And now our picks of three additional outstanding entries for the The Funkie Junkie Boutique Blog Top 3 Badges. In numerical order they are #3 Senna, #17 Judy McKay, and #18 sarascloset. You'll be contacted shortly with the Top 3 badges so that you can display them proudly on your blog.

And finally for the lucky randomly drawn winner for the $25 gift certificate to The Funkie Junkie Boutique; our congratulations go to #4 Jo - Let's Art Journal. Please email Linda at thefunkiejunkie@gmail.com for the gift certificate details.

Thank you again to everyone who took part in this challenge and congratulations to all our winners. The current challenge - 'Rather Blustery Day' - can be found HERE and runs through Tuesday, March 22nd at 11:55 pm EST, so there's still plenty of time to link your projects. Please be sure to read the rules carefully before you submit your entry.

Saturday, March 12, 2022

Saturday Showcase: Alcohol Ink Play

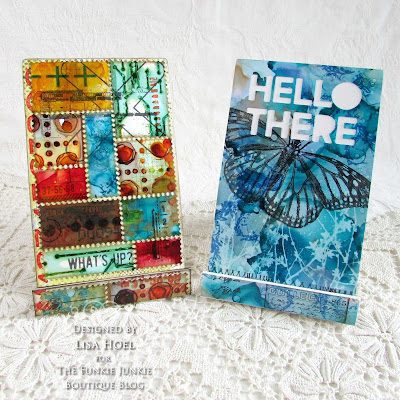
Hello, Lisa Hoel here with a new Saturday Showcase for you. For our current challenge, "Rather Blustery Day", you are supposed to focus on a technique, supplies, etc. that you find challenging. I chose to focus on Alcohol Inks for my challenge and I'm continuing that theme here today! I used the alcohol ink backgrounds I created to decorate two phone stands made with Eileen Hull's new Phone Stand Die.

Lisa Hoel for The Funkie Junkie Blog challenge – alcohol ink Phone Stands made using Eileen Hull's Phone Stand Die #creativejuicefreshsqueezed #tim_holtz #sizzix #mymakingstory #thefunkiejunkie #thefunkiejunkieboutique #frillyandfunkie
These stands are so quick to make and are great for gifts!

Lisa Hoel for The Funkie Junkie Blog challenge – alcohol ink Phone Stands made using Eileen Hull's Phone Stand Die #creativejuicefreshsqueezed #tim_holtz #sizzix #mymakingstory #thefunkiejunkie #thefunkiejunkieboutique #frillyandfunkie

Lisa Hoel for The Funkie Junkie Blog challenge – alcohol ink Phone Stands made using Eileen Hull's Phone Stand Die #creativejuicefreshsqueezed #tim_holtz #sizzix #mymakingstory #thefunkiejunkie #thefunkiejunkieboutique #frillyandfunkie

I'm really glad I dove in and just played around with the alcohol inks. I started off by watching again some of Tim Holtz's educational videos (soooo informative!). You can find two here and here. I used Yupo cardstock for my substrate. Yupo is a non-porous synthetic paper that is perfect for alcohol ink. I have a list of other supplies used at the bottom of this post but you can browse products here in the Funkie Junkie Boutique.

Here are some photos of the results of my background experiments:


Here's one technique that Tim shared that I really liked. He showed us how to make prints with stencils.


Mist a stencil with isopropyl alcohol and "stick" it down onto the Yupo. Drip various colors of ink onto the stencil/paper. It will wick under the stencil but that is what you want it to do. Let it sit there until all the ink dries underneath the stencil.

Peel off the stencil and you get your first generation print!


You can create several successive prints with the ink left on the front of the stencil. Mist it with more isopropyl alcohol and lay it on a new sheet of Yupo. Let it dry and peel it off. Repeat.


Another fun product to use is Alcohol Lift-Ink.


I cut a piece of one of my backgrounds very slightly larger than the face of the phone stand. Also a smaller piece to cover the front of ledge on the bottom.

A stamping platform is very helpful for this technique because it often needs several applications of Lift-Ink to remove enough alcohol ink. Start with a CLEAN stamp! Residual ink on your stamp will stain your ink pad.

Amount of ink removed after one stamping.

Position and ink your stamp, then stamp it onto your background. The lift-ink reacts with the alcohol ink. Dab (don't wipe, smear warning) the stamped areas with a clean paper towel. When most of the inks have been picked up by the towel, you can buff the rest off.

Results after repeating process 3x.

If you want a stronger contrast repeat the above steps to keep removing alcohol ink. Don't forget to clean your stamp each time.

You can also stamp over alcohol ink using Archival Ink. Be careful stamping on the Yupo because it is slick and can easily smudge as you apply pressure.


Next I cut out the "HELLO THERE" words out of the background using the Bold Text #1 Die Set . Thinlits dies cut through Yupo just fine. I glued it to the stand and trimmed off any overhanging paper.


Phone Stand assembly time!
It only takes one pass through your die cutting machine to cut all the pieces you will need. Cut it out of mat board or heavier chipboard so it will be sturdy.


Fold all the parts at their score lines. I find it easier to insert the tabs of the ledge piece through the slots before I glue the back brace into place.


Put some dabs of glue under the tabs.


Glue back brace in place.


You can change the pitch of your stand depending on where you adhere the brace.


Glue the front piece of the ledge in place.

Details about the second phone stand:
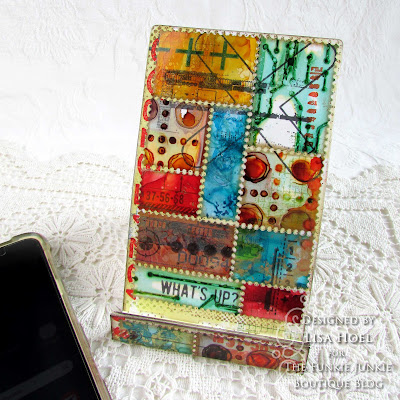
I used Eileen Hull's new Snail Mail Die Set to cut "stamps" to make the collage on the front. First I picked out complementary alcohol ink backgrounds from my pile and cut them up into sheets with the Snail Mail Die. With regular paper you can tear them apart like stamps but since the substrate was Yupo I cut them with scissors.


I mixed and matched my stamps into a collage covering the front of the phone stand. I also put some extra stamping on the back because, why not? ;-)


Lastly, I stamped with various of colors of Archival Ink over the whole collage. I assembled the stand as shown above.

Whew, that was a lot! I hope you are inspired to go play and try some new techniques. Supplies are listed below. Have a great weekend!


Supplies used:

Tim Holtz Die Set - Bold Text #1
Eileen Hull Scoreboards Die - Phone Stand
Eileen Hull Thinlits Die Set - Snail Mail
Tim Holtz layering stencils - Patchwork Hex, Dotted Line, Circuit
Tim Holtz stamp sets - Halftone & Rings, Glitch 1, Glitch 2, Mini Glitch, Inquisitive, Evolution, Field Notes, Specimen, Spring Sprung
Ranger Archival Ink -  Black Soot, Vintage Photo
Alcohol Ink Blower tool
Stamping Platform
91% Isopropyl rubbing alcohol (from drug store/grocery store)
Sizzix Making Essential - Mat Board

Wednesday, March 9, 2022

Rather Blustery Day

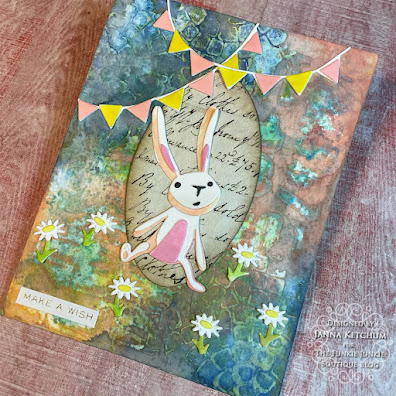
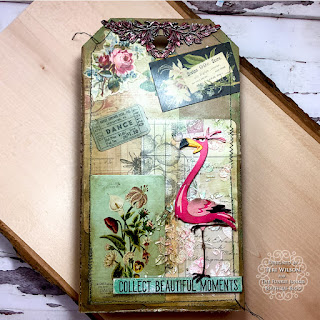
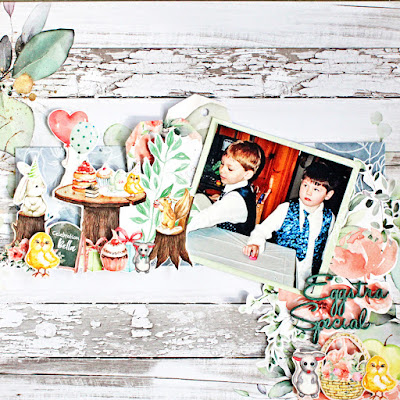
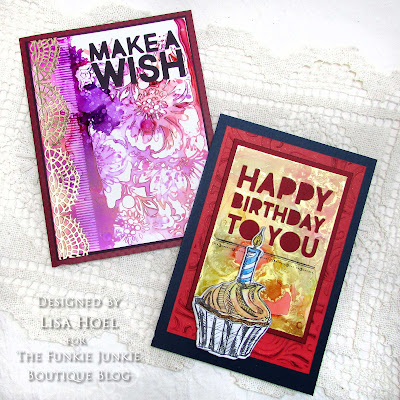
The new challenge on The Funkie Junkie Boutique Blog - Rather Blustery Day - is hosted by Suzz. "I am inspired by Pooh Bear's quote from A A Milne of 'It's a rather blustery day.' Pooh Bear struggled against the windy day and you can share something you struggle with in your art! It can be a technique, color palette, tools, or supplies that you find difficult to use. Share them with us along with your story on what you struggle with! I can't wait to see your blustery day!"   Here are the projects our Design Team made to inspire you in conquering your struggles.

Suzanne Czosek - Suzz's Stamping Spot


Teri Wilson - Teris Mailbox

Laura Gilhuly - Angel Scraps

Lisa Hoel - Creative Juice


The overall winner will be offered the chance to be a Guest Designer at a future date here at The Funkie Junkie Boutique Blog, and everyone who enters and follows the rules will go into the drawing for the chance to win a $25.00 spending spree at The Funkie Junkie Boutique. There are also Top 3 Badges for three additional outstanding entries, chosen by the Design Team.

The guidelines for entering are simple: create a new vintage or shabby chic project following the challenge theme, link it to your post (not just your blog) and also include a link to this challenge in your post. You can combine our challenge with up to 10 challenges (including this one) to be in with a chance for winning. If you are entering through a public forum (such as Instagram) you'll need to include the words 'Funkie Junkie Boutique Challenge'. Also, please turn off your Word Verification so our Design Team can leave comments on your blogs. Make sure you follow these rules as unfortunately, we have had to eliminate entrants from the prize drawing in the past.

Whatever you create, enjoy the making! We look forward to seeing your projects! This challenge is open through 11:55pm Eastern Time on Tuesday, March 22, 2022.

Tuesday, March 8, 2022

Guest Designer - Susan Babcock

The Funkie Junkie Boutique is delighted to have Susan Babcock (Susanbcards) as our Guest Designer this week. Susan was our Design Team's choice as overall winner of our Out with the Old, In with the New! challenge in January.


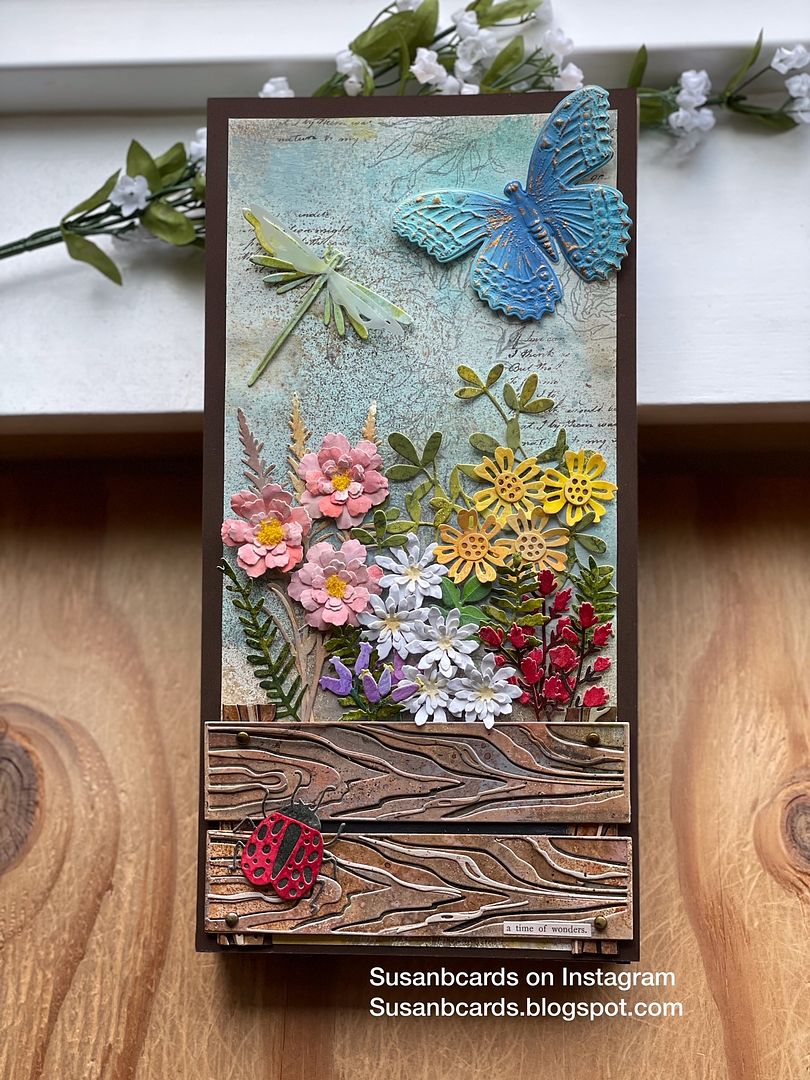
Hello, I'm Susan aka Susanbcards. I'm so honored to be a Guest Designer at the Funkie Junkie Boutique blog this week. I have always enjoyed arts and crafts but my favorite is papercrafts. A few years ago, I watched some Tim Holtz demos and started experimenting with mixed media and have been hooked ever since.

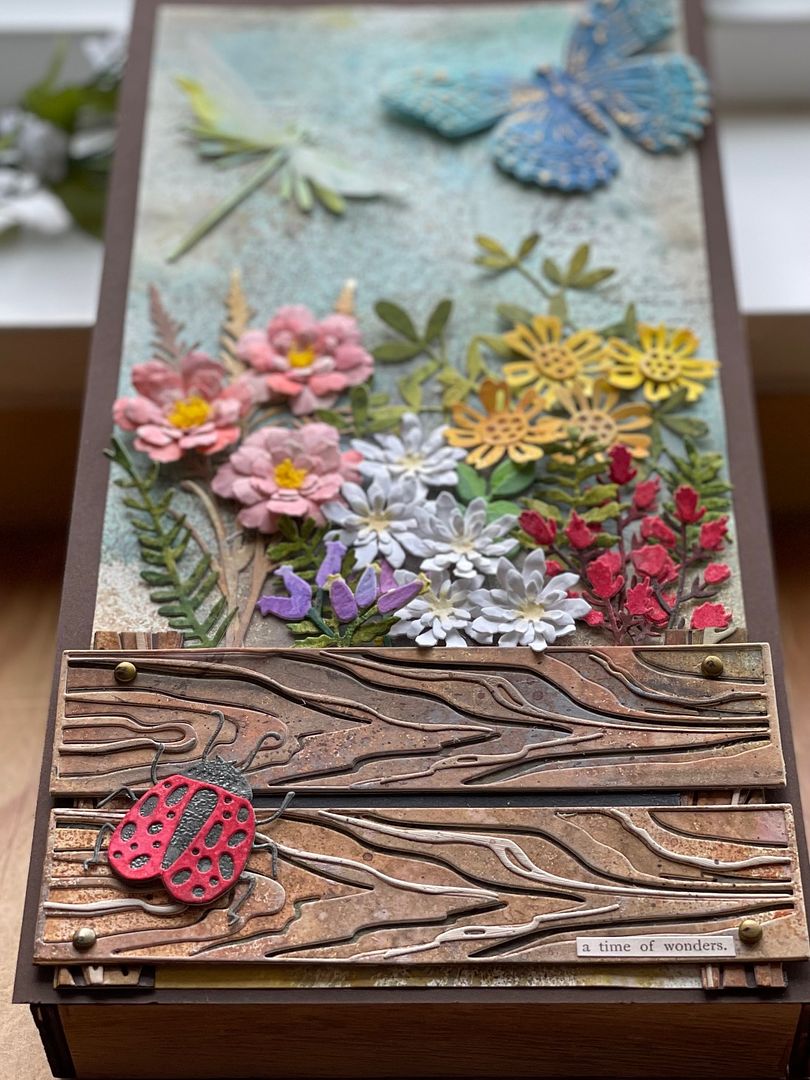
The project I'm sharing today started out as card but as I worked it continued to grow until it became a decor piece that fit on the back of the large Tim Holtz vignette tray! I sprayed some Distress Mixed Media Heavystock paper with Distress Spray Stains and Oxides, then lightly stamped some script and floral stamps for added interest and texture.

I used the new Tim Holtz/Sizzix Woodgrain die to make a flower bed filled it with diecut flowers and leaves. I completed the panel with some insects and a butterfly.

Make sure you check out Susan's blog (Susanbcards) to see more about how she created this wonderful mixed media piece. Don't forget to share your 'For the Love of Mixed Media' project with us. The challenge can be found HERE and runs through 11:55 pm EST on Tuesday, March 8th.

Wednesday, March 2, 2022

Guest Designer - Karen Petitt

The Funkie Junkie Boutique welcomes Karen Petitt (karenp.31) - the overall winner of our Icy and Cold challenge - as our new Guest Designer.


I've crafted or created in one way or another since childhood. I have learnt that I have that urge or need to create or make something. These days I love creating cards, home decor, mixed media canvas and journal pages.

Karen created a lovely Mixed Media piece as inspiration for our current challenge: Onto an MDF board I adhered scrunched up layers of plain collage paper deliberately not smoothing out any creases. Once dry, I added pink, purple and blue liquid watercolour paints to the paper. I then applied an uneven layer of white gesso. Once that was dry, I used a Tim Holtz script stamp and Inkon3 black ink pad to add stamping to the background, then I dried the ink. I used a Tim Holtz stencil to apply gold texture paste in each of the corners and when it was dry, I embellished with fabric flowers and leaves, paper flowers and leaves and a chipboard butterfly.

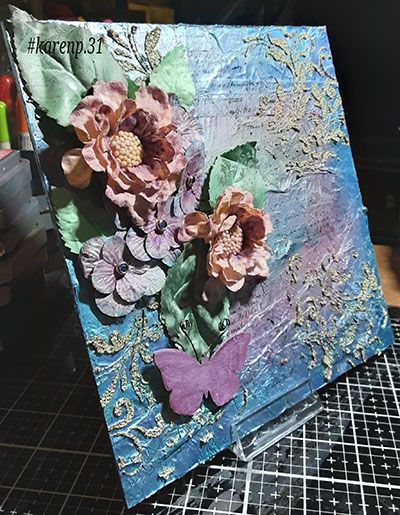
We love the texture and color that Karen was able to incorporate into her mixed media creation. Thank you, Karen, for sharing your inspiration for the "For the Love of Mixed Media" challenge, and for accepting our invitation to be a Guest Designer.

Make sure you check out Karen's Instagram to see more of her work. Then come back and share your 'For the Love of Mixed Media' projects with us. The challenge can be found HERE and runs through 11:55 pm EST on Tuesday, March 8th.

Monday, February 28, 2022

Challenge Winners - Funky Frilly Valentines

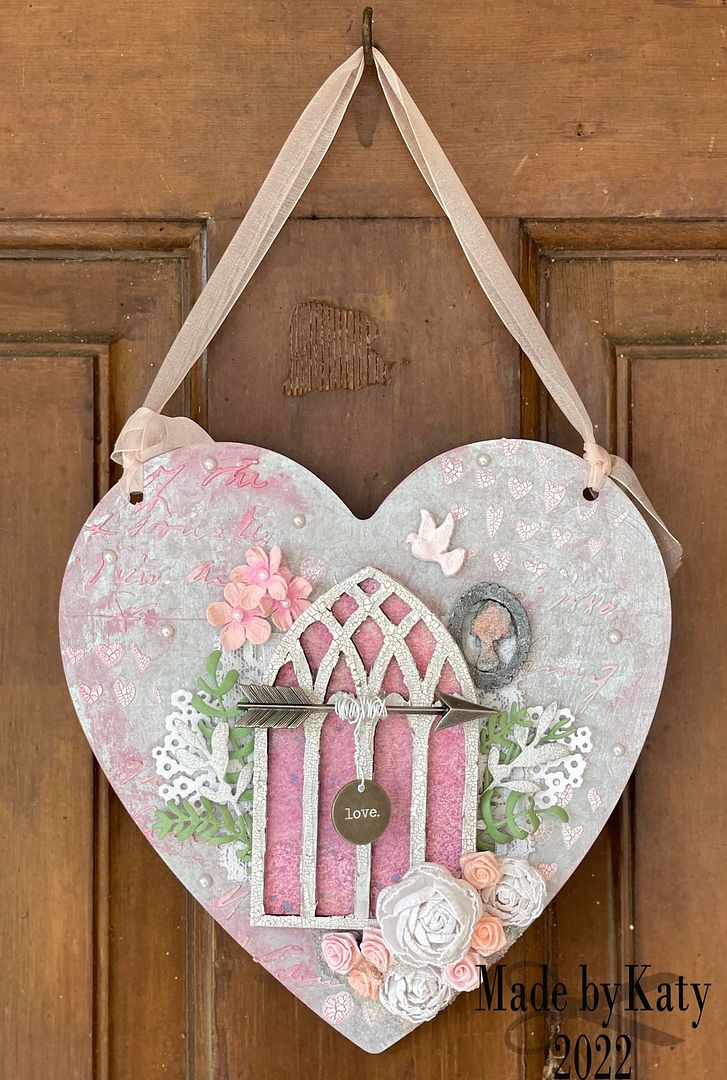
Our Design Team certainly had a difficult time choosing from among so many lovely Funky Frilly Valentines! Thank you to everyone who participated. We all enjoyed seeing how beautifully creative you were in making special gifts for your loved ones. The overall winner is Katy Drogos. Her transformation of a donated metal heart into a beautiful piece of art for her door was amazing! We're a bit biased about who was the winner of her lighthearted competition with a coworker. Although her friend's artwork is stunning, we think it was Katy, hands down.


Congratulations to Katy for winning an opportunity to be a Guest Designer at a future date here on The Funkie Junkie Boutique Blog. You'll be contacted shortly with all of the details. And now our picks of three additional outstanding entries for the The Funkie Junkie Boutique Blog Top 3 Badges. In numerical order they are #4 Jo - Let's Art Journal, #9 Adrijana Knez, and #11 Mistletoe Home. You'll be contacted shortly with the Top 3 badges so that you can display them proudly on your blog.

And finally for the lucky randomly drawn winner for the $25 gift certificate to The Funkie Junkie Boutique; our congratulations go to #13 Catherine's Crafy Corner. Please email Linda at thefunkiejunkie@gmail.com for the gift certificate details.

Thank you again to everyone who took part in this challenge and congratulations to all our winners. The current challenge - 'For the Love of Mixed Media' - can be found HERE and runs through Tuesday, March 8th at 11:55 pm EST, so there's still plenty of time to link your projects.

Saturday, February 26, 2022

Saturday Showcase - Stampers Anonymous Floral Outlines Stamp

Hello fellow Junkies. It's Teri with TerisMailbox here, sharing a product for The Funkie Junkie Boutique. As soon as Tim released The Floral Outlines stamp, I was smitten. Today I am sharing six different cards, all using the Floral Outlines Stamp.


I have a video here documenting the process.


I'll run through photos of the six cards and link the products below each one.


This is the easiest technique. Simply use your ink pads to ink up the various colors on the leaves and blooms, spritz with water and stamp on Distress Watercolor paper. Lightly spritz a second time and stamp in another area. Splatter the ink on the background, choose a sentiment and attach to an A2 cardbase.


Products used:
Random Quotes CMS182

This card started with ink smooshing on Distress Watercolor Paper using Bundled Sage Distress Ink. Stamp the floral image with Black Archival ink and watercolor the floral images to add color depth.

Use the ledger stamp to add texture to the background using The Peeled Paint Mini Archival Ink Pad. Stamp the sentiment with Peeled Paint and mount on an A2 cardbase.

Products used:
Good Thoughts Stamp CMS085
Ledger Stamp CMS241


Here is a different take on watercolor stamping, smooshing and water coloring. Use the Distress Ink pads as in the first example to ink the stamp up and spritz with water and stamp onto Distress Watercolor Paper. Spray water over the image and lit the inks wick. Once dry, watercolor the images with Distress Inks (colors listed below). Ink smoosh the background with Shaded Lilac Distress Ink.


Stamp the sentiment and add to an A2 card base. A little black bling adds a fun touch.

Products used:
Way With Words Stamp CMS165


I switched over to Alcohol Inks for this card. After stamping the Floral Images on a heavy Vellum using Jet Black Archival Ink, I laid the piece on my glass mat and added Mushroom Alcohol Ink and worked it around the blooms as well as I could.


I used several warm color Alcohol Inks from my stash as well as Moss Alcohol Ink to paint the floral images. The alcohol and the inks did make the image run slightly. Next time, I'll try to paint on the reverse side to preserve the stamp outlines. Stamp the sentiment and add to an A2 cardbase.

Products used
Random Thoughts Stamp CMC182
Heavy Vellum
Miscellaneous Alcohol Inks from my stash


Here is another simple card. After ink smooshing and drying the background, Stamp the sentiment and the floral image with Archival Ink.


Mount on an A2 card base and you are good to go.

Products used:
Life Quotes Stamp CMS227


This card is all stamping and had so much texture, I decided not to add a sentiment. This cards starts with another stamped image similar to the first card. I did spritz more water and let the stamp sit on the Watercolor paper so it spread a little.


I ink smooshed around the image and dried the piece. Using the Ledger Stamp, I added texture to the background. I also added ink to the edges for additional depth.

Products used:
Ledger Stamp CMS241

I hope I've inspired you to try these techniques!

Thanks so much for stopping by today! I'd love to have you follow/subscribe on my social media sites: Facebook, Instagram and You Tube all called TerisMailbox! Be well, Be creative.