***********************
well it is my turn for the Friday Focus and boy I have been given another fab product , texture fades ...I love these and have got a little carried away...so grab a cuppa! (and there are some ideas that I just haven't managed to finish!)
So what are texture fades and why do I love them? They are a fab range from the one and only Tim Holtz and can be used to emboss texture into so many materials...and come in a vast range of designs to suit all tastes and styles! Just embossing them on different materials and then colouring in different ways creates so many cool effects .. and there are so many materials they will emboss..
So I will go through a few favourites and show you how the finished makes ended up.( the full details will be on my blog over the next couple of weeks.)
Tag 1: inking the inside of the embossing folder
This tag uses a texture fade to create the background, but instead of simply embossing the tag I have inked up the texture fade first using Distress inks. For this tag I have used antique linen and broken china.
( To fit the tag in the embossing folder Tim has a great tip for cutting a slot into the folder for the tag to fit in )
cut a slot through the top of the folder, leaving a small piece attached at either side x
( To fit the tag in the embossing folder Tim has a great tip for cutting a slot into the folder for the tag to fit in )
cut a slot through the top of the folder, leaving a small piece attached at either side x
This gives a really soft finish , which can be left as and means the raised areas can be left the colour of the cardstock / tag. For this I have inked the side where the design is indented.
To complete the tag I have inked the edges and added a great sentiment, some flowers made using tattered floral die and some butterflies, coloured with distress markers and spritzed.
Again stamp on the embossing folder on the side where the design is indented. Such a clever effect and then can be finished however you wish. I completed my tag with another great Tim Sentiment and some flowers cut from crinoline, dyed with stains and then layered. I inked the edges with walnut stain.
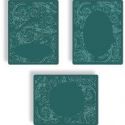
Embossing diffusers come in a set of three and have the inside and outside frame parts..they allow you to create fab new effects with texture fades by allowing you to only emboss parts of the folders . All the instructions for use are included.
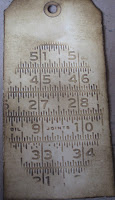
For this tag I chose the ruler texture fade and an embossing diffuser..( the picture also shows the tag for tag 4 ), which allowed me to emboss just the outside leaving a flat oval in the middle, great for stamping of adding other pieces too and gives the folder a completely different look .
I stamped inside this piece using haberdashery set amongst others , inked with distress, oh and some spritz and flick. I finished the tag with idea-ology,flowers dipped in UTEE and chit chat stickers.

To complete the tag I have inked the edges and added a great sentiment, some flowers made using tattered floral die and some butterflies, coloured with distress markers and spritzed.
Tag 2 : stamping on the embossing folder using reverse script
The base of this tag very similar to one of Tim's tags from last year found here and video for reflections stamping here .
This involves inking up the reverse script stamp with jet black archival ( you do need to move fairly quickly ) and then embossing, using a frame folder. When embossed the script appears correctly! Tim really is a clever man!
Tag 3 and 4: both these use embossing diffusers and texture fades.
Tag 3 :
For this tag I chose the ruler texture fade and an embossing diffuser..( the picture also shows the tag for tag 4 ), which allowed me to emboss just the outside leaving a flat oval in the middle, great for stamping of adding other pieces too and gives the folder a completely different look .
I stamped inside this piece using haberdashery set amongst others , inked with distress, oh and some spritz and flick. I finished the tag with idea-ology,flowers dipped in UTEE and chit chat stickers.
Tag 4:
For this tag I used the insert for the embossing diffuser, this does take a bit of time to line up..using the same embossing folder as the tag above, giving just an embossed piece in the middle ( or wherever you decide) I also played with other things that can be embossed....
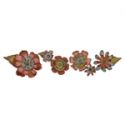
I embossed sticky back canvas for the flowers, I die cut these then embossed and then inked with distress ink..layering with crinoline and one of Linda's fab buttons.
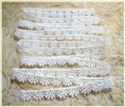
I also embossed some seam binding, I coloured with distress stains and some distress paint and then used thin stitch embossing folder and embossed.It holds the design really well.
I finished the tag with a Tim quote, lace, rusty pin and dress form stamped on canvas.
two tags to go...see told you I got carried away.............
Tag 5 : texture fades and matching dies :
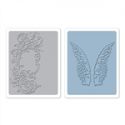
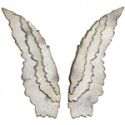
Another fab thing is that there are some dies that have matching texture fades, for this I have used these beautiful wings. This allows the shape to be die cut and texture added..
So I started by die cutting the wings, then placing in embossing folder and embossing, they were then inked and coloured . I also used another texture fade and same diffuser for the background.
To complete I added a die cut heart, using shattered stains technique and a chit chat sticker.
Tag 6 : embossing texture paste and packaging.
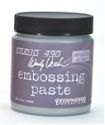
For this tag I layered in some studio 490 silver embossing paste on the tag and left to dry, when dry I used a texture fade to emboss it...and then smudged on black soot distress paint, spritzed and removed some. Jenny has also embossed texture paste in a Friday focus and has a cool idea for using wax crayons and texture fades too... .
sorry forgot to photo the background empty..
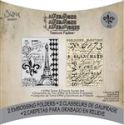
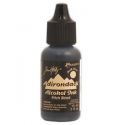
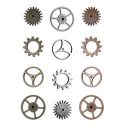
To complete the fab time traveller gent, lots of idea-ology ...oh and one more use of texture fades...embossing the packet the texture fade came out of...for the gears, which I die cut , them embossed and coloured using alcohol inks.
Well if you have made it to the end thanks x I told you I got carried away. Full details of each tag will be on my blog over the next two weeks.
As these are Friday Focus, time to grab a bargain, as they are discounted by 15% for this week and are already 20% off ...so happy shopping, hope I have inspired you...there are so many more fab ways and materials to use..
trace x
All the products are listed below :

have a fun and inky day! trace x















Love your tags and am so glad for a super tutorial all in one spot! Thank you!
ReplyDeleteCompletely fabulous Friday Focus, Trace - what a wonderful collection of tags and embossing techniques... thank you.
ReplyDeleteAlison x
Where to start?!!! How to ensure people know they NEED embossing folders and diffusers!!! Trace you have truly surpassed yourself here - an utterly magnificent Friday Focus filled with so many fantastic ideas. You are a star. Hugs, Jenny x
ReplyDelete...fabulous Tags Trace, so much detail, great use of inks and elements and superb step by step with embossing folders, was going to say the heart and wings my favourite but just pipped to the post by steampunk man...a fabby posting...Mel:)xx
ReplyDeleteBrilliant tags Trave! Really like how you've embossed the stocky back canvas for the flowers :)
ReplyDeleteGreat tags Trace love all the different textures, you have made my wish list grow again lol. Elizabeth xxx
ReplyDeleteWow Trace, what fabulous tags and some wonderful techniques to try as well. Thank you for such an enriched post. Hugs Rita xx
ReplyDeleteTrace what an amazing and inspirational post. I just love all the makes to go with your ideas. Fabulous.
ReplyDeletehugs {brenda} x0x
Boy did you ever set the bar high with this post. All the tags are wonderful and make me want to forget the laundry and try out your terrific techniques. Thanks for sharing, I am off to go shopping.
ReplyDeleteHugs!
Cec
Fabulous makes Trace and thank you for sharing the how to.
ReplyDeleteHugs Annie x
ALL that is absolut awesome Trace! Thank you!
ReplyDeleteA really phenomenal piece of work, Trace! Each and every tag is incredible, special in it's own way. So many yummy textures and inkings and your use of embellishments is fabulous. So many terrific ways to use the texture fades. You have really inspired me to get into my craft room later today and do some creating. Thanks for such an amazing Friday Focus!
ReplyDeleteHugs,
Linda
Amazing tutorials!!
ReplyDeleteWow, all of these are totally amazing, my mouth hangs open, each one is so clever and what a lot of work! Mt favourite is the heart and wing one but they are all fantastic, thanks for the inspiration!!!
ReplyDeleteWhat a lot of tags you made! Tags 1, 4 and 6 are the ones that I like most. Love the colours and the texture is great! (Have to use the diffusers more; used them only ones...) You inspired me with the textures; think I´m going to use more of that for my stockcards! Enjoy the sunne weekend, Gerrina
ReplyDeleteWOW !! is definitely the word, Trace, these tags are stunning, some fantastic techniques. I thought your sneak peek was gorgeous, but you have surpassed yourself here. Thank you for the step by steps too. I will be saving this page for inspiration. Stunning !!
ReplyDeleteLots of love from Patricia xx
So much info & inspiration! I learned a lot & hope to be trying some of these techniques soon!
ReplyDelete