 This one is made from some metallic gold wrapping paper and the ‘Festive Greenery’ die from Alterations. The dots of glossy accents added over the card stock berries haven’t finished drying..but you get the idea…
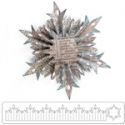
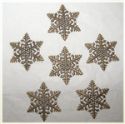
 This cracker has a very different ‘feel’ to it. The wrapping paper has hollographic stars on it and the embellishment is a ‘Snowflake Rosette’ made with another Alterations die. The rosette is topped with a metal filagree snowflake that was heat embossed with holographic embossing powder and topped with a colored rhinestone. Now for the ‘how’. Once you make one, the process becomes clear…
 Begin with a piece of paper that is 12″ wide and 6″ high. Score the paper at 2-1/4″, 2-3/4″ and 3-1/4″ from each end. Fold the 3 score lines so that they look like this...
 The diagram is shown with the ‘right’ side up. In other words, think of the side with measurements as the right side of your cracker…
 Now fold the edge so that the middle score line is the only fold and the ‘right sides of the end of the cracker are facing each other. This will allow you to cut a series of V shapes across the entire length. Make certain that you leave small, uncut points. It is these small points of attachment that will break apart when someone pulls the ends apart. Cut the other end the same way...
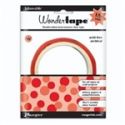
 This is what you should have now. Along the bottom (or top) edge, apply double sided tape as shown. It isn’t necessary to continue the tape over the cut areas. Leave the protective strip in place for now…
 Now turn your cracker over so the wrong side is facing you. If you want your crackers to make an authentic ‘Snap’, then you will need to order some. I googled ‘Christmas Snaps’ and found a US company that shipped quickly and cheaply. Now, it is time to attach ONE end only of the snap, recessed just a bit from the edge. I used a small glue dot, pressing it firmly in place. It is important that the center of the snap not be attached. The unattached end will be secured later…
 Now it’s time to decorate. I either punched a design at each end or in the case of the ‘faux burlap’ cracker, I used a pair of decorative scissors to scallop the ends. For this one, I adhered two strips of the paper doily strips followed by a piece of jute ribbon. The dimensional embellishments can be adhered after the cracker is finished. The next step is to peel off the backing paper of the double stick tape for the center section only and carefully rolling the cracker, attach one long end to the other. Then do the same to each short section…
 Once you have turned it into a three part tube, it’s time to tie ONE end only. I used a variety..ribbon, linen thread, cord, etc. Tie it as tightly as the fold allows. If you pull too hard, you may break the points of attachment. A really fun part is next. You get to fill the center compartment with whatever goodies and little gifts you choose. Once filled, you will tie the other cut band closed…
 Now it’s time to attach the second end of the snap, just below the other edge. It was necessary for me to trim mine. The center portion of the ‘snap’ is free floating in the cracker.
I hope you have fun with this idea. It would be a wonderful project to enlist some children in and the possibilities are tremendous! Now, I have to decide what design I’m going to use! I’ve begun to collect all sorts of little gifts…nail polish, keychain flashlights, a tiny fresh pepper grinder…whatever you think would be enjoyed and that will fit into the cracker!
Hope you have a wonderful weekend~
((hugs)) and blessings,
Rebecca


wonderful tutorial! Love crackers xx
ReplyDeleteWhat a cool project. Super tutorial. Thanks so much for sharing your step by step instructions, Rebecca!
ReplyDeleteWow Rebecca, what a great tutorial, I am definitely going to have a go at making some of these! x
ReplyDeleteFab tutorial Rebecca ! Need to find some time to make some of these ! Sue Cx
ReplyDelete