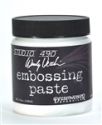
Let's start with a piece of heavyweight card, a stencil and some of my current obsession, Wendy Vecchi white embossing paste. It stays wet for quite some time so there's no waste, and if you add Distress Paint (in this case Antique Bronze) to it the colour stays true and vibrant. Note; the shine from the paint will disappear in this mix so if you want it to remain use the translucent paste instead. It does have a longer drying time though. In this case it was the colour I was after primarily. Use a heat gun to dry the surface (very quick) so you can move on and stencil the whole way across the page.
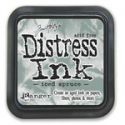
Now to get inky. I'm batch making cards for an upcoming Christmas Fair so there is a basic colour scheme going on which includes Iced Spruce. I made up a mist using Reinker and spritzed the centre of the card. A little water helped it run from side to side (although not as much as I wanted - still on the search for my 'holy grail' of plain uncoated card). The good thing about adding the Metallic Paint to the paste is that it really resists inks well.
More colour needed, this time Sailboat Blue which I dripped in spots onto random areas with the intention of spritzing it with water and letting it run. Trouble is by the time I took this photo it had already soaked into the card more than expected.
I've learned. Don't panic. Don't bin it and start again. Keep going. I blended inks onto the rest of the card which really dulled down the whole effect. Hmm.
Actually I quite liked those spots of deeper colour, so after applying a quick overall mist of Dylusions White Linen I dripped some more of it and the Sailboat Blue onto the card. Now we've got a background!
I'm making A6 cards so the next step was to chop up my background into eight equal parts (first across the centre and then into four sections for each half). Now distress the edges and give the embossing paste a light rub with the ink to reinvigorate it's colour after the White Linen layer.
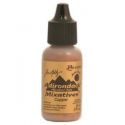
And here's one of the finished cards. I only needed to add a mini blueprint Christmas image onto watercolour paper (painted with Distress Inks), a sentiment and some festive die cuts to complete it. The kraft glassine holly leaves were covered in Copper Alcohol Ink to match the stencilled embossing paste.
Hope that gives you an idea or two for creating a batch of stencilled backgrounds of your own, and if you haven't played with embossing paste before I'd thoroughly recommend it. Thanks for dropping by. Hope you have a great weekend. Jenny xxx









That would make a great background for male cards too. Thanks for the how to's (and how not to's :-) ).
ReplyDeleteThanks so much for sharing this idea - great to see it progressing via your pictures and the finished card is lovely.
ReplyDeleteThanks so much for this...I have not tried the paste and now feel confident to buy some and have a go ;0) x
ReplyDeleteFantastic tutorial Jenny, your embossed background looks fabulous. Thanks so much for the tips! Hugs, Anne x
ReplyDeleteWhat a wonderful tutorial Jenny. I just love what you've done and you make it sound so doable too. Hugs Rita xxx
ReplyDeleteThanks for this great tutorial, Jenny! There are so many ways to use stencils and embossing paste and it's always great to find new ideas. I'm addicted to stencils and embossing paste :)!
ReplyDeleteWhat a great idea to make a "batch" background and then use it like this! Love how the Dylusions Antique Linen came to the rescue (what would we do without it?....)
ReplyDeleteGreat step by step and the finished card looks wonderful!. Love how the red frame on the sentiment just picks up a bit of red in the die cuts, just lifts the whole thing and makes it truly festive!
Wonderful StepXStep, Jenny! Your stenciled embossing paste background is sensational - love the colors you worked with, especially how you colors the paste. Thanks for taking us through the various layers as you built them up. Love the copper mixative on the holly leaves too - it adds just a nice festive touch!
ReplyDeleteHugs,
Linda
Thank you so much for sharing this with us .... well done!
ReplyDeleteI can't wait to give it a go!
diane @ aug's blog
That's a beautiful creation, great colors.
ReplyDeleteOh my that background is perfect for the Gingerbread stamp! Great SxS and love that color combination! Hugs!
ReplyDeleteThanks for this great idea!!! It´s looks fantastic!
ReplyDeletelucky...lucky people getting a card from you...
ReplyDeletethis is cool!
lucky...lucky people getting a card from you...
ReplyDeletethis is cool!
A wonderful tutorial Jenny!! Love that copper and the very cool effects!!!
ReplyDeleteAbsolutely beautiful Jenny, thanks for the step-by-step too! Chris xxx
ReplyDeleteLove how you create such great panels with texture and colour for layering into your beautiful compositions... thank you for sharing the process!
ReplyDeleteAlison x
Great Tutorial Jenny and I love the textured backgrounds you have created
ReplyDeleteHugs
Annie x
Fabulous card Jenny, I love the stencilled background, so glad you kept going ! Love your colour choices x
ReplyDelete