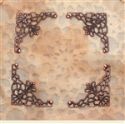
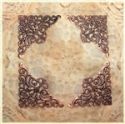
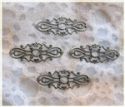
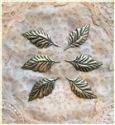
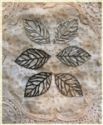
Hi everyone and welcome to the second Friday Focus for 2014. It's time to take a closer look at the filigree metals and metal charms that Linda sells at The Funkie Junkie Boutique. They may be keenly priced but they can make a big impact on your projects. I've selected a few of my favourite pieces to show how they could work for you.
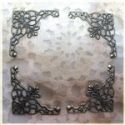
Proving that you don't have to put corners in the corner! As they are lightweight they can be cut with scissors and glued on with clear drying wet adhesives.
As you can cut these filigree metal pieces them so easily it means you can have fun looking for the alternative shapes to be seen in the originals. A corner? No! A window box of course (if you chop off the bottom).
I know the festive season is now over, but this shows that you can make them even more beautiful by adding Ranger Stickles or Distress Glitters (with a dab of Glossy Accents).
And don't just stick to one colour of Distress Paint. My latest project for the current Frilly and Funkie challenge shows that by mixing blues/greens you can add a patina feel to the metal.
You can achieve a similar effect by dabbing your filigree metal with Alcohol Inks too.
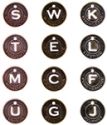
The fun doesn't stop there either. You can use the chunkier metal charms on home decor, jewellery and other decorative items. Taking inspiration from a Tammy Tutterow tutorial HERE, I created some bag charms a few months ago and just couldn't bear to part with this one!
I had immense fun using Tammy's ideas, stamping, inking and die cutting some shrink plastic shapes.
Having overlaid and glued some of these inked/stamped shapes together they were ceremoniously 'dunked' in my Melt Pot to cover them in clear UTEE. Suggestion; add holes to your shapes 'pre-shrink' or, if you forget, 'pre-dunk'. Trying to do it afterwards is really hard.
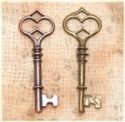
You can also add other beads and Idea-ology charms (in this case coloured with Alcohol ink and then sanded back). The large 'faux leather' heart is actually made by die cutting two pieces of grunge paper, embossing and inking them with Distress Inks and then sewing them together with contrasting thread. Finally I added in the large brass key charm, giving it (and the UTEE pieces) a quick brush with some gilding wax.
I'm hoping that by now you can see the versatility of the filigree metals and charms sold at The Funkie Junkie Boutique. They cost very little already, and with the additional Friday Focus 15% discount for the coming week, Linda is almost giving them away. Pop them into your basket when buying those larger purchases and you'll soon have a collection of fabulous items which can be used/altered in so many ways.
Have a great weekend everyone and take care of yourselves,
Jenny xxx









That first card is like the sun coming out after a gloomy day. The holiday cards are so rich looking. All of it, beautiful work. Very good ideas how to use the metal embellishments. Thank you. ( It has been extremely cold and gray here, the first card just warmed me right up.)
ReplyDeleteFabulous works of art. I am so lucky to have one of your fabulous embellishments adorning my bag.
ReplyDeleteOh my! What a perfect idea for the pile of metal embellies I have been hoarding :) and finally, after months of busyness, I can actually try this! YAY, crafting day and great ideas to start me off!
ReplyDeleteWoW...good grief..that was a boat load of inspiration there! I nearly lost my balance when I saw that filigree flower box..love that, but it's all sensational and completely shows off the groovy stuff in the boutique! Thank you so much :)
ReplyDeletehugs,
Lisa x
Fabulous inspiration Jenny - I just love the bag embellishment. Off to have a look in the shop! Have a lovely weekend x
ReplyDeleteWow, you have shown an incredible variety of uses for the metals and all such gorgeous projects. Thanks for the inspiration.
ReplyDeleteAbsolutely beautiful, Jenny! Love it all, but that heart is breathtaking! Happy Weekend!
ReplyDeleteWhat a wonderful selection of projects, Jenny, and each one a great advert for the embellishments.
ReplyDeleteWow! What to say? I just love them all! Such inspiration - I shall have to come back to take it all in! Chrisx
ReplyDeleteYou never fail to impress, Jenny, your work is so beautiful - I love the Venetian one especially and I really, really love my handbag charm. Thanks so much for giving us more inspiring ideas for using metal charms. Hugs, Anne x
ReplyDeleteWow! A wonderful selection of gorgeous projects, I love the little canvas.
ReplyDeleteA fantastic focus - with so many amazing ideas for using the fab metal bits and bobs - gorgeous, Jenny!
ReplyDeleteAlison x
Oh my gosh, Jenny! I am in awe of you!! I can't even begin to choose a favorite. I adore the window box, and I am beyond excited to try out the patina technique. You have put soooooo many ideas into my head:-)) Thank you so much for the inspiration!!
ReplyDeleteWow what a post Jenny, so many lovely ideas and ways to use the metal pieces. As for your bag charms I am delighted to be the owner if one if these gorgeous pieces and still have it in my handbag. Thanks for all your inspiration.
ReplyDeletehugs {brenda} x0x