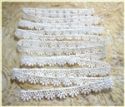
Finally, here is how I constructed the white lace flower...
Saturday, July 20, 2013
Saturday StepXStep
This week's Saturday Step x Step at Frilly and Funkie is about flowers created from burlap and lace. You know I have a penchant for flowers and burlap and lace, so I thought I would share some simple ways of making these four variations...
Let's begin with the lower left flower. It uses the Sizzix 'Tattered Florals' die. I cut three layers of the small, medium and large components in both burlap and lace (two layers at a time for burlap and three at a time for the lace). The lace was a very inexpensive overall lace. The cheapest all-over lace is really the best choice for this flower, as soft, drapey lace won't give the flower the substance and dimension that the stiff lace does (and the pricier laces I found were all very soft)!
For this Step-By-Step, I chose to use a deeper colored burlap to better show the contrast with the lace. In real life, even tiny differences in colors work very well...
Alternate burlap and lace, three times for each of the three sizes and layer them, staggering the petals...
The center is a pearl domed brad, pushed through all the layers. No cutting or glueing was needed. A button sewn down through all the layers would be a fabulous choice too. The next flower is made from 3/8" woven jute ribbon...
Begin with a chipboard disc (2-1/2" or so)...
Make a loose knot at the end of the ribbon and hot glue it to the center. Hold the knot gently in place until the glue cools and then begin...
to fold the ribbon loosely and glue it down, one fold at a time. It's important not to rush through each fold. If you tug on the freshly glued portion, you will wind up with hot glue on the other folds. Don't ask me how I know ;)
Continue turning the circle as you go, until the circle has been filled...
I wanted a 'soft' look to the leaves on this flower, so I...
found some scraps (about 3-4 " long) of hand dyed silk ribbon, an inch wide. Hold it as you see above and then...
fold the other end down. A small dab of hot glue holds it together...
On the back of the disk, fold the ribbon over the edge, to the back and glue the jute ribbon down along with the ribbon leaves...
It's pretty just as it is, but I couldn't resist the urge to embellish it with a few pearl beads...
The next flower is made exactly the same as the one above. The difference is that I took a 3/8" lace and ran it along with the jute ribbon...
Begin with a knot at the end. This is glued to the center of a chipboard (or cardboard) disc...
This works well, when the folds are loose and each 'twist' or fold is glued as you go along. I think it will be very pretty with a cream burlap and white lace too..a bit more subtle...
Finally, here is how I constructed the white lace flower...
Using a 13" length of wide venice lace (this was a piece I've had for ages, so I've linked to one at the end of this post,that will work just perfectly), anchor a piece of strong sewing thread to a cut edge and begin lacing the thread through the loops...
Gather the lace tightly together and knot off the end but don't cut it...
Using the thread that's still attached, stitch the straight, cut edges together...
A small burlap flower from the earlier die cuts was glued over the center hole, followed by a large, flat-backed rhinestone...
So here's the group again. I hope it incourages you to play around with these materials and have some fun creating really unique embellishments. I'm thinking of gift bags, a prettily wrapped present, on a barrette, a scrapbook cover..........
Finally, here is how I constructed the white lace flower...
Subscribe to:
Post Comments (Atom)


These are all so beautiful, Rebecca. I especially love the white one made out of the wide Venise lace. You can be sure one of these will appear on one of my makes in the near future. Itching to give the all a try! Thanks so much for this wonderful StepXStep!
ReplyDeleteHugs,
Linda
I found my bag of lace, now to find the time...so hard in the summer and then I lose the inspiration come winter, sigh....maybe if the rain comes. These are so pretty and make fun gift tags/barrettes etc.
ReplyDeleteThese are gorgeous! I have been making burlap flowers myself lately, going to have to try these now too!
ReplyDeleteWhat a superb step by step Rebecca! I'm gonna be reaching for my bag of lace now. Hugs, Jenny x
ReplyDeleteFantastic flowers! I never thought of cutting lace with the dies. Thanks for sharing your techniques with everyone.
ReplyDeleteFabulous tutorial Rebecca....these flowers are stunning. TFS
ReplyDeleteAnnie x
these are gorgeous flowers x trace x hugs x
ReplyDeleteFabulous step x step Rebecca ! The flowers are gorgeous ! Sue C x
ReplyDeleteAbsolutely gorgeous flowers! And a GREAT tutorial!
ReplyDeleteA great tutorial! Thanks so much for sharing!
ReplyDeleteLove these! have pinned it to my Pinterest things I want to make!
ReplyDeleteHow lovely these are!
ReplyDeleteAlison x
I really enjoyed this post. I'm sure that I'll try to make the twisting flower with some of the many choices of ribbon I have!
ReplyDelete