
In the spotlight this time are Ken Oliver Color Bursts, and if you were here last Friday you'll have seen Part One of my focus. Having got totally carried away with these wonderful little bottles of color I split the post in two and today share Part Two with you. A quick recap; Color Bursts are a finely granulated powder watercolor medium which come in easy to handle bottles with small nozzles(that's important). They are concentrated pigments so a little truly goes a very long way.
I kept it relatively simple last week but now it's time to get funkie and add in the Liquid Metals too. First off let's have another step by step tutorial to show what can happen when you are less 'controlled'. Remember the spare background from last week? I grabbed a piece of Ken Oliver Mixed Media Art Board, heat embossed a script background using fine white embossing powder and then spritzed all over with water.

So now when I tapped the Fushia Color Burst powder onto the board it immediately began to spread.

I added in the other colours from last week too.

And to make it run and blend I added even more water - see the embossing resist and appear!

I dabbed away the excess water for a watercolour background effect.

Since I was working towards matching up with the spare background from last week it needed more green. Simple, tap on a little more colour, mist on a little more water, pat dry and hey presto!

To create a border I dabbed Picket Fence Distress Paint around the edges, sprinkled on more white embossing powder and heat set.

A layer of Texture Paste was applied through the stencil.

I then added vellum embossed doilies, decided they'd covered the stencilled flowers too much, and re-stencilled them for even more impact.

That spare background was die cut and embossed to create coordinating butterflies, and a little Picked Raspberry Distress Ink packed a real punch on the edges.

With some Chit Chat words, brass corners, design tape and Liquid Pearls the mini canvas was complete...

And here's a couple of close ups;


And so to finish, here's what is possible when it all goes wrong, you turn over, start again and use the techniques you've learned along the way...
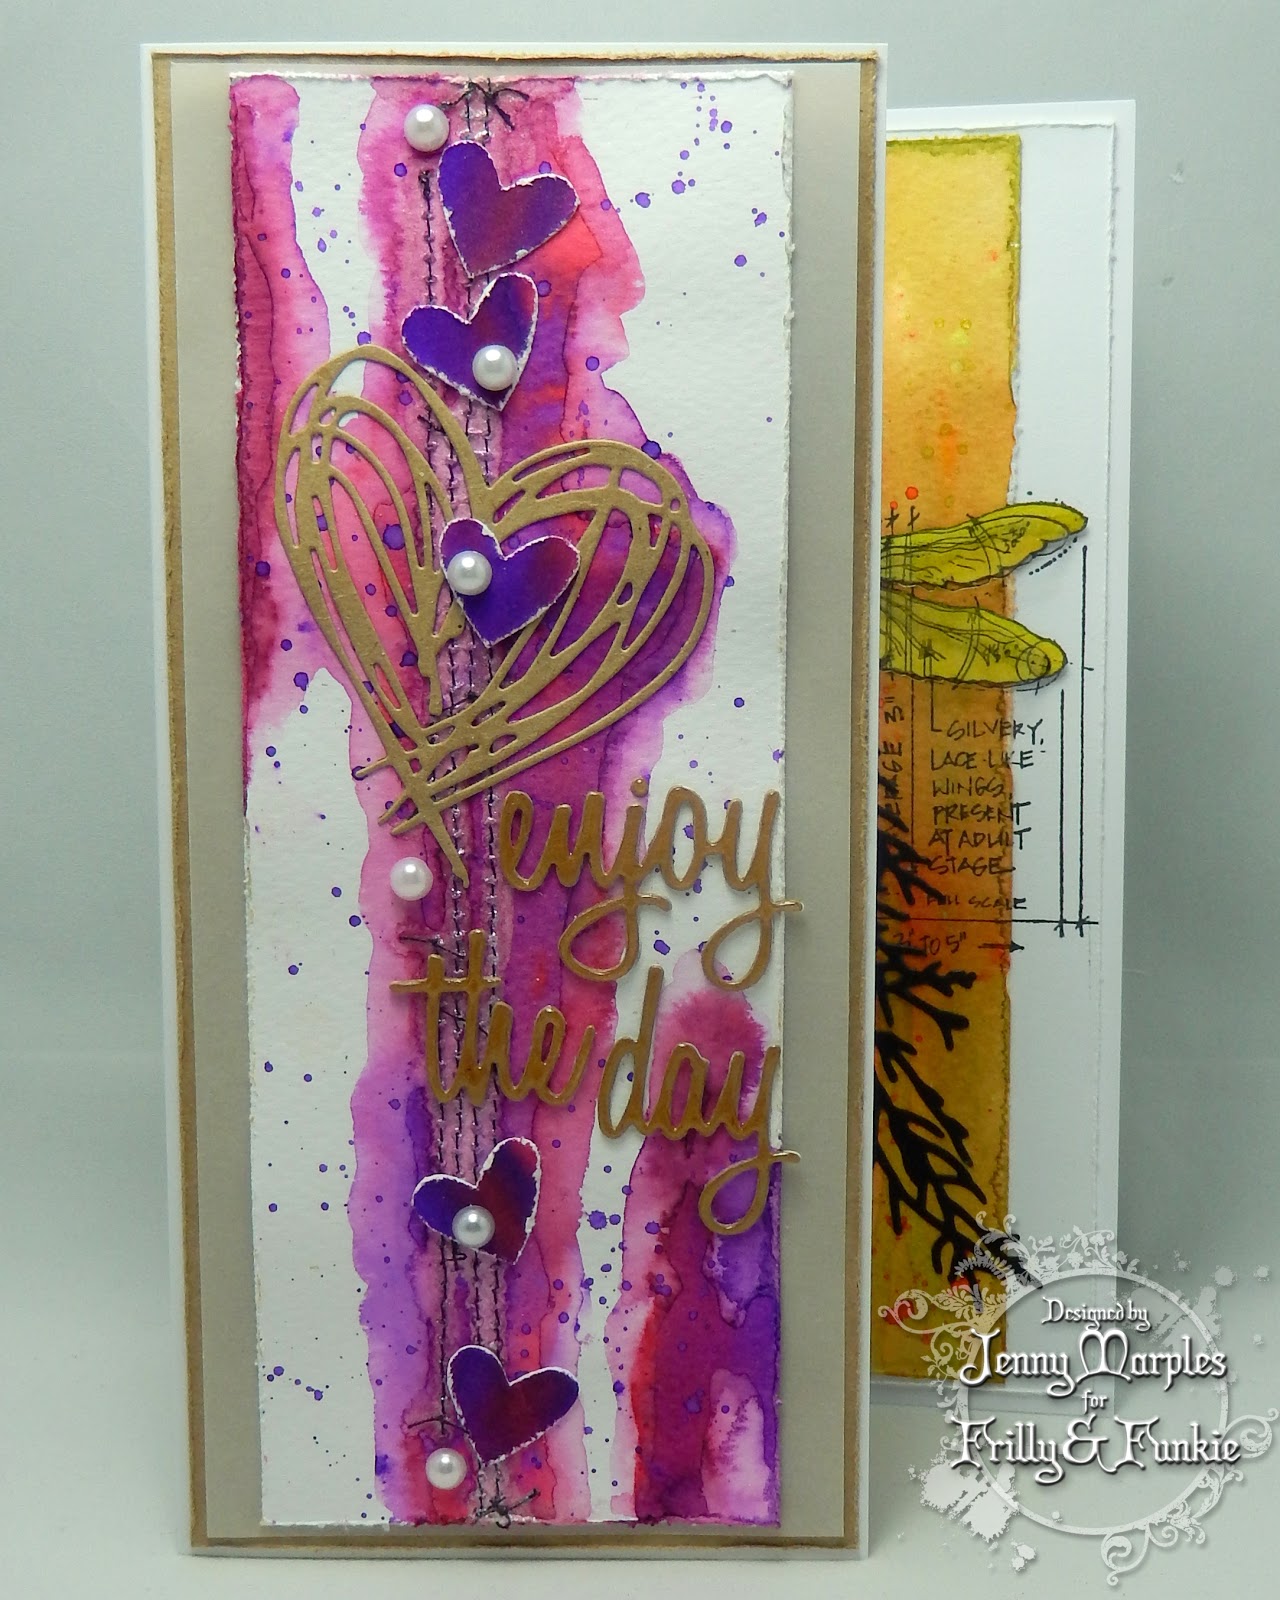
This is the flip side to one of my first cityscape card trials - I used the colours that had bled through to the reverse, painted on some more water, applied more dilute Color Bursts, dripped Platinum Liquid Metals down the stitching, added a few die cuts and pearls and the look was changed.


And here's a second trial cityscapes card flipped and redone...

I spritzed the whole background and dripped and flicked Color Burst all over, allowing the colours to combine and run with more Liquid Metals down the centre. A little stamping, die cuts and wings coloured wings to match and any 'mistakes' were gone!


Thank you for indulging my over-enthusiastic experimentation over the past two weeks and for your lovely comments. I hope you've enjoyed this week's ideas and feel even more ready to play with your Color Bursts too. Remember, with an extra 15% discount applied to Color Bursts for the next week at The Funkie Junkie Boutique it makes sense to stock up now.
Who spotted I used three butterflies on my canvas? With those it fits perfectly with our current challenge 'Let's make it a trio!' Make sure you join in the fun and link your own creations for a chance to win one of several prizes.
We'll be back tomorrow with a Saturday Step by Step from my Funkie team mate Zoe Hillman so make sure you come back for that.
For now take care of yourselves,
Jenny xxx
 |  |  |  |  |
 |  |  |  |  |
 |  |  |  |  |
 |  |  |  |

Beautiful designs Jenny x
ReplyDeleteThank you Nikki. Jenny x
DeleteGorgeous creations and fabulous descriptive post, thanks Jenny xxx
ReplyDeleteThank you Brenda. Jenny x
DeleteHallo Jenny, diese Karten sind wirklich wieder wunderschöne geworden ! Ich liebe Deine Art zu gestalten Sylvia
ReplyDeleteVielen Dank Sylvia !
DeleteWonderful colours and great ideas. Thank you for sharing how you did this
ReplyDeleteLove Chrissie xx
Thank you Chrissie. Jenny x
DeleteFabulous Jenny!
ReplyDeleteThis comment has been removed by the author.
DeleteThank you Sue. Jenny x
DeleteAbsolutely beautiful cards Jenny and a fab step by step - Thank you. Mo x
ReplyDeleteThank you Mo. Jenny x
DeleteWowzers! Those are some fabulous cards using the bursts in a wonderful way! Fabulous Jenny!
ReplyDeleteThank you Suzanne. Jenny x
DeleteWow Jenny, just gorgeous! I love the stencilling over the doily and those butterflies are so beautiful! Wonderful tutorial. hugs :)
ReplyDeleteThank you Pamellia. Jenny x
DeleteWonderful ideas!
ReplyDeleteThank you Patty. Jenny x
DeleteGorgeous backgrounds! I especially love the first one, with the soft colors and the text resist.
ReplyDeleteThank you Elizabeth. Jenny x
DeleteLoved the step by step...thank you so very much. Great idea to stamp and emboss first in white before using the powders and thanks for the idea about EP over the white paint and heat setting it. Great inspiration and such a gorgeous canvas, thank you x
ReplyDeleteThank you and I'm so glad I could share more helpful ideas! Jenny x
ReplyDeleteThese are all super Jenny. Love the butterfly canvas. I really must get my colour bursts out and have a proper play. Hugs Mrs A.
ReplyDeleteAbsolutely Mrs A! They are such fun to play with. Thank you so much. Jenny x
DeleteI love your canvas Jenny, the black words were a perfect final addition to the composition,
ReplyDeleteLucy x
Thank you Lucy. Jenny x
DeleteI love how painterly the finished background is!!! And I love the flipped over "mistakes". It's such an artistic and delicate look. You have whet my appetite to play with Color Burst!
ReplyDeleteThank you Kathy. So glad I've inspired you to play! Jenny x
DeleteLol. Your over enthusiastic experimentation certainly produced some incredibly beautiful results Jenny! The art board is beautiful and I just love the gorgeous dragonfly card too! Anne xx
ReplyDeleteThank you so much Anne. Jenny x
DeleteFantastic samples and tutorial. I love the background with the resist. I wasn't a really big fan of the two bottles of Color Burst that I purchased but thanks to you am going to give them a second chance.
ReplyDeleteHugs!
Cec
Thank you Cec. I'm so glad you're going to give them another go. Jenny x
DeleteAbsolutely gorgeous!
ReplyDeleteThank you Pam. Jenny x
DeleteOh dear! Looks like these Ken Oliver Colour Bursts have jumped onto the sinking ship of my "never ever gonna end" wish list! Lol! If I thought that your first part using these whetted my appetite for them, this part 2 sealed the deal!! Absolutely gorgeous canvas and those cards made with "mistakes"?? If I made "mistakes like that I'd be wanting to make more "mistakes" all the time!! By the way, just one question. I noticed a face book badge on the left of the page, and wondered if it would be okay for me to share/put it on my face book page??!
ReplyDeleteOh Christine I feel like apologising but I really don't want you to miss out on all the fun! Thank you for your lovely comments, and by all means feel free to share the badge and link to this blog. Jenny x
DeleteThese are just awesome!!! I love them, and I really love the ones you made from the backs. Proves my theory that there is no such thing as a mistake, only a new challenge - right ?😊 I'm going to be a new subscriber as of now 😀 and thanks Ken for the link. Cheers, Clare NZ
ReplyDeleteSo glad you found us and have enjoyed the posts. Welcome and thank you! Jenny x
DeleteGorgeous ! Jenny LOVE your art board - the background is so beautiful with the emboss resist showing through the lovely delicate bland of colours. Might have to invest in some of these colour burst being a big fan of watercolour art . Great way too to use the pieces you thought were heading for the bin - Love the dragonfly . I working backwards ( on catch up , yet again ) so off to see Part 1 now
ReplyDeletehugs x
Thank you Amanda! I can promise you these little bottles pack a big punch and will go a very long way. Can't wait to see what you do with them. Jenny x
DeleteThese are so gorgeous Jenny! I especially love the first canvas panel the most because those colours and finished canvas are what I hope to be able to create too! It's also been interesting to hear that someone else turns the ink or paint soaked card over. That's something I have done now and then too, when the right side hasn't ended up looking like I wanted the reverse is sometimes perfect such a happy result and no wasted card!
ReplyDeleteThank you for another fun tutorial, you ladies are the reason that I am inspired to play and experiment Karen x
Thank you so much for your lovely comments Karen! Great minds clearly think alike when it comes to potential disasters and the saving of waste! I'm so pleased we continue to inspire you. Jenny x
DeleteEach of these cards is gorgeous! Your play was quite productive!!!
ReplyDeleteThank you so much Autumn! I'm glad you think so. Jenny x
DeleteWonderful spring colours on the butterfly card, but it's those tall elegant cards, full of rich beautiful inky colour and brilliantly adorned, which have captured my heart.
ReplyDeleteAlison x