Bendi cards have two crossing flaps in the front, that bulge away from the back panel. This version uses die cuts and stamps to create a little scene...

I love the little bicycle, leaning against the white picket fence and the brads holding the wheels on...

inside, the card is lined with patterned paper, a border of grass and a little cluster of tags that hold the sentiments...

Another segment of the picket fence and some stamped flowers...

The opposite side (and shortest flap), have picket fencing that matches up with the fencing on the front along with some more die cut, leafy foliage... My next card is a bendi card with an entirely different mood...

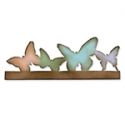
This card has a higher back panel and in this instance, it was die cut with Tim Holtz's Alterations die, 'Butterflight'...

Along the top, a second set of butterflies top the die cut edge. They are distress inked around the edges and then treated with a thin coat of distress stickler...

Each of the edges of the two lower, crossing panels is edged with cut-out butterflies...

The inside, back panel of the card has two more butterflies and a whispy, lovely triple bow and trailing tails...

The view from above shows the two 'pockets' that are formed by the two panels that cross at the front. Here's a basic guide to help you create your own Bendi card...

These are the dimensions of the panels I began with, while making the first card. Curves will be added to the left and right flap later, to suit the particular design...

Score a half inch from the inside edges of the flaps. These half inch tabs will be attached to the back panel and will fold around to the front. At the outside edges of the flaps, draw a line a quarter (to 3/8's") from the outside edge of each flap and cut a tab with sloping sides into each end, cutting away all the paper except for the tabs...

Two and a half inches from the flap that will attach the left flap to the back panel, draw a light pencil line. Place the shorter flap on top of the taller flap (right flap over left flap) with right sides facing out, lining up the bottom edges. bring the right panel up to the line with the tab hanging over the pencil line, then make two pencil lines, showing where the right flap's tab will insert into the left. Using a craft knife, cut along the pencil line, just exceeding the marks for the tab, ever so slightly...

Next, draw a light pencil line vertically on the back panel, 1-1/4" away from the right edge. Lay the left flap on top of the back panel, bringing the flap up to the line with the tab over the line and with the bottom edges lining up. Make two pencil marks (shown above) as guides to show you where the tab will be inserted into the back panel. Cut that space open as you did in the previous step...

Now you can attach both flaps to the back panel. I prefer to use a very heavy duty, double sided tape for this job. Then you can insert the tab from the left flap into the back panel...

and then the tab of the right panel into the slot on the left flap. Now you can see your basic card shape. For my butterfly card, I wanted a higher back panel, so I cut the butter flight border using a much longer panel of paper than I needed. This was so that I could adjust the height of the panel after the die cutting. The left flap was cut to 4-1/2" in height x 5-1/2" in width. once the flaps were attached to the back panel, I did some serious cutting, making a curve so that this flap was 1-7/8" high at the point before the tab. The line cutting it down is curving not straight...

I needed lots of butterflies, two for the top edge, that were placed on top of the original die cut to add dimension and then an assortment to cascade down the top edges of the two flaps. Since there are four different styles on this die, I cut out 7 additional die cuts (all at once- this style of die has no problem going through multiple layers) and proceeded to cut out two or three from each die cut. You can see in the photo above, that it is possible to cut into the bottom of the card stock or another butterfly figure, so that you have complete butterfly designs. Usually, I had one butterfly per die cut that had to be cut into in order to achieve whole butterflies...

Using an ink applicator, each butterfly was treated to some rough distress inking. It wasn't necessary to be very careful about the distressing because of the next step...

Place a dab of distress glitter on your finger and apply it over each butterfly. It was necessary to use this amount on each half of a butterfly...

Again, it isn't necessary to be particular in the application. The irregularities that occur were very much to my liking...

This is what the card looked like after the initial application of butterflies. If you scroll back up, you will see that each of the panels edges was distress inked. Some additional butterflies were added and then some ribbon and bows. I stamped a sentiment on the back panel, but this card construction is wide open for interpretation! I hope you give it a try some time.
Sending you ((hugs)) and Blessings,
Rebecca


Rebecca I love this! The design is fabulous and I love the scene on the first one in particular. I need to make a card for my sister it's a special number this time and this design has given me an idea, thank you so much! Sue C x
ReplyDeleteOooo, so glad it's given you an idea! Lucky sister!! ((hugs)) Rebecca
DeleteYour first card is a delight, it really brightens up a dull day with the lovely Spring-like scene. Your second card is absolutely gorgeous, I just love those beautiful butterflies. Thank you so much for the very clear step by step too. Anne x
ReplyDeleteThank you kindly Redanne! Wish I could send you some of our (overly) abundant sunshine! ((hugs)) Rebecca
DeleteI adore both versions Rebecca. What a great way to make a very special card which you can make as simple or detailed as you want. Will definitely be giving this a go. Jenny x
ReplyDeleteThanks Jenny~ that's what happens when I can't make up my mind! ;))
Delete((hugs)) Rebecca
Beautiful cards Rebecca. The attention to detail is absolutely stunning. Hugs Rita xxx
ReplyDeleteThank you so much Rita~Hope you have a wonderful weekend! ((hugs)) Rebecca
DeleteThanks for all the details on how to put together these brilliant layered cards - they both look stunning!
ReplyDeleteAlison x
Thank you Allison~ split personality perhaps ;)) ((hugs)) Rebecca
DeleteThis is such a brilliant concept! Thanks for sharing! Love both cards.
ReplyDeleteThanks for visiting and leaving your kind comment!! ((hugs)) Rebecca
DeleteWhat a great card and tutorial. Thank you for the detailed instructions! I'm always looking for different and interesting cards to make. Both of your cards are fantastic! And, they show how versatile this card style is.
ReplyDeleteI really do love the versatility of Bendi cards! Thanks so much for your comments! ((hugs)) Rebecca
DeleteFabulous idea. Great tutorial.
ReplyDeleteThanks for sharing, Julie x
Thanks very much Juli~ ((hugs)) Rebecca
DeleteThanks for this super tutorial Rebecca. Both cards look terrific and show how you can adapt tutorial to varying card styles. Nicola x
ReplyDeleteThank you Nicola~ hoping you have a happy, crafting weekend! ((hugs)) Rebecca
DeleteOooh...now I want to make a butterfly one-that's gorgeous, Rebecca! I'm almost done with one of these bendi cards as a new baby card, and I'm itching to play with those pretty butterflies and make a shabby spring one now-I'll tell dh that it's your fault I'm not cleaning house today...heehee!
ReplyDeleteUse me as the excuse any time Kathy!! So happy to help! hehehe! ((hugs)) Rebecca
DeleteThank you so much for this wonderful step by step, Rebecca!! I have never seen this card fold before. It is so dimensional and offers many possibilities. Your cards are both so lovely!! They both have me dreaming of springtime. The butterflies are sooooooo pretty!!
ReplyDeleteHugs,
Nancy
Thanks Nancy~ it's springtime in the 'Valley of the Sun' and the butterflies are busy! ((hugs)) Rebecca
DeleteLove trying new folds and these cards are FUN! I am forcing myself to set aside time to play with this this week. This is a new one for me :)Thanks
ReplyDeleteOhhh, I'm so glad you will get some playtime! This is such a fun-to-make card style! ((hugs)) Rebecca
DeleteAbsolutely beautiful card. I really want to make it. Thank you so much for wonderful the tutorial. Etsuko xx
ReplyDeleteMy pleasure Etsuko! I hope you have as much fun with this style as I have! ((hugs)) Rebecca
Deletea great step x step, gorgeous design and lovethe soft colours of the butterfly one but they both look fab! Gorgeous Rebecca xx hugs x
ReplyDeleteThat's my fav too~ Thanks Trace, hope all's well. ((hugs)) Rebecca
DeleteThis is gorgeous Rebecca! I just LOVE your work. Everything you post is a feast for the eyes! xx
ReplyDeleteThank you very kindly Joann~ My next F&F post is very different from my usual style… I'll be jumping off my creative cliff! ((hugs)) Rebecca
DeleteThis is fabulous Rebecca !! I've never heard of a bendi card and looks cool !! Will have to try one day ! Great tutorial and gorgeous cards !!
ReplyDeleteThese are gorgeous! I'm going to have to try them! Thanks so much for sharing. Excellent tutorial!
ReplyDeleteThese are gorgeous! I'm going to have to try them! Thanks so much for sharing. Excellent tutorial!
ReplyDeletelovely idea but do these cards need a box or will the curved bits go in to an envelope?
ReplyDeleteBest
Carolyn
Beautiful cards and thanks for sharing the measurements!
ReplyDelete