Hi everyone, Jenny (Buttons) here. You will no doubt have seen Linda's update on new stocks of new, competitively priced Ranger goodies arriving at The Funkie Junkie Boutique, including Distress Paints, stamps, embossing folders and Idea-ology. But why bother getting them eh? Quite simply because they are awesome.
To show you why I am hooked on using the Paints and embossing folders in a quick and effective way just follow the link HERE. And as for the Idea-ology range? Well you just wait until Friday when Trace is going to amaze you with more awesome ideas for using all the pieces right here at Frilly and Funkie.
OK, don't forget to drop back here tomorrow for the launch of the new challenge, and in the meantime take care of yourselves. Hugs, Jenny x
Showing posts with label Folder Embossed Backgrounds. Show all posts
Showing posts with label Folder Embossed Backgrounds. Show all posts
Tuesday, March 19, 2013
Saturday, November 3, 2012
Saturday Step X Step - Faux Embossed Metal
Marjie Kemper here, happy to be hosting this week's Step X Step. This technique comes straight from Tim Holtz's book, The Compendium of Curiosities Vol 2. If you don't have that book, you really do need it... I promise. It has tons of great tips and techniques, and I refer to it often.
I used the Faux Embossed Metal technique on this project, which is the November page for my 2012 Kathryn Wheel calendar:
I intended to use this technique just for the accent piece that shows the month, but it is quite bold and didn't look good against any of my attempts. So I decided to do the entire page with this technique.
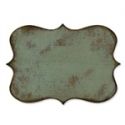
I started by cutting a piece of black card stock from the Sizzix Ornamental die, then embossed it with the Collage Texture Fade. I used a shim when cutting, like I demonstrated on this project last month.
I love the rich texture the Texture Fade provides:
I pulled some of my favorite Perfect Pearls Mists and spritzed liberally before heat setting them:
The shine is really rich in person. I cut two pieces of black card stock in half lengthwise and used the same technique on them with the Retro Circles Texture Fade (you must move the folder once and emboss it a second time to accommodate the length of the length of the paper).
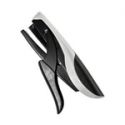
I attached all the cardstock to the calendar page with Tim's Tiny Attacher, and added some grunge letters painted with Ranger's Silver paint dabber.
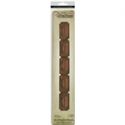
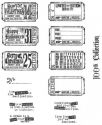
I needed something to pop that accent piece off the page. I cut the Harlequin border out of a rich silvery paper and then traced around my Ornamental die to mat it on more of the same. Cut out my tickets with the Sizzix ticket strip die and stamped Tim's blank 'admit one' image on top.
There you have it. Remember our new challenge started on Wednesday. We hope you'll join in!

Saturday, May 19, 2012
Saturday StepXStep - Folder Embossed Backgrounds
I sure hope you are all doing well and ready for the weekend! Many times, I have blogger friends ask me about my backgrounds and so I thought I would share a couple. First I would like to let you know that I experiment frequently and some of you may know, but others may not, Alcohol Inks will work on somewhat porous surfaces. Now first they have to be primed, like the plastic bottle I altered and used Kilz Primer or as with this white card stock a Black Paint Dabber was used to prime the surface.
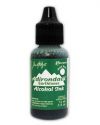
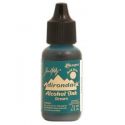
Cover the white card stock with the Black Dabber and then use a sponge to blot and smooth the coverage, next use the heat tool to dry. Once dry cover with the alcohol inks and mixative (Bottle, Stream, Meadow and Gold Mixative). I always like to heat set after each application.
Next I used the Retro Circles Texture Fade, embossed, covered the raised areas with Walnut Stain, Frayed Burlap and Brushed Corduroy Distress Inks, heat set and die cut. The finished panel was added to chipboard using two way adhesive, prior to die cutting. I like to use several colors for this to give extra layers of color, so let each color show through.
For the Honeycomb background (I love that folder), using a piece of two way adhesive, I adhered the Tissue Wrap. If you look close, it is all about traveling and yes, I purposely chose that section! This was then inked with the new and fabulous Distress Ink colors, heat set and then embossed and again shaded with the Archival Sepia! The ends were distressed and inked with Walnut Stain.
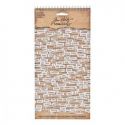
The little Chit Chat Stickers were shaded and backed with card stock. My metal kind of surf board is inked with Black, wiped off the top as we only want the sentiment black and then colored with alcohol inks (Latte Ginger, Meadow and Blending Solution). Tied a little thread and layered it up.
Thank you so much for stopping by and I hoped you enjoyed this Saturday's Step X Step!

Subscribe to:
Posts (Atom)


