Hello, Friends! It's
Kathy here, and it's time for another
Friday Focus here at Frilly and Funkie where we highlight one of the fabulous products from the
Funkie Junkie Boutique.
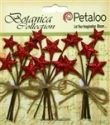
This go round, we are putting the spotlight on the gorgeous
Petaloo line of flowers. For the next 2 weeks, you'll be able to purchase these amazing blooms
at an additional 15% discount. Ooh la la!
I have prepared some projects using different types of Petaloo flowers so that you can see how truly versatile and beautiful they are. I also have a fun little step-out tutorial to share with you, so you might want to go grab a nice cuppa and a little snack before we embark.
Using Petaloo Flowers in Mixed Media
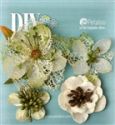
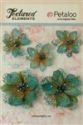
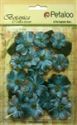
Because I am trying to spread my wings a bit with mixed media, the first project I have to share with you is this Mixed Media Collage made with elegant Vintage Velvet Dogwoods and sparkling Teal Jeweled Textured Flowers. It's pure eye candy! I call this piece, "Flowers of the Sea."
You all know how very much I love the ocean, so I had to use Prima's French Riviera papers with these glorious flowers. The collage measures 6" wide x 8" tall and is built on a thick piece of corrugate packing material that I salvaged from our move.
When I am working in a collage format, I try to choose my elements very carefully. For this piece, I wanted to add embellishments that would draw out the soft blues, creams and tans in the paper line. These gorgeous teal velvet dogwoods, creamy white dogwoods and teal jeweled textured flowers made the central images POP off the background layers.
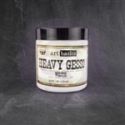
I painted the raw corrugate with white gesso, then layered on beachy paints to prepare the surface for my papers. There are so many layers on this piece that you almost have to see it in person to take them all in. Since my main image was rather small, I used the flowers to create a sort of frame that would draw the eye toward the center of the collage.
I added pearls, found items from the beach and ephemera from the French Riviera collection and tucked everything in and around those fabulous floral elements.
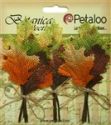
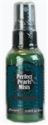
So these flowers add texture, color and framing to the collage. I also want to mention that I sprayed the leaves with Perfect Pearls Mist, and they took the color beautifully and kept their shape, too. The flowers and velvet leaves were spattered with Dylusions Linen Spray, and again...no problem.
Using Petaloo Flowers on Cards
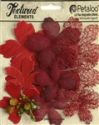
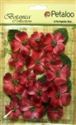
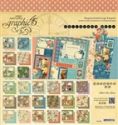
This second project is a card made with Graphic 45's Children's Hour papers. I selected the July page and wanted to pull out the bright red tones from the paper, so I used some red Petaloo blooms to do that.
I anchored the bottom corner of the card with a large assemblage of flowers, leaves and a copper starfish charm from the shop. Tucking in the red glitter stars added even more texture and a touch of glitz to the card. It's perfect for a July 4th theme and makes me think of fireworks.
I placed this flower cluster next to the fussy cut girl holding a shell so that she would not disappear on the card. And just look at all that wonderful texture the flowers add to the composition!
Again, I used the flowers to frame my central image. Petaloo works closely with Graphic 45, so their flowers are always a perfect match for Graphic 45 papers.
This small velvet dogwood was just the right finishing touch for my bow cluster.
Here's a peek at the inside of the card, because I know you all like to see how a card is finished.
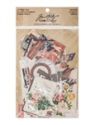
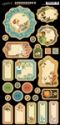
I used one of the elements from the Tags and Pockets to hold a blank tag. You can write your sentiment here and there's also room to tuck in a gift card or cash gift.
A Shabby Chic Gift Tag with Pion French Flea Market and Petaloo
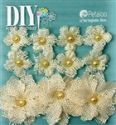
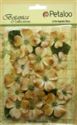
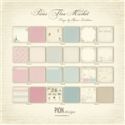
My final project is a little shabby chic gift tag made with DIY Textured Blossoms and Pion French Flea Market Papers.
These flowers are designed to take paint, stain, or other mediums and still keep their shape. I've tapped these with Broken China Distress Ink and spritzed them with a little Gold Mist. I wanted them to remain mostly white.
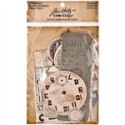
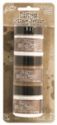
Are you wondering what I used for the base of this tag? It's Petaloo Packaging! I love the size and color of the tags that the flowers are mounted on. They are just the right thickness for a gift tag and take very well to mixed media treatments. Here's a step out to show you how I prepped the chipboard base for this tag.
Here's how the tag looked before I altered it. The pretty blue background was the perfect shade to go with Pion Design's French Flea Market papers.
I sanded the tag to get off the adhesive backing, and to remove the printed information.
My blog buddy,
Anita Houston (who was a designer on the Funkie side of the team a few years ago) does a technique where she sprays manila tags with Distress Ink Refresher to create a faux leather finish. I wondered if I might be able to do this same thing with the chipboard tag. And, to my delight, it worked! Instead of crumpling my tag though, I sent it through my Big Shot with Tim's Collage Texture Fade. It embossed beautifully!
To highlight the embossing, I sponged the tag with Vintage Photo Distress Ink.
I watered down some Broken China Distress Paint with a spritz or two from my Distress Sprayer, then brushed it lightly over the tag.
I lightly swiped the tag with Broken China and Pumice Stone Distress Stain.
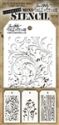
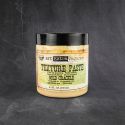
Then I added Prima Gold Crackle Texture Paste with Tim's Mini Layering Stencil #10. After the paste dried, I placed the stencil down again so that it was slightly off center from the paste and added a drop shadow with Vintage Photo Distress Ink.
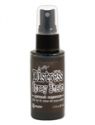
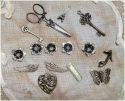
I spattered the tag with Dylusions Linen Ink and some Ground Espresso, too. I used corner punches to shape the top and bottom corners. Then I just layered on my elements.
I hope you'll agree with me that these incredible flowers are a great way to add texture, color and dimension to your artwork. Whether you are making a card, a tag, or a mixed media project, Petaloo flowers add that special touch that takes a project over the top. And through June 9th, you can add them to your crafty stash for an additional 15% off!
Thanks for stopping by!
Cheerio,
kathy
Product Links to the Funkie Junkie Boutique