Saturday, February 25, 2017

Saturday Step x Step - Fractured Felt


Hello, it is Cec here and today I am presenting the Saturday Step x Step feature and bringing you a little canvas I made and am calling Fractured Felt for one of the elements I created. Since the Design Team is celebrating all things Wendy Vecchi, I made sure to use some of her fabulous products in this project.


I started with a 5"x7" canvas that I picked up at the dollar store and gave it a coat of Gesso first.  Then I painted it with some Craftsmart Silver Gray acrylic paint.


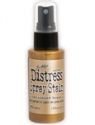
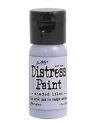
I dry brushed the canvas with a light coat of Gesso to knock back the gray a bit and then sprayed it with some ink sprays - Dylusions White Linen followed by Tim Holtz Hickory Smoke and Brushed Pewter Distress Spray Stain.


Now it was time to fracture some felt.  I took a piece of white polyester craft felt from my stash (you can find it at craft stores, fabric stores and dollar stores, it comes in small rectangles and is available in many colours) and cut it to the size I wanted.  Next I painted it with some White Pearl Metallic paint from DecoArt and while it was still wet I sprinkled some Stampendous Silver Embossing Powder on some of the painted areas.

I would suggest you work in sections and that you use a palette knife to push the embossing powder into the paint.  I didn't push the embossing powder into the paint and I ended up with it everywhere. Also make sure that you have the paint touching other areas of paint and some parts of the edges.


The next step is to take your heat gun to the felt and what happens is that the embossing powder melts and any areas that are not painted will also melt and create holes and the edges will shrivel a bit.

Once I had melted (fractured) my felt I decided that the White Pearl paint was too yellow so I went back over some areas with White acrylic paint from Delta Ceramcoat and sprinkled on some Snow Embossing Powder from Recollections.  Then I carefully heated it again in those areas.

Note:  I tried this with some by-the-yard felt from my sewing cupboard that I suspect was not all polyester and it did melt but it did not create holes, it just shriveled and became wavy, which is also a cool look.


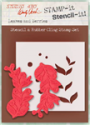
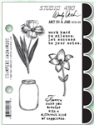
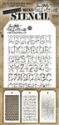
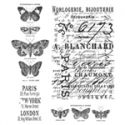
Next I made the flowers by stamping the bloom from the Build a Blossom Stamp-it, Stencil-it by Wendy Vecchi twice onto some of her Clearly for Art Blackout using Versamark.  I heat embossed them with Silver Embossing Powder from Stampendous and then fussy cut them.  I clipped between the petals and then used my heat gun to soften them so I could shape them.  It helps to have someone else hold the heat gun so you can shape while the material is still soft so my husband was pressed into service for this task.


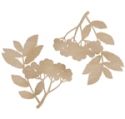
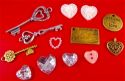
I covered some die cut leaves with some Silver Sterling Metallic paint from Folk Art and then shaped them with a large embossing tool.


The heart was hand cut from a scrap of card stock and stamped with a Script stamp from IndigoBlu using some Versamark.  Then I heat embossed it with some of Wendy Vecchi's Red Geranium Embossing Powder.


Before I assembled the canvas I inked the edges of the leaves and heart with some Tim Holtz Hickory Smoke Distress Ink and then layered all the elements starting with the fractured felt.  I added a Big Chat sticker from Tim Holtz for a sentiment.  There is no real reason why I chose that word except maybe that this is a project that worked out the way it was in my head so I feel blessed.

I was recently playing with different materials to see what the effect would be if I took my heat gun to them. I love what happens to craft felt and hope that I have inspired you to give this a try.

Wednesday, February 22, 2017

Out of the Cold

Hello, it is Cec here and if you are like me you are already tired of Winter you'll want to get Out of the Cold! I am the hostess for the new challenge starting today and that is what I am calling it. I describe it this way:

"It is winter and that means snow and cold in so many places so let's head to the tropics. Create any vintage or shabby chic project that will make us feel warm - think lots of sunshine, bright colours, flora and fauna and even animals hiding in the rain forest."

The team will choose their top four picks with the winner being invited to join us in a Guest DT spot here at Frilly and Funkie and the next three will receive badges to display on their blogs. Everyone who enters and follows the rules will be entered into the draw to have the chance to win a $25 spending spree at The Funkie Junkie Boutique.

The guidelines for entering are simple; create a new vintage or shabby chic project following the challenge theme, link it below to your post (not just your blog) and also include a link back to this challenge in your post. You can combine our challenge with up to 10 challenges (including this one) to be in with a chance of winning. If you are entering through a public forum (such as Instagram) you'll need to include the words Frilly and Funkie Challenge. Also, please be sure to turn off your Word Verification so our Design Team can leave comments on your blogs. Make sure you follow these rules as unfortunately we have had to eliminate entrants from the prize draws in the past.

For this challenge and the next two after it, the Design Team is excited to be celebrating all things Wendy Vecchi. We will all be using her fabulous products, new and old, in our creations - you'll be blown away at how versatile they are since we all have different creative styles. When you enter the challenge, you are not required to use Wendy's products in your creation but it would be great if you did. Don't have any yet? Check out her product range at The Funkie Junkie Boutique.

The Funkie side of the Design Team are back this week with some fabulous inspiration for you;

Suzanne Czosek - Suzz's Stamping Spot 

Jenny Marples - Pushing The Right Buttons


Zoe Hillman - iGirlZoe


********************************************
WEEK ONE

The Frilly side of the Design Team has created some wonderful inspiration for you during Week One, and all of them will be sure to transport you Out of the Cold;

Kathy Clement - Kathy by Design

Cec Wintonyk - CW Card Creations

Nancy Dynes - Tattered Treasures

To check out more details about the gorgeous cards made by the Design Team just click on the blog addresses next to their names. We hope they have inspired you to come back and share your warm creation using the link below.

For more inspiration join us tomorrow to see what our latest Guest Designer has created. And the Funkie side of the Design Team will be back next Wednesday to share their ideas for getting Out of the Cold.


Monday, February 20, 2017

Challenge Winners - Be My Valentine?

Welcome to the beginning of a new week! Thank you so much to everyone who took the time to enter our 'Be My Valentine?' challenge. The Design Team really enjoyed looking at all the beautiful and romantic Valentines to pick our winners.


This time we've chosen Annie Rosenstiel as our overall winner. We loved the different textures and clever design of her entry. Congratulations Annie on being our favourite for the 'Be My Valentine?' challenge and winning the opportunity to be a Guest Designer here at Frilly and Funkie for a future challenge.

And now for the three winners of our Frilly and Funkie Top 3 Badges for this challenge; the choices, in numerical order, are... #5 Nancy, #13 Autumn, and #20 Julie!!! Please email Linda at thefunkiejunkie@gmail.com for the codes for the Top 3 badges so that you can display them proudly on your blog.


And finally Random.org has chosen a lucky winner for the $25 gift certificate to The Funkie Junkie Boutique. Our congratulations this time go to #28 Sara Emily!

A big thanks from the Frilly and Funkie team to everyone who took part in this challenge and congratulations again to our winners. Once again, please email Linda at thefunkiejunkie@gmail.com for the codes for the winner's badge and to give us your email address for the Guest Designer details (Annie), for the Top 3 badges (Nancy, Autumn and Julie) and for the gift certificate details (Sara Emily).

Our current challenge, 'Out of the Cold' runs through Tuesday, February 28th. We hope to see you entering this time around so that you too can be in with a chance to win.

Have a great week everyone!

Friday, February 17, 2017

Friday Focus on Laser Cut Wood and Chipboard

Happy Friday! Suzz here, bringing you the next Friday Focus. The Friday Focus for the next two weeks is laser cut wood and chipboard embellishments from Southern Ridge Trading Company and Kaisercraft.

These items will be an extra 15% off our regularly discounted prices (total of 35% off list) through March 3rd. You can find all these bargains under our Friday Focus tab at The Funkie Junkie Boutique.

There were so many wonderful choices in the store that I had a hard time picking and ended up creating two different projects.

My first project was inspired by the Southern Ridge Trading Company laser cut clock.


I saw this lovely clock face and knew it would look beautiful on the mini clipboard. I painted it with gesso and then used the gold paint as my starting point for the color base.


The clipboard  and clock were painted with a coat of white gesso paint. After the paint dried the clock was painted with tarnished brass paint.

The Wendy Vecchi squares stencil was used to apply crackle embossing paste over the background.   While the embossing paste was wet a layer of  tarnished brass and raspberry distress stains were sprayed and mixed with water over the surface.

The dragonfly was die cut from kraft paper and a piece of chipboard. The dragonflies were painted with white gesso. The kraft dragonfly was partially painted leaving sections of the kraft showing which got a smear of gold paint. The chipboard dragonfly was embossed with the embossing folder and pink distress spray was sprayed over the background.

The images and sentiments were stamped on tissue paper using archival ink and then applied to the background after it was dry using collage medium.


The metal on the clipboard received a coat of metallic paint along with stamped images using StazOn ink.

The dragonflies used a bit of seam binding died with the pink spray and a gold painted heart for a focal point.

The second project is a  card using the Kaisercraft wood laser cut flowers.


The flowers were painted with ranger paint. After the paint dried, embossing paste was applied using the  mini layering stencil to create a polka dot effect.


The background has crackle embossing paste using the Wendy Vecchi stencil with a stamped image overlay.  The distress stain was spritzed over the surface after the embossing paste was dry and before the image was stamped.

You can find these Friday Focus products as well as all the other products at The Funkie Junkie Boutique!

Suzz


Thursday, February 16, 2017

Guest Designer - Trace Metcalfe

Please say hello and give a warm welcome to our Guest Designer for this challenge, Trace Metcalfe. If Trace is a familiar face you are correct as she was part of the Frilly and Funkie Design Team. You can find her fabulous work on her blog Inkypinkycraft.


I have been a crafter for many years and love all things vintage and distressed and am hugely inspired by Tim Holtz. I love his products, he is a huge inspiration to me and I don't know where my crafting toady would be without distress !

For family reasons I have had to take a step away from blogging, designing for teams and magazines but crafting is never far from my heart . I have made a resolution , to allow myself a little time in blogland each week to indulge myself and was thrilled to earn this spot with my first blog post in 6 months . I love these stolen inky moments.

My style is mostly vintage and I do love my browns. I am always happy when my fingers are inky and crafting is definitely something that makes me happy.


My project for this theme, surprisingly has very little brown , but still a vintage feel - despite the splashes of colour - a rarity for me .

I started with one of the new Tim Holtz thickboard tags, medium size and set too creating layers of texture paste, distress paint and lots of yummy distress crayons.

I then added collage medium and layers of ephemera, scuffed and inked to add texture.


For the bursts of tropical colour I added some tropical blooms , coloured with abandoned coral..but did sneak a bit of walnut stain around the edges! Plenty of Idea-ology and some hand dyed seam binding complete my piece.
* * *
Trace has created a tropical beauty that is sure to make you yearn for a warmer climate. If you want to learn more about her wonderful tag, click here to be taken to her blog. Once you are finished checking out all the eye candy you will find there, come on back and share your creation for the Out of the Cold challenge. You have lots of time as it is open until February 28th at 11:55 pm EST.