Monday, December 24, 2018

Challenge Winners - In The Kitchen

Today we announce our top picks from the last challenge of 2018 'In The Kitchen'. Thank you to everyone who took the time to join in the fun creating festive projects incorporating the kitchen.


We had so much fun looking at each of the entries and #4 Lula was chosen as our overall winner. Isn't this a spectacular festive decoration which Lula explained would be adorning her kitchen with the aid of a fridge magnet. Congratulations to Lula on being our favourite and winning the opportunity to be a Guest Designer here at Frilly and Funkie for a future challenge. You will be contacted with all the details.

And now for the three winners of our Frilly and Funkie Top 3 Badges for this challenge; the choices this time in numerical order are; #2 oops.designs, #3 Helen Hollinger and #5 Rox Boyce. Please email Linda at thefunkiejunkie@gmail.com for the codes for the Top 3 badges so that you can display them proudly on your blog.


And finally we have a randomly chosen lucky winner for the $25 gift certificate to The Funkie Junkie Boutique. Our congratulations this time go to #1 Carol Stamps! Please email Linda at thefunkiejunkie@gmail.com for the gift certificate details. A big thank you again from the Frilly and Funkie team to everyone who took part in this challenge and congratulations to all our winners.

We look forward to seeing you in 2019 with lots more fun challenges and tutorials from our talented Design Team. For now, from everyone here at the Frilly and Funkie Challenge blog we wish you all a very Merry Christmas and a Happy New Year.

Saturday, December 15, 2018

Saturday Showcase - Tim Holtz Stamps for a Festive Birthday Card

It's our final Saturday Showcase tutorial of the year here at the Frilly and Funkie Challenge blog. We hope you are enjoying this series as we showcase a variety of techniques and projects incorporating the range of craft supplies stocked in The Funkie Junkie Boutique.

This is a busy time of year for sending those festive cards to friends and family and of course there are still people marking other celebrations like birthdays. Here's an idea for using a selection of Tim Holtz stamp sets to create a festive birthday card and as you'll see I'm keeping in with our current challenge theme for using things you'd see 'In the Kitchen'.


Here are the steps I took to create this card (and remember to click on each photo for a closer look).

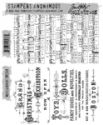
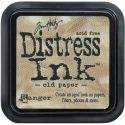
Start by cutting a piece of white card smaller than you card blank and use a brayer or spatula to scrap a little White Gesso over the surface unevenly. Blend Old Paper Distress Oxide Ink over the dry gesso background. Dampen a piece of tissue or cloth and wipe over the surface - the gesso acts as a partial resist to the ink so you will be left with a mottled look. Stamp the Music background from the Music & Advert stamp set with Watering Can Archival Ink over the background.


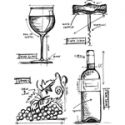
Stamp the wine bottle image from the Wine Blueprint stamp set onto the lower half of the background using Black Archival Ink (I used my Stamp Platform to make sure I got a perfectly replicated image). Next stamp the cork screw image above the bottle, again with Black Archival Ink. Paint the metal part with Sterling Acrylic Paint and dry before re-stamping the image with the Archival Ink; this ensures the details are not lost beneath the paint.


On a spare piece of card stamp the wine bottle image as before and this time colour it with Umber, Fuchsia and Buff Acrylic Paints. Re-stamp with the Archival Ink to add the details back in and cut out the image. Repeat this process for with the handle of the cork screw, painting it with the Umber Acrylic Paint before re-stamping and cutting out.


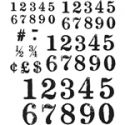
Use numbers from the Merchant stamp set to stamp and emboss the recipient's age if required; I used Liquid Platinum Embossing Powder but a silver or gold colour could work equally well.


Apply dimensional foam tape or similar to the reverse of the wine bottle and cork screw handle and layer onto the background over the original images.


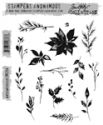
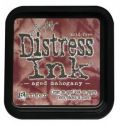
Use Distress Inks and stamp out some of the Winter Watercolor foliage onto Watercolor card. The colours used here were Peeled Paint, Bundled Sage, Aged Mahogany and Walnut Stain.


Cut around the foliage (leaving as much of a white border as you like) and blend the Walnut Stain Distress Ink around the edges to age the white parts. Blend the same ink around the edges of the stamped background too.


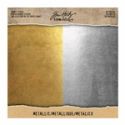
To create matting layers for your stamped background cut a piece of Silver Metallic Kraft Card and a piece of white card to size. Sand the Metallic Card lightly to give it a burnished look and paint the edges of the white card with Fushia Acrylic Paint to match the wine bottle.


Finish the card by layering the three background together and arranging the foliage around the bottle and cork screw. I stitched around the edge of the main background too before adding it all to the card blank as a finishing touch.

Now let's take a closer look at the finished card so you can see how it came together in more detail;


I hope you've enjoyed finding out more about how this festive birthday card came together. A list of the essential ingredients is listed below, all available from The Funkie Junkie Boutique. And remember there's still time to enter our final Frilly and Funkie challenge of 2018 HERE.
Jenny xxx


Wednesday, December 12, 2018

In the Kitchen

Hi! Suzz Here. Welcome to the latest Frilly and Funkie Challenge!

This time of the year we find ourselves in the kitchen either preparing food for family and friends or just gathering around the kitchen table with family. Your challenge is to incorporate the kitchen somehow in your project. You can use an object from the kitchen in creating your project or you can use a sentiment or image that reflects the kitchen. You decide how to represent being in your kitchen in your art.

The winner will earn the chance of a Guest Designer spot here at Frilly and Funkie, and everyone who enters and follows the rules will go into the draw for the chance to win a $25 spending spree at The Funkie Junkie Boutique. And there are Top 3 Badges for three further outstanding entries, chosen by the Design Team, because choosing just one winner is so hard!

The guidelines for entering are simple; create a new vintage or shabby chic project following the challenge theme, link it below to your post (not just your blog) and also include a link back to this challenge in your post. You can combine our challenge with up to 10 challenges (including this one) to be in with a chance of winning. If you are entering through a public forum (such as Instagram) you'll need to include the words Frilly and Funkie Challenge. Also, please be sure to turn off your Word Verification so our Design Team can leave comments on your blogs. Make sure you follow these rules as unfortunately we have had to eliminate entrants from the prize draws in the past.

This week the equally creative and talented Funkie side of the team give us more inspiration:

Sara Emily - sarascloset

Suzanne Czosek - Suzz's Stamping Spot
Sizzix Winter Wonderland Sizzix Ice Flake Ranger Distress Stain Sprays Idea-Ology Tim Holtz Christmas Clippings For the Funkie Junkie Boutique

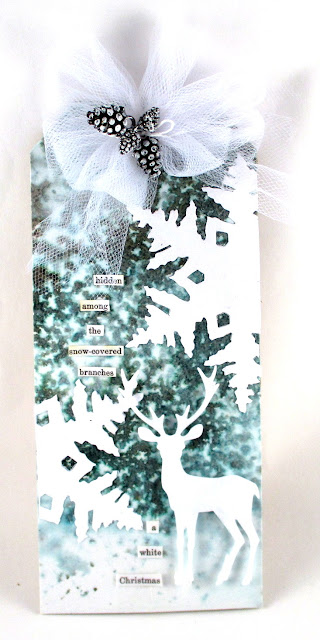
Sizzix Tattered Pinecone Tim Holtz Quote Chips Ranger Distress Stain Spray  For the Funkie Junkie Boutique

*****************************************************
WEEK ONE

First up, the creative and talented Frilly side of the team give us some inspiration:

Jenny Marples - Pushing The Right Buttons

Kathy Clement - Kathy by Design

Cec Wintonyk - CW Creations

Time to go treasure hunting in your kitchen and crafty supplies and join us in the fun! Please link up  your kitchen inspired art below! And join us again tomorrow when our latest Guest Designer will share her kitchen creation.

Suzz


Monday, December 10, 2018

Challenge Winners - Tis the Season for Gift Giving

Hi everyone. Today we announce our top picks from the 'Tis the Season for Gift Giving' challenge. We were spoiled for choice when picking our winners as the standard of entries was so high and it was a joy to see all those wonderful gifts you created. Thank you to everyone who took the time to join in the fun.


It was an extremely close run thing but finally #10 Beverly Jordan was chosen as our overall winner. Beverly's gorgeous album was made for two very special people and we encourage you to see more of the inside pages HERE. Congratulations to Beverly on being our favourite and winning the opportunity to be a Guest Designer here at Frilly and Funkie for a future challenge. You will be contacted with all the details.

And now for the three winners of our Frilly and Funkie Top 3 Badges for this challenge; the choices this time in numerical order are; #11 Barb Turpin, #13 Rox Boyce and #14 Adrijana Knez. Please email Linda at thefunkiejunkie@gmail.com for the codes for the Top 3 badges so that you can display them proudly on your blog.


And finally we have a randomly chosen lucky winner for the $25 gift certificate to The Funkie Junkie Boutique. Our congratulations this time go to #3 Nana Connie! Please email Linda at thefunkiejunkie@gmail.com for the gift certificate details.

A big thank you again from the Frilly and Funkie team to everyone who took part in this challenge and congratulations to all our winners. The current challenge, 'In The Kitchen' runs through Tuesday, December 18th and the Design Team will be back here this Wednesday December 12th with some more inspiration for you. We hope to see you entering this time around so that you too can be in with a chance to win.

Have a great week everyone!

Saturday, December 8, 2018

Saturday Showcase - Christmas Sugar & Spice

It is Cec here and I am presenting the Saturday Showcase this week.


I wanted to create something that followed the theme of the current challenge In The Kitchen so I have made a simple Christmas folio card using many types of products that can be found in The Funkie Junkie Boutique.

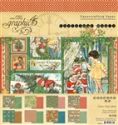
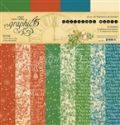
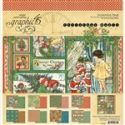
Please note that the Graphic 45 papers I used (St. Nicholas and A Christmas Carol) were from my stash because new product I ordered has not arrived due to postal issues at my end.  I will link below to Graphic 45 Christmas papers that would be perfect alternatives.

I also utilized my computer to create some paper with dancing gingerbread men and to create the Sugar & Spice text.  Both were inked with some Old Paper and Vintage Photo Distress Inks to age them.

I made my finished folio card 5 1/2" square with a 1/2" spine but you can create yours in any size you wish.  I cut my mats and papers 1/8" smaller than the previous layer - except for the red mat strip across the front where I had a senior moment and made it a bit wider.  Here is how to put this folio card together - there are lots of steps so hang in with me.

The folio base


  • Cut two pieces of heavy card stock and score each piece at 1/2" on the long side
  • Adhere the two 1/2' sections together and bend - this forms a spine


  • Cut four pieces of red card stock and adhere to the front and back and inside and outside of the folio
  • Cut four pieces of patterned paper, ink the edges with Vintage Photo Distress Ink and add to the red card stock
  • Cut two pieces of red card stock and adhere to the outside and inside of the spine
  • Cut two pieces of patterned paper, ink the edges with Vintage Photo Distress Ink and add to the red card stock on the spine

The pockets


  • From the same card stock as the folio blank, cut two pocket sections and score at 1/2" on the short side
  • Cut four hinges (gussets) for the pockets 1" wide and score in half lengthwise
  • Clip the ends of the hinges on an angle  Note: You should do the same with the 1/2" section of the pocket base - I forgot
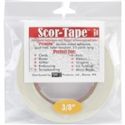
  • Add Scor tape to both sides of each hinge and to side of the 1/2" section of the pocket base that will folded towards the inside of the pocket
  • Cut two pieces of red card stock and adhere to each pocket base and then top with patterned paper
  • Add hinges to both sides of the inside of the pockets with the folded edge to the outside and remove the tape
  • Fold the bottom to the inside, remove the tape and add the pocket to the card on the inside top and bottom

The embellishments


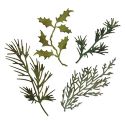
Using the Holiday Greens die.cut greenery and holly leaves from green card stock


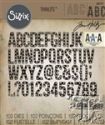
  • Cut the word Sweet from red card stock using the Alphanumeric die
  • Cut chevrons from Christmas paper and Metallic Gold paper and ink the edges with Vintage Photo Distress Ink
  • Emboss the gold chevron with an embossing folder or texture fade


  • Dye a length of seam bin ding with Aged Mahogany, Candied Apple and Vintage Photo Distress Ink and dry crumpled up


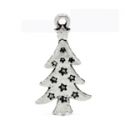
  • Alter a silver Christmas tree charm with a Peeled Paint Distress Crayon


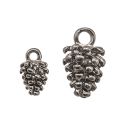
  • Alter an Idea-ology pine cone with Ginger Alcohol Ink


  • Add the two charms along with a mini Idea-ology jungle bell to a length of chain with small jump rings
  • Create a loopy bow with the dyed seam binding and tie with a length of burlap string that has the charm chain threaded through it

To assemble

  • Add greenery and chevrons to the front of the card
  • Add patterned paper to a strip of red card stock and adhere across the card
  • Add Sugar & Spice text, the loopy bow, a little poinsettia, some retro ephemera and a gingerbread man button


  • On the inside, add the holly leaves and red gems along with the word sweet to one pocket front
  • Add recipe card and tea bags to the pockets
This would make a great little gift for a friend that you don't normally exchange gifts with.  I hope you make one and have fun creating.