Saturday, February 23, 2019

Saturday Showcase - Prima Marketing Julie Nutting Dolls

Happy Saturday!  Suzz here with the latest showcase.   I am highlighting a few of the Prima Marketing Doll Stamps by Julie Nutting.  These sweet stamps always remind me of the old fashioned paper dolls and creating fun outfits with a variety of styles.

I decided to try out a few of the new dolls in stock including "Kyoko" and the "Travel Girl" set.

Prima Marketing Julie Nutting Kyoko Tim Holtz Doily Prima Marketing Watercolor Pencils For the Funkie Junkie Boutique

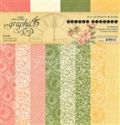
I tried out a few different ideas with the pretty Kyoko.  I stamped her clothes first on a few different pattern papers.  My favorite was the pretty flowers and bees from the lovely Farmhouse paper.  
Prima Marketing Julie Nutting Kyoko Tim Holtz Doily Prima Marketing Watercolor Pencils For the Funkie Junkie Boutique
This inspired my entire tag.  Here are the steps I used to create the tag:

1. Stamp Kyoko on white cardstock and the pattern paper. 
2. Heat emboss the stamped image on the pattern paper with black embossing powder.
3. Color the image on the white cardstock with your favorite coloring medium.  (I used watercolor pencils and a waterbrush.
4. Add shading to the skirt and top with your favorite coloring medium.
5. Cut out the skirt and dress.
6. Cut out the doll on the white cardstock.  (I cut out under her arms by cutting her arm at the skirt line which actually helps the image when you dress her up because it naturally falls behind the skirt)
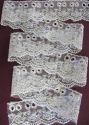
7. Cut tag from mixed media paper.  Emboss doily using texture paste.  Let dry.
8. Mix a touch of green and brown paint on craft mat with water. 
9. Apply paint to one side of embossed tag.  Spritz with water.
10.  Apply brown paint on edge and spritz with water.
11. Let tag dry.
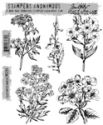
12. Stamp flowers multiple times and color to coordinate. 
13. Cut out flowers and layer.
14. Assemble tag.

I had so much fun with the first doll I tried out a few other variations with the travel girl doll.

Prima Marketing Julie Nutting Travel Girl Stampers Anonymous Entomology Ranger Distress Ink Shaded Lilac Prima Marketing Watercolor Pencils For the Funkie Junkie Boutique

For my travel girl I stamped her around 8 times onto white cardstock with archival ink.  

Prima Marketing Julie Nutting Travel Girl Stampers Anonymous Entomology Ranger Distress Ink Shaded Lilac Prima Marketing Watercolor Pencils For the Funkie Junkie Boutique

Because the travel girl was a smaller size I had to look for stamps and stencils that would look great on her outfit. 

First I stamped the ledger stamp over one of my stamped images:
Prima Marketing Julie Nutting Travel Girl Stampers Anonymous On the Farm For the Funkie Junkie Boutique
 Then I colored in every other box on her dress:
Prima Marketing Julie Nutting Travel Girl Stampers Anonymous On the Farm  Ranger Distress Ink Shaded Lilac Prima Marketing Watercolor Pencils For the Funkie Junkie Boutique
My next idea was to use a polka dot image over the dress and I used a stencil with distress oxide ink.
Prima Marketing Julie Nutting Travel Girl  Ranger Distress Ink Shaded Lilac  For the Funkie Junkie Boutique

 And here are the two fancy girls trying out their outfits:

Prima Marketing Julie Nutting Travel Girl  Ranger Distress Ink Shaded Lilac  For the Funkie Junkie Boutique

I ended up using the pretty soft purple outfit and pulling together other stamps from the Travel Girl set to make a travel inspired card.


Prima Marketing Julie Nutting Travel Girl  Ranger Distress Ink Shaded Lilac  For the Funkie Junkie Boutique

There is still time to play along in the "Let me Count the Ways Challenge". 

Suzz

Here are the links to the products at the Funkie Junkie Boutique:

Wednesday, February 20, 2019

Let Me Count the Ways

Hello and welcome! It's Sara Emily here to host our newest challenge at Frilly and Funkie.

Since it's just a day away from Valentine's Day, the opening line of Elizabeth Barrett Browning's famous love poem "Let Me Count the Ways" (Sonnet 43) comes to mind. "How do I love thee? Let me count the ways." For this challenge, I would like to see your vintage or shabby chic project that includes three of something. This could be three colors, three words, three stamps (you get the idea); just be sure to tell us what those three elements are.

The winner will earn the chance of a Guest Designer spot here at Frilly and Funkie, and everyone who enters and follows the rules will go into the draw for the chance to win a $25 spending spree at The Funkie Junkie Boutique. And there are Top 3 Badges for three further outstanding entries, chosen by the Design Team, because choosing just one winner is so hard!

The guidelines for entering are simple; create a new vintage or shabby chic project following the challenge theme, link it below to your post (not just your blog) and also include a link back to this challenge in your post. You can combine our challenge with up to 10 challenges (including this one) to be in with a chance of winning. If you are entering through a public forum (such as Instagram) you'll need to include the words Frilly and Funkie Challenge. Also, please be sure to turn off your Word Verification so our Design Team can leave comments on your blogs. Make sure you follow these rules as unfortunately, we have had to eliminate entrants from the prize draws in the past.

This week the fabulous Funkie side of the Design Team are up to share their challenge creations - click on each image for a closer look:

Sara Emily -- sarascloset


Suzanne Czosek - Suzz's Stamping Spot

Sizzix TimeKeeper Sizzix Bird Silhouette Stampers Anonymous Etcetera Tim Holtz Layering Stencil Nordic Ideaology Quote Chip For the Funkie Junkie Boutique

Jenny Marples - Pushing The Right Buttons


*******************************************
WEEK ONE

This week the amazing Frilly side of the Design Team are up to share their challenge creations - click on each image for a closer look:

Maggi Harding - Scrap, Travel & Bark!

Graphic 45 Garden Goddess Card

Cec Wintonyk - CW Creations


Kathy Clement - Kathy by Design


Now it's your turn to create a Vintage or shabby chic project including three of something. Enter them using the link below. We can't wait to see what you will create! Remember to come back tomorrow to see what our latest Guest Designer has in store for us.

There will be even more inspiration from the Funkie side of the Design Team next week too, so be sure to visit us again next Wednesday.

Happy Crafting!
Sara Emily

Monday, February 18, 2019

Challenge Winners - Winter Blues

Today we announce our winners from the 'Winter Blues' challenge. Thank you to everyone who shared their blue projects with us. The team were again thoroughly spoiled for choice when picking our favorites.


Our final choice of overall winner this time was #8 Melissa (Milliemade) who made this wonderful shadow box inspired by the song Blue Moon. Congratulations to Melissa on being our favorite and winning the opportunity to be a Guest Designer here at Frilly and Funkie for a future challenge. You will be contacted with all the details.

And now our picks for the three winners of the Frilly and Funkie Top 3 Badges for this challenge; the choices this time in numerical order are; #15 Lisa Hoel (Creative Juice) #16 Deb Riddell (Paxton Valley Folk Art) and #17 Donna (InkySplatters). Please email Linda at thefunkiejunkie@gmail.com for the codes for the Top 3 badges so that you can display them proudly on your blog.


And finally we have a randomly chosen lucky winner for the $25 gift certificate to The Funkie Junkie Boutique. Our congratulations this time go to #11 Sherry Hickey ! Please email Linda at thefunkiejunkie@gmail.com for the gift certificate details.

Thank you again from all of us here at Frilly and Funkie to everyone who took part in this challenge and congratulations to all our winners. The current challenge, 'Let Me Count The Ways' runs through Tuesday, February 26th and the Funkie side of the Design Team will be back here this Wednesday, February 20th with some more inspiration for you. We look forward to seeing your entries!

Have a great week everyone.

Saturday, February 16, 2019

Saturday Showcase: Prima Spring Farmhouse Beekeeping Gift Box

Hello, Friends!  Happy Saturday!  It's Kathy here with this week's Saturday Showcase.  Although we are still in the midst of winter, we can add a little springtime to our crafting with Prima's gorgeous Spring Market Paper Collection.  The Beekeeping Gift Box tutorial I've prepared for you today will make a wonderful hostess gift, birthday present, get well greeting, hostess gift or Easter treat box for someone you love.


Bees and beekeeping  are a popular trend in the papercrafting industry, and Prima Spring Farmhouse is loaded with delightful bee images like the one featured on the cover. The gold foil accents in the paper collection add wonderful elegance and shine.


The main image is framed with the Graphic 45 Square Tag and Clock Dies.  To strengthen the image, I've embossed it twice with Seth Apter Vintage Beeswax baked texture.  Flowers and ribbon from my stash are combined with ephemera from the collection to create a sweet spring vignette.


The inside of this Beekeeping Gift Box is filled to the brim with bee themed treasures.  I'll share all of them with you in the video tutorial below.


You'll find a linked supply list to the Funkie Junkie Boutique below.

Thanks for stopping by!
Cheerio,
kathy

Product Links to The Funkie Junkie Boutique

Prima Spring Farmhouse Collection:


Thursday, February 14, 2019

Guest Designer - Tracey Fairgrieve

Please say hello and give a warm welcome to our Guest Designer for the Let Me Count the Ways challenge.  Tracey Fairgrieve of New Beginnings - Creating in My Corner was the top pick from the Inspired By challenge.


Hello everyone, i'm Tracey and it's an absolute honour to be a Frilly and Funkie Guest Designer today.

A little about me. . .

As long as I can remember I have loved to create, drawing, painting and experimenting with a variety of mediums. A former Community worker I helped support Parents/Guardians with pre-school children and help promote the importance of creativity to encourage their skills and development often using the environment around. Now as a carer I take advantage of any free time I have to be creative and share how it all came to be...


Romance is certainly in the air with Sara Emily's challenge theme this fortnight as she reflects upon Elizabeth Barrett Browning's Love Poem How do I love thee? (Sonnet 43) Let me count the ways. As we are asked to use three of something for this challenge I've created a Vintage fabric hanging heart.


Using Tim Holtz Patchwork pieces stamp set, a border was stamped at the top and bottom of the hanger using sepia versafine, onto fabric I stamped then cut out the hexagons sewing each one by hand onto the heart adding lace and buttons from my Grandma's button tin. The top of the heart is open and acts as a pocket secretly holding an affection book.


The affection book contains the words Adore, Cherish and Forever, three words that let me count the ways. Amongst my paper stash I came across those three words on a 6x6 paper it was as if they were just waiting to be found. Machine stitched then cut from the page, three little word tags have been created to sit within the book.

I'm really looking forward to seeing how everyone interprets Sara Emily's challenge.

* * *
To get all the details of this very romantic hanging with its hidden book and three words of love just pop over to Tracey's blog. Once you have checked it out come on back and share your project for this challenge. The challenge can be found HERE and runs through 11:55 pm EST on February 26th.

Don't forget to come back here on Saturday for another fabulous Saturday Showcase and then next Wednesday, the gals on the funkie side of the team will be here with their inspiration for the challenge.

Saturday, February 9, 2019

Saturday Showcase - Eileen Hull Designs Treasure Box and Stacking Drawers

Hi everyone and welcome to another Saturday Showcase, the Design Team's chance to share tutorials and products available from The Funkie Junkie Boutique with you and kick start your creative weekend. Today I'm sharing the tutorial for a project made using two new Sizzix die sets from Eileen Hull Designs.


This vintage style travel trunk opens to reveal sectioned drawers and pockets all ready to hold everything the seasoned traveller could require on a long trip abroad.


Here's how it came together;


The set of three drawers were cut using matboard and Eileen Hull's Stacking Drawers die set. The outer 'sleeve' wraps around easily as all the pieces are pre-scored by the die. When assembling the drawers I found it worked best to put the bottom pieces on the inside for a better fit.


The outer trunk was cut using matboard and Eileen Hull's Treasure Box die set. The pieces are also pre-scored and easy to assemble and you'll see this time I put the bottom pieces on the outside.


You'll see from the photo above how the assembled bare matboard drawers fit together inside the box with room to spare for the inclusion of handles or pulls if required.


Each of the drawer pieces were painted once assembled. 'Stormy Sky' Distress Paint is perfect for this. I then aged them by blending a little 'Potting Soil' Archival Ink along each of the edges.


To prevent the painted surfaces sticking to each other and make the drawers easier to slide in and out I rubbed a plain wax candle over them.


For my travel trunk I covered the box in a faux suede fabric - having done this once a strong suggestion would be to apply your choice of finish, be it fabric or patterned paper, to both sides of your matboard before cutting the pieces with the die as this way you can assemble it pre-decorated.


Above you can see how the drawers sleeves fit snuggly in place inside the decorated box. I chose to use glue on the edges of the sleeves to ensure they were firmly secured in place.


More fabric was added to the outside of the drawers. Again I would suggest you add your choice of fabric or patterned paper to the matboard before cutting these pieces to make assembly much easier and quicker.


The edges were covered in strips cut from Tim Holtz 'Rose Gold' Metallic Kraft Stock and aged with more 'Potting Soil' Archival Ink. By using Tim Holtz 3D Texture Fades 'Foundry' Embossing Folder you can achieve a more realistic look to the Kraft Stock.


To finish the travel trunk I cut hinges using the Treasure Box die set and created a belt to hold the box closed, attaching them with Tim Holtz Long Fasteners. A pocket was added to the inside of the box lid to hold travel documentation; you could use Tim Holtz 'Stitched Slots' Thinlits die set and Tim Holtz 'Treat Bag' Thinlits die set to create these as both fit well.

On the top of the trunk I added a beautiful Copper Tone Filigree Metal Piece from The Funkie Junkie Boutique, filling it with gemstone chips. Linda also stocks gorgeous Antiqued Copper Tiny Triangle Filigree Pieces which worked perfectly in the corners.

Here are some close ups to show more of the details from the finished travel trunk;


I hope you've enjoyed seeing today's Saturday Showcase tutorial and have learned more about how these die sets work beautifully together. Don't forget there's still time to enter the current Frilly and Funkie challenge 'Winter Blues' HERE.

Have a great weekend!
Jenny xxx

Links to the products used from The Funkie Junkie Boutique;

Tim Holtz 'Stitched Slots' Thinlits die set

Wednesday, February 6, 2019

Winter Blues Challenge

Hello, Friends! It's Kathy here and I'm very pleased to welcome you to our latest challenge! January is the longest winter month and lots of us get the "winter blues." Let's take the winter blues in a positive direction by creating a mostly monochromatic vintage or shabby chic project done up in shades of blue. You may use a bit of white, beige or grey for contrast, but I would like to see the blues to be front and center in this project.

The winner will earn the chance of a guest spot here at Frilly and Funkie, and everyone who enters and follows the rules will go into the draw for the chance to win a $25 spending spree at The Funkie Junkie Boutique. In addition, the Design Team will select three further outstanding entries and those creators will receive a Top Pick badge to display on their blogs!

The guidelines for entering are simple; create a new vintage or shabby chic project following the challenge theme, link it below to your post (not just your blog) and also include a link back to this challenge in your post. You can combine our challenge with up to 10 challenges (including this one) to be in with a chance of winning. If you are entering through a public forum (such as Instagram) you'll need to include the words Frilly and Funkie Challenge. Also, please be sure to turn off your Word Verification so our Design Team can leave comments on your blogs. Make sure you follow these rules as unfortunately we have had to eliminate entrants from the prize draws in the past.

This week the Funkie side of the Design Team share their Winter Blues creations;

Suzanne Czosek - Suzz's Stamping Spot

Stampers Anonymous Merchant Idea-ology Ball Chain Tim Holtz Paper Dolls Metal Gate Ephemera Mulberry Paper Flowers For the Funkie Junkie Boutique

Sara Emily - sarascloset


Jenny Marples - Pushing The Right Buttons


********************************************
WEEK ONE

First up, the Frilly side of the Design Team shares their Winter Blues creations;

Cec Wintonyk - CW Creations


Maggi Harding - Scrap, Travel & Bark!


Kathy Clement - Kathy by Design


Now it's your turn to share your Winter Blues creations here at Frilly and Funkie! Enter them using the link below and remember to come back tomorrow to see what our latest Guest Designer has in store for us. There will be even more inspiration from the Funkie gals next week too so make sure you look out for those.


Monday, February 4, 2019

Challenge Winners - Vintage Valentines

Today we announce our winners from the 'Vintage Valentines' challenge. Thank you to everyone who shared their wonderful Valentines with us. The team were spoiled for choice when picking our favorites.


Our final choice of overall winner this time was #9 Sylvia (Little Treasures by Sylvia) who made this fabulous vintage Valentines hanging. Congratulations to Sylvia on being our favorite and winning the opportunity to be a Guest Designer here at Frilly and Funkie for a future challenge. You will be contacted with all the details.

And now our picks for the three winners of the Frilly and Funkie Top 3 Badges for this challenge; the choices this time in numerical order are; #2 Monika (Mistletoe Home Designs) #10 oops.designs and #15 Lyla Larimore. Please email Linda at thefunkiejunkie@gmail.com for the codes for the Top 3 badges so that you can display them proudly on your blog.


And finally we have a randomly chosen lucky winner for the $25 gift certificate to The Funkie Junkie Boutique. Our congratulations this time go to #8 Teresa (Andor Violeta Sketchbook)! Please email Linda at thefunkiejunkie@gmail.com for the gift certificate details.

Thank you again from all of us here at Frilly and Funkie to everyone who took part in this challenge and congratulations to all our winners. The current challenge, 'Winter Blues' runs through Tuesday, February 12th and the Funkie side of the Design Team will be back here this Wednesday, February 6th with some more inspiration for you. We look forward to seeing your entries!

Have a great week everyone.

Saturday, February 2, 2019

Saturday Showcase - Painting with Distress Inks on Different Papers

It is Cec here and I am presenting the Saturday Showcase this week.  I thought I might show you the result of painting with Distress Inks on different papers.


To make this a true test, I had to make sure I did each one in exactly the same manner.  I cut each piece of paper 4 1/4" x 5 1/2" and used a stamp platform and Jet Black Archival Ink (Ranger) to stamp a bouquet of flowers from the Illustrated Garden set (Tim Holtz).


The Pantone Color for 2019 is called Living Coral so I immediately knew I was going to use Abandoned Coral Distress Ink (Tim Holtz) for the flowers.  Peeled Paint Distress Ink (Tim Holtz) was chosen for the leaves and branches.  All the painting was done with a Water Brush (Tim Holtz) and a #4 round brush.

I started with the water brush first transferring colour directly from the pad to the flowers and gave everything one coat and then used the paint brush with just a bit of water on it to move the colour around.  I went back in and added the shading with the water brush and then used the paint brush again to blend everything to try to eliminate any harsh lines.  It is important not to let either brush get too wet.  If the water brush seems too dry, squeeze it a bit over a piece of scrap card stock to get it flowing and wipe it off a few times to knock back some of the excess water.  The same process was repeated to colour the leaves and branches.

Here are the different papers and the results - I sure hope my photos show the differences since we had a dark snowy day when I was taking them but you can click on the photos to bring up a larger view..


This is Specialty Stamping Paper (Ranger) and gave me a clean, sharp image in one stamping.  Painting was really easy and gave a lovely light colour finish.  I think this is my favourite of all the samples.


This is 110 lb. Card Stock (Staples and gave a really good image in one stamping but the colouring is darker and you have to be careful to ensure you don't saturate the paper because it is not coated and more porous.


This one is 140 Lb, Cold Press Water Colour Card (Canson) and needed to be stamped twice to give a good stamping.  The stamping was done on the rougher side (the side with tooth).  The depth of colour is about the same as the second version on card stock.  Note:  I will link other water colour card options carried by The Funkie Junkie Boutique.


Here is one stamped on old book paper that was glued to a piece of card stock.  I love how the inks are translucent and the text shows through but I find the colour a bit dark for my liking.


I made a card with my final sample, which was stamped on the smooth side of 96 lb. Bristol (Canson).  The stamping is nice and clean and the colouring is only slightly darker than the sample on Specialty Stamping Paper so I vote for this option as my second choice.

To make the card I distressed a piece of patterned paper from the Garden Goddess pad (Graphic 45) and added it to a 5" x 7" cream card blank.


Next I ran some scraps of a coordinating plain paper from the same pad through a Bubbles Texture Fade (Tim Holtz) that I have had for eons.  Then I mixed some Perfect Pearls Perfect Pearl (say that twice fast - lol) powder with some Gum Arabic and sponged it over the top trying to keep it on the raised areas as much as possible.  It sure gave a lot of shimmer as you can see in the card photo.

The edges were distressed and they were added to the first panel but since I had used off cuts and they did not meet in the middle, two strips of venise lace were added back to back in the middle of the card and then a small strip of the background panel was distressed and added to bridge the gap.

An oval die was used to cut the image and then it was distressed and the edges were inked with some Abandoned Coral DI before it was added to the card with dimensional foam.


I altered a crystal spray with some Salmon Alcohol Ink (Tim Holtz) and added it to the card.  A white feather cut from a dollar store boa was added on top of the spray stem.  I dyed some seam binding with the Abandoned Coral DI, created a loopy bow and added it on top of the feather to finish off the card.

It was fun to play and I have come to the conclusion that while you will achieve different results with different papers and the same inks all of them are pretty.  Depending on your painting style, you could even get different results than I did.  The hardest part of this exercise is deciding what kind of look you are going for and would be happy with.