Saturday, June 30, 2018

Saturday Showcase - Tim Holtz Botanical 3D Texture Fades Embossing Folder

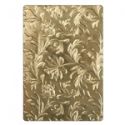
Hi everyone and welcome! Jenny here with this week's Saturday Showcase where I'm shining a spotlight on one of Tim Holtz new 3D embossing folders from Sizzix. Since this 'Botanical' Texture Fades Embossing Folder arrived I have become a touch obsessed, embossing everything from card to fabric! So today I'm involving you in this obsession with two ideas for using it with different medias. And a heads up, to take a closer look at any of these pictures just click on them.

Tim Holtz 3D Embossing Botanical Sizzix Faux Plaster Tutorial


I began by cutting a piece of 8.5 x 11 Tim Holtz Mixed Media Heavystock into four quarters - the reason for using this Heavystock is that it has been designed to be very forgiving when you apply wet media and I find it doesn't warp the way some regular cardstock can.

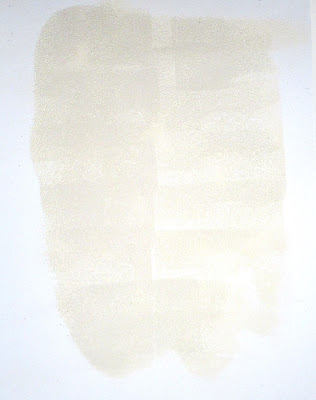
For my first experiment I spread an uneven layer of Ranger Opaque Texture Paste over the first quarter of Heavystock, allowing it to air dry (which doesn't take long, even here in the UK).


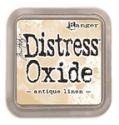
When dry I blended Antique Linen Distress Oxide Ink over the whole surface, spritzed with water, allowed it to dribble and run by moving the Heavystock around, then dried it with my heat tool. Do bear in mind you can stop at any stage of this process if you like the effects you've achieved!


Now I ran the altered Heavystock through my Big Shot with the Botanical Texture Fades 3D Embossing Folder using my Multipurpose Platform and one of my Cutting Plates - the instructions for getting the correct 'sandwich' are included in the packaging and on Sizzix own website.


You'll notice I de-bossed my surface as I wanted to achieve a look of old decorative plaster. Again, you could leave it at this stage but I couldn't! choosing instead to brayer Picket Fence Distress Paint over the surface lightly.


Finally I sprayed the whole piece with a little mist of water and used a paintbrush to dribble Vintage Photo Distress Spray Stain down into the de-bossed grooves. To encourage it to 'run' you can add more water until you get the effect you want. I allowed it to air dry again, though you could use a heat tool to speed up this part of the process. You'll notice as it dries it takes on more of a pale rose hue as the inks and water react with the Texture Paste.


So now my altered Heavystock was ready for use in a finished project. I tore it down the middle, effectively leaving me with two halves for two cards, though you could just use the whole piece as a stand alone background as it wouldn't need much in the way of embellishing.


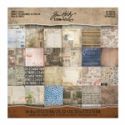
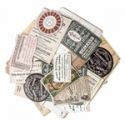
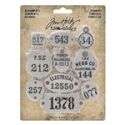
You can see I took some Tim Holtz Paper Stash to create a simple background, adding stitching and Design Tape with some torn Worn Wallpaper before layering on my embossed card. It then only took some ephemera (the Ideaology Layers collections, Collector and Botanical are a great source for these) a couple of metal Adornments and a sentiment from the Small Talk Occasions set to complete it. Here are some close ups so you can see how the embossed Heavystock adds so much detail to the finished card;


Tim Holtz 3D Embossing Botanical Sizzix Distress Oxide Paint Tutorial


Now here's a second a second, much shorter experiment which has equally wonderful results. Again I started with a quarter of the Mixed Media Heavystock. This time I dipped it repeatedly into a blend of Hickory Smoke Distress Oxide Ink and water to get that mottled effect we are all familiar with.


Having run it through my Big Shot with the Botanical Texture Fades 3D Embossing Folder (embossing rather than de-bossing this time) I used my brayer to apply a layer of Pumice Stone Distress Paint over the raised areas.


After the paint had dried I blended Walnut Stain Distress Ink into the Heavystock to add some 'age' and contrast to the embossed areas. And that was it, ready for use! I love the darker look to this one and decided to create a male themed card with it.


Now I must admit this card became a little more 'involved' than the last, though to keep it simple you could equally just use Tim Holtz Paper Stash and various Layers as before.


I did use Paper Stash for the background as before but this time used my brayer to add light layers of Distress Paint over before applying an uneven layer of Texture Paste through a Layering Stencil. As it had a look of verdigris I did add one more layer of media to my torn piece of altered Heavystock (I can't ever leave well enough alone!) brayering the smallest amount of Tumbled Glass Distress Paint over the raised areas.


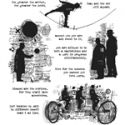
The central panel looks complicated but was achieved easily by stamping one of the images from the Tim Holtz 'Theories' stamp set onto card dipped in Antique Linen Distress Oxide Ink and water. I stamped the image for a second time onto spare card, cut around the man and balloon, and dipped them in the leftover paints from the background to get the verdigris look again (use shades of brown and grey and end with light dabs of the Tumbled Glass). The altered metal Adornments and a sentiment from the Small Talk Snarky set completed the card. Here are the final close ups so you can see more of that embossed Heavystock;


That's it for today's Saturday Showcase tutorials using Tim Holtz Botanical 3D Texture Fades Embossing Folder! I hope you've enjoyed seeing just a couple of the possibilities for using it - there are plenty more as you play with different colours, inks and paints, and of course two more designs too! And now that The Funkie Junkie Boutique has the new Tim Holtz 3D Impresslits in stock there are even more 3D shapes to alter.

Have fun and get creative!
Jenny xxx


Wednesday, June 27, 2018

By Airmail

Hi everyone and welcome! It's Jenny here hosting the latest challenge 'By Airmail' on Zoe's behalf with thanks to her for picking a great theme. She just loves sending and receiving letters in the mail. And especially love the stamps, airmail stickers and postmarks that these letters pick up along the way. For this challenge, create a vintage or shabby chic postal themed project. Think old fashioned aircraft, airmail stamps, post marks, postage stamps.

The winner will earn the chance of a Guest Designer spot here at Frilly and Funkie, and everyone who enters and follows the rules will go into the draw for the chance to win a $25 spending spree at The Funkie Junkie Boutique. And there are Top 3 Badges for three further outstanding entries, chosen by the Design Team, because choosing just one winner is so hard!

The guidelines for entering are simple; create a new vintage or shabby chic project following the challenge theme, link it below to your post (not just your blog) and also include a link back to this challenge in your post. You can combine our challenge with up to 10 challenges (including this one) to be in with a chance of winning. If you are entering through a public forum (such as Instagram) you'll need to include the words Frilly and Funkie Challenge. Also, please be sure to turn off your Word Verification so our Design Team can leave comments on your blogs. Make sure you follow these rules as unfortunately we have had to eliminate entrants from the prize draws in the past.

Before sharing the first of the Design Team projects we are sad to announce that this will be the last challenge featuring Frilly team mate Autumn Clark. I'm sure you'll all agree that Autumn has shared so many gorgeous pieces and fantastic tutorials with us over the past year and she will be very much missed. The whole team thank Autumn so much for her contributions and wish her every success for the future.

It's time for a second helping of ideas and gorgeous projects, this time from the Funkie side of the Design team. Click on each photo for a closer look and on the links above to find out more about them;

Sara Emily Barker - sarascloset

Suzanne Czosek - Suzz's Stamping Spot
Tim Holtz Idea-Ology Foam Stamp Cutout Floral Stampers Anonymous String Stencil For the Funkie Junkie Boutique

Jenny Marples - Pushing The Right Buttons

******************************************************************
WEEK ONE

Let's get you started with plenty of ideas and wonderful projects from the Frilly side of the Design Team. Click on each photo for a closer look and on the links above to find out more about them;

Autumn Clark - SewPaperPaint
Frilly and Funkie: Airmail Challenge by SewPaperPaint #mixedmedia #timholtz #cardmaking #ideaology #sizzix #spellbinders #starsandstripes #stars #patriotic #4thofjuly #american #foundrelatives #vintage #diecut #cards #primamarketinginc #finnabair #finnabairmechanicals #poppy #sewpaperpaint #autumnclark
Cec Wintonyk - CW Creations

Kathy Clement - Kathy by Design

We look forward to seeing what you create for this challenge - use the link below to share your vintage or shabby chic mail inspired projects with us. Tomorrow we'll be sharing a post from our latest fabulous Guest Designer so make sure to check that out. And next week the Funkie side of the Design Team will be here to share even more ideas with you.

We can't wait to see what you make, so get creative!
Jenny


Monday, June 25, 2018

Challenge Winners - Letter Perfect

Hi everyone! Today we announce our top picks from the 'Letter Perfect' challenge. There were so many wonderful entries featuring letters and words, making the Design Team's job in picking a winner really difficult. Thank you to everyone who took the time to join in the fun.


In a close run vote the we finally chose #20 Stefi as our overall winner. We loved the clever way she altered a puzzle to create texture and layering before adding text and words to bring meaning and focus to the finished project. Congratulations to Stefi on being our favourite and winning the opportunity to be a Guest Designer here at Frilly and Funkie for a future challenge. You will be contacted shortly with all the details.

And now for the three winners of our Frilly and Funkie Top 3 Badges; the choices this time were, in numerical order; #3 Rox, #7 Barb and #14 Martina. Please email Linda at thefunkiejunkie@gmail.com for the codes for the Top 3 badges so that you can display them proudly on your blogs.


And finally we have a randomly chosen lucky winner for the $25 gift certificate to The Funkie Junkie Boutique. Our congratulations this time go to #10 Cathy! Please email Linda at thefunkiejunkie@gmail.com for the gift certificate details.

A big thank you again from the Frilly and Funkie team to everyone who took part in this challenge and congratulations to all our winners. The current challenge, 'By Airmail' runs through Tuesday, July 3rd and the Design Team will be back here on Wednesday June 27th with some more inspiration for you. We hope to see you entering this time around so that you too can be in with a chance to win.

Have a great week everyone!

Saturday, June 23, 2018

Saturday Showcase: E to the Power of 2

Happy Saturday! Suzz here. I am here to share a Saturday Showcase with you. I love Saturday because I can stay in my pajamas, hang out in my craft room and see what the team has cooked up in the Saturday showcase!
For my showcase I decided to play around with Embossing Powders and Embossing Folders hence my title of E to the power of 2.

Tim Holtz Paper Dolls Tiny Text Idea-ology Stars for The Funkie Junkie Boutiqe

I started with the idea of creating a wood grain effect with embossing powder and amp it up with a texture fade.

Ranger Distress Oxide Antique Linen for The Funkie Junkie Boutiqe

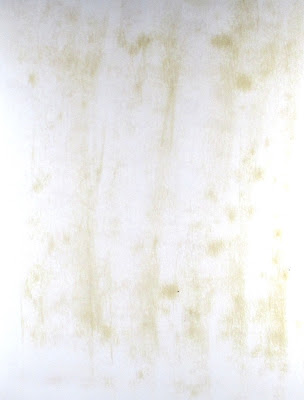
1.  Drag an ink pad across the surface multiple times. (I used Antique Linen)
2.  Ink over the surface with embossing ink. ( I wanted to make sure that the embossing powder would stick so I added a layer of embossing ink over the antique linen.)

Helpful tip:  The antique linen is to give background color if you don't want your wood grain to be completely created from embossing powder.

Ranger Vintage Pearl Wendy Vecchi Watering Can EP for The Funkie Junkie Boutique

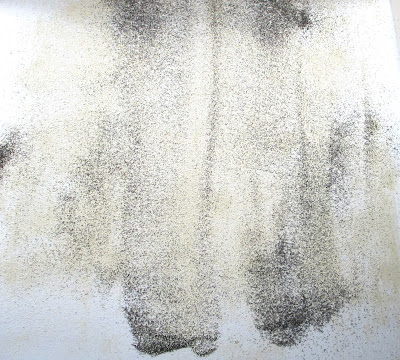
3.  Pick your embossing powders that you want to make the variation of colors in your grain.  I picked vintage pearl and Watering Can.

Helpful Tip: The Wendy Vecchi embossing powder has a nice texture which is a little chunkier and gives a nice effect of texture.

4. Sprinkle randomly the embossing powders in various areas.

Helpful Tip: Limit the amount of  darker colors to prevent the background from becoming too muddy.

Ranger Vintage Pearl Wendy Vecchi Watering Can EP for The Funkie Junkie Boutique

5. Take any tool that you have to drag the powders across the paper.  You can use a plastic ruler or any flat surface to control the effect.  I think a comb, fork or anything would give a cool effect.

Ranger Vintage Pearl Wendy Vecchi Watering Can EP for The Funkie Junkie Boutique

6.  Heat the embossing powder to melt it.

Helpful Tip: A trick I was taught by Fran at Stampendous is to hold the paper and heat from underneath.   This will take longer but will keep your embossing powder in place. Be sure to monitor how close you are to the paper as you can burn your paper.

Ranger Vintage Pearl Wendy Vecchi Watering Can EP for The Funkie Junkie Boutique

7.  Once the background is heated up you can choose what you want to do with it.  I decided to add the lumber texture fade on top of my mixed embossing powder background.

Ranger Vintage Pearl EP Wendy Vecchi Watering Can EP Sizzix Wood Grain EF for the Funkie Junkie Boutique

8.  Emboss the ivory and gray background with the lumber texture fade embossing folder.

9.  Spray the surface with gray distress stain spray.  Wipe off excess spray.  Any areas you didn't emboss with embossing powder will pick up the gray ink spray.
 
For my next background I decided to add an additional layer of embossing powder and embossed texture. 

Sizzix Texture Fades Lumber For the Funkie Junkie Boutique

10.  Using the same background created in steps 1-6.  Ink the embossing folder with embossing ink.

Sizzix Texture Fades Lumber Wendy Vecchi Watering Can Vintage Pearl  For the Funkie Junkie Boutique

11. Emboss the ivory and gray background using the lumber embossing folder.
12. Sprinkle the surface with the watering can embossing powder.
13. Shake off excess and heat the embossing powder until it melts.
 
For the next background I decided to go lighter with my wood grain effect.

Ranger Vintage Pearl Embossing Powder for The Funkie Junkie Boutique

1.  Ink up a background with embossing ink.
2.  Sprinkle the surface with ivory embossing powder.
3.  Shake off the excess.
4.  Heat embossing powder.

Sizzix Lumber Texture Fades Ranger Vintage Pearl Wendy Vecchi Watering Can EP for The Funkie Junkie Boutique

5. Ink up the embossing folder with embossing ink.
6.  Run the ivory background through the big shot with the embossing folder. (Clean off your embossing folder)
7. Sprinkle the embossed background with the gray embossing powder and shake off the excess.
8. Heat the embossing powder to melt the gray powder.

I decided to create one last background with the lumber texture fade and embossing powders:

1.  Ink up the embossing folder with Hickory Smoke Distress Ink and emboss white cardstock.

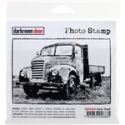
Darkroom Door Old Truck Wendy Vecchi Watering Can EP for The Funkie Junkie Boutique

2.  Cover background with clear embossing powder and shake off excess.
3.  Heat emboss clear embossing powder.
4.  Cut to fit card size and distress edges with distressing tool.
5.  Sponge edges with gray distress ink.
6.  Stamp and color Old truck image.
7.  Lightly stamp text with gray ink in background behind truck.
8.  Ink up twine with gray ink spray.

Well I hope you have enjoyed embossing to the power of 2 and it has inspired you to check out the very awesome selection of embossing powders and embossing folders at The Funkie Junkie Boutique!

The new challenge "By Airmail" has just started and there is plenty of time for you to play along as the challenge is open until 11:55 Eastern Time on Tuesday, July 3rd, 2018.

Time to get inky!

Suzz