Thursday, August 30, 2018

Guest Designer - Lucy Foxworth

It is time for us to introduce our Guest Designer for the 'Haberdashery' challenge. Please say hello and give a warm welcome to Lucy Foxworth of Paper Glitter Glue who was the Top Pick from the 'Planes, Trains and Automobiles' challenge.


This photo is from the first day of a bike trip I took in 2016 where I rode 1800 miles from Washington state at the border with Canada to Lake Isabella, California. It was one of the hardest, but most fun things I've ever done in my life. You want to know one of the things I missed the most when I was on the road? Crafting. No craft supplies on my bike. My day job is in a Pediatric ER which is challenging so crafting provides a wonderful outlet. I've been seriously making paper crafts for the past 3 years, but I have been making things my whole life.


The challenge this time is Haberdashery. So first I had to look it up to make sure I understood the concept. I had it mixed up with milliner (hat making) initially.

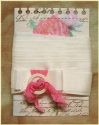
A haberdasher is one who sells small goods like buttons, thread, needles, zippers - notions, we call them in the US. But also in the US, the term evolved to mean one who sells men’s clothing usually high quality men’s clothing. And a haberdashery is where these products are sold. Well, you know I love to make little cardboard houses so that's right what my mind focused on. Make a little haberdashery shop - Hilda's Haberdashery It's a two-sided Halloween-themed house with the outside more like a traditional Putz house and the back side is the actual shop where witch's hats and capes are sold.


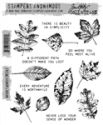
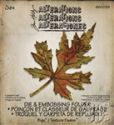
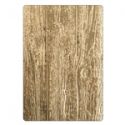
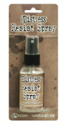
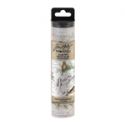
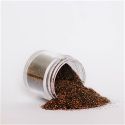
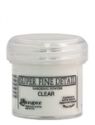
Incorporated sewing elements are the needle and thread sign, scissors stamped on the background, scissors on the sign in the front as well as dress forms holding the capes for sale. I used lots of Tim Holtz products because I love his stuff. The slate surface was stenciled using my favorite Tim Holtz Stampers Anonymous mini-stencil #28. I used Ranger Grit paste to make the stone and layers of Distress paints to color the stone. Village Rooftop dies were used for the shingles. The Village Belltower windows were glued over the Village Bungalow shutters to make the windows.


I made the wallpaper for the inside of the house with a new Stampers Anonymous stamp called Ornate and Lace and then over-stamped it with the Inventor 3 Scissors. My capes and hats covered up most of that stamping though. The needle and thread sign as well as the dress forms are made from the Tim Holtz Mini Sewing Room Mover and Shaper dies. I LOVE the new spider web stamps from Tim and Stampers Anonymous called Tangled Webs. The lines are so fine and delicate and so perfect for a creepy detail on any Halloween project.

Full details about making this project are on my blog - Paper Glitter Glue.

* * *

What a fabulous take on the challenge! After you have checked out all the details of Lucy's little house come on back and share your 'Haberdashery' project. The challenge can be found HERE and runs until 11:55 pm EST on September 11th.

Come on back on Saturday for a new Saturday Showcase and then to get more inspiration for the Haberdashery challenge, the gals on the Funkie side of the Design Team will be here next Wednesday with lots of eye candy for you.

Saturday, August 25, 2018

Saturday Showcase -- Wendy Vecchi's Make Art Blendable Dye Inks

Welcome to our Saturday Showcase feature! It's Sara Emily here to shine a spotlight on Wendy Vecchi's Make Art Blendable Dye Inks. I spotted these water soluable inks in The Funkie Junkie Boutique and had to give them a try. I have to admit, I was first attracted to them by their names. But Wendy's archival inks are my go-to waterproof, permanent inks, so I knew they had to be special.  Today, I hope to demonstrate their rich, intense color and versatility. First, I'll outline my steps with photos and descriptions, then we'll get to the close ups. Remember, you can click on any photo to zoom in. Here's a look at my completed project.

Sara Emily Barker Saturday Showcase Faux Bark and Leaf Tutorial for The Funkie Junkie Boutique #wendyvecchi #makeartblendabledyeink #timholtz #sizzixalterations #stampersanonymous

The Background

Sara Emily Barker Saturday Showcase Faux Bark and Leaf Tutorial for The Funkie Junkie Boutique #wendyvecchi #makeartblendabledyeink #timholtz #sizzixalterations #stampersanonymous 2

1. Spray a jumbo manila shipping tag with Distress Resist Spray and allow to dry thoroughly.
2. Blend with Garden Patina and Acorn inks. All mentioned inks will be the blendable dye inks from here on unless I specify otherwise.

Sara Emily Barker Saturday Showcase Faux Bark and Leaf Tutorial for The Funkie Junkie Boutique #wendyvecchi #makeartblendabledyeink #timholtz #sizzixalterations #stampersanonymous 3

3. Using a clean dry cloth, wipe tag to remove ink from resist.
4. Spritz tag with water. I used a Distress sprayer, and squeezed the trigger slowly to get larger, more sparse droplets. Allow to sit a moment to activate the ink. Then dry with heat tool.
5. Tear a desired section of Ideaology Aviary Collage Paper and adhere with Distress Collage Medium Matte. Before tearing the thin paper, I use a water brush to outline the area I wish to use on my project. This makes tearing the tissue a breeze.
6. Edge tag with Acorn ink.

The Details

Sara Emily Barker Saturday Showcase Faux Bark and Leaf Tutorial for The Funkie Junkie Boutique #wendyvecchi #makeartblendabledyeink #timholtz #sizzixalterations #stampersanonymous 4

1. Cut a panel of sandable card (from stash), sand edges, and wipe to remove dust. Ink sanded areas with Sunflower and Acorn inks. Set aside. You could use Classic Kraft Stock instead. I just happened to have this one out.
2. Color rayon seam binding by blending random areas of Acorn and Garden Patina. Spritz lightly with water, allowing the colors to mingle, and heat dry when you are satisfied with the effect. This will halt further blending.

The Bark

Sara Emily Barker Saturday Showcase Faux Bark and Leaf Tutorial for The Funkie Junkie Boutique #wendyvecchi #makeartblendabledyeink #timholtz #sizzixalterations #stampersanonymous 5

1. Emboss a strip of kraft card with Lumber 3D Texture Fade. Apply Watering Can and Acorn inks by swiping pads down the grain of the embossing. Dry with heat tool and apply Wendy Vecchi Crackle Texture Paste (I used my finger) in random areas and thicknesses. Allow to thoroughly dry.
2. Use a water brush to 'draw' outline of where you wish to tear the panel to make an organic shaped piece. Tear and dry, discarding edges. Edge remaining  'bark' with Archival ink in Coffee.  Rub that same ink pad  randomly over ridges to give more depth. Dry with heat tool.
3. Pick up some Acorn ink on finger and rub into cracks to further define them. Set piece aside.

The Leaves

Sara Emily Barker Saturday Showcase Faux Bark and Leaf Tutorial for The Funkie Junkie Boutique #wendyvecchi #makeartblendabledyeink #timholtz #sizzixalterations #stampersanonymous 6

1. Ink Tim Holtz new Nature's Wonders leaf in Wendy Vecchi Watering Can Archival ink and make impressions on Ideaology Kraft Glassine paper.  I used my Stamp Platform to ensure a good impression. I ended up having to stamp three times to get good coverage on the slick surface, and the platform makes it a breeze to ensure the impression is perfectly aligned. Dry thoroughly with heat tool. Bring a clothespin, because this does not smell wonderful.
2. Blend with Poppy ink. Fussy cut. Set aside.

Sara Emily Barker Saturday Showcase Faux Bark and Leaf Tutorial for The Funkie Junkie Boutique #wendyvecchi #makeartblendabledyeink #timholtz #sizzixalterations #stampersanonymous 7

3. Stamp the maple leaf from the same set in Wendy Vecchi Potting Soil Archival ink on a scrap of  Heavystock. Using a water brush pen, color leaves with Sunflower, Prickly Pear and Poppy, allowing the colors to blend. I applied lighter colors first. Dry with heat tool.
4. Apply some Acorn ink to craft mat and spritz with water 'til beads form. Pick up color with Splatter Brush and splatter ink onto leaf panel. Dry.
5. Blend leaves with Acorn ink. Dry and fussy cut. Ink edges with Acorn. Set aside.

Sara Emily Barker Saturday Showcase Faux Bark and Leaf Tutorial for The Funkie Junkie Boutique #wendyvecchi #makeartblendabledyeink #timholtz #sizzixalterations #stampersanonymous 8

6. Spread crackle paste onto Heavystock in random thicknesses, making some streaks by dragging the paste down. Allow to dry thoroughly.
7. Blend with Sunflower ink, dry and spritz with Resist spray. While the spray is still wet, sprinkle with Emerald Creek Burnt Copper Leaves embossing powder. Heat dry to melt powder. You have to work fast, because the spray dries quickly.
8. Blend with Poppy and Acorn inks. Dry.
9. Using Layered Leaf die, die cut leaf from panel. This die comes with a coordinating embossing folder, which I did not use. I already had the texture I was looking for.
10. Edge with Acorn ink. (not shown) Set aside.

***I ended up flicking the finished leaf with water, sprinkling with more Burnt Copper Leaves and heating to add more contrast.***

The Sentiment

Sara Emily Barker Saturday Showcase Faux Bark and Leaf Tutorial for The Funkie Junkie Boutique #wendyvecchi #makeartblendabledyeink #timholtz #sizzixalterations #stampersanonymous 9

1. Using the stamp platform and a fitting sentiment from the Nature's Wonders set, I heat embossed my chosen words on Heavystock. I inked with Acorn and used Ranger Clear Super Fine Detail powder.
2. Blend with Garden Patina.
3. Blend edges with Acorn. (not shown)

The Finish

Sara Emily Barker Saturday Showcase Faux Bark and Leaf Tutorial for The Funkie Junkie Boutique #wendyvecchi #makeartblendabledyeink #timholtz #sizzixalterations #stampersanonymous 10

 Wrap seam binding ribbon around tag, make a bow, and secure on back with tape. Adhere to black panel with collage medium. Adhere bark and layer and adhere leaves. In keeping with our current Back to Nature challenge,  I adhered some dried bracket fungus. Pop up sentiment with Ranger Foam Adhesive.

The Close Ups

Sara Emily Barker Saturday Showcase Faux Bark and Leaf Tutorial for The Funkie Junkie Boutique #wendyvecchi #makeartblendabledyeink #timholtz #sizzixalterations #stampersanonymous 11

Sara Emily Barker Saturday Showcase Faux Bark and Leaf Tutorial for The Funkie Junkie Boutique #wendyvecchi #makeartblendabledyeink #timholtz #sizzixalterations #stampersanonymous 12

Sara Emily Barker Saturday Showcase Faux Bark and Leaf Tutorial for The Funkie Junkie Boutique #wendyvecchi #makeartblendabledyeink #timholtz #sizzixalterations #stampersanonymous 13

Sara Emily Barker Saturday Showcase Faux Bark and Leaf Tutorial for The Funkie Junkie Boutique #wendyvecchi #makeartblendabledyeink #timholtz #sizzixalterations #stampersanonymous 14

I hope you've been inspired to step out of your routine and try some new craft products! I highly recommend giving these wonderful inks a try. If you're anything like me, you'll fall in love with the rich colors, which are especially perfect for fall crafting.

 And don't forget, you've got until Tuesday to play along in our current Back to Nature challenge. Then on Wednesday, we'll start all over with another fun challenge! Happy crafting!

Sara Emily

The following products were used and can be purchased at The Funkie Junkie Boutique:

Wednesday, August 22, 2018

Back to Nature

Welcome fellow crafters and visitors! It's Sara Emily here today, happy to bring you our current challenge, 'Back to Nature'. Having just returned from our annual trek to the mountains of West Virginia where we observed so much natural beauty on our hikes, I couldn't help but make my challenge nature themed. You can make anything you like, from a card or tag to altered art, just be sure to include a natural element in your vintage or shabby chic project. Think real twigs, leaves, shells, pebbles. Or you could include a die cut or a stamped or stenciled image representing a natural object.

The winner will earn the chance to be a Guest Designer here at Frilly and Funkie, and everyone who enters and follows the rules will go into the draw for the chance to win a $25 spending spree at The Funkie Junkie Boutique. We are also awarding Top 3 Badges for three further outstanding entries, chosen by the Design Team, because we can't pick just one favorite!

The guidelines for entering are simple; create a new vintage or shabby chic project following the challenge theme, link it below to your post (not just your blog) and also include a link back to this challenge in your post. You can combine our challenge with up to 10 challenges (including this one) to be in with a chance of winning. If you are entering through a public forum (such as Instagram) you'll need to include the words Frilly and Funkie Challenge. Also, please be sure to turn off your Word Verification so our Design Team can leave comments on your blogs. Make sure you follow these rules as unfortunately we have had to eliminate entrants from the prize draws in the past.

This week we have more ideas and beautiful projects from the Funkie side of the Design Team. Click on each photo for a closer look and on the links to find out more about them.

 Suzanne Czosek - Suzz's Stamping Spot

Jenny Marples - Pushing The Right Buttons

Sara Emily - sarascloset

Zoe Hillman - iGirlZoe


************************************************************
WEEK ONE

Let's start off with some ideas and wonderful projects from the Frilly side of the Design Team. Click on each photo for a closer look and on the links above to find out more about them.

Maggi Harding - Scrap, Travel, & Bark

Kathy Clement- Kathy by Design

Cec Wintonyk - CW Creations

Now it's your turn to get creative! Enter your nature inspired vintage or shabby chic projects by clicking on the link below. We can't wait to see what YOU will create!

Be sure to stop back tomorrow to see what our latest fabulous Guest Designer has created. And the Funkie Design Team members will be back again next Wednesday with even more natural inspiration! We hope you will be back to check that out, but until then, happy crafting!

Hugs!
Sara Emily


Monday, August 20, 2018

Challenge Winners - August

Hi everyone! Today we announce our top picks from the 'August' challenge. We were so excited to see your amazing entries. Thank you to everyone who took the time to join in the fun.


The Design Team were torn between so many of the entries but finally chose #9 Lisa Hoel as our latest overall winner. We loved how Lisa had taken the arch shape as her background for a colourful ocean odyssey. Congratulations Lisa on being our favourite and winning the opportunity to be a Guest Designer here at Frilly and Funkie for a future challenge. You will be contacted shortly with all the details.

And now for the three winners of our Frilly and Funkie Top 3 Badges for this challenge; the choices this time were, in numerical order; #3 oops.designs, #10 Amanda (Paper Wishes) and #11 Lyla Larimore. Please email Linda at thefunkiejunkie@gmail.com for the codes for the Top 3 badges so that you can display them proudly on your blog.


And finally we have a randomly chosen lucky winner for the $25 gift certificate to The Funkie Junkie Boutique. Our congratulations this time go to #4 Carol! Please email Linda at thefunkiejunkie@gmail.com for the gift certificate details.

A big thank you again from the Frilly and Funkie team to everyone who took part in this challenge and congratulations to all our winners. The current challenge, 'Back to Nature' runs through Tuesday, August 28th and the Funkie side of the Design Team will be back here on Wednesday August 22nd with some more inspiration for you. We hope to see you entering this time around so that you too can be in with a chance to win.

Have a great week everyone!

Saturday, August 18, 2018

Saturday Showcase: Sentiments, Quotes and Words

Happy Saturday! Suzz here to share with you a Saturday Showcase celebrating the beauty of sentiments and quotes and words with a tutorial on pressing flowers. I love using sentiments, quotes and words on my art.
I wanted to create a background that was the perfect complement to my sentiments, quotes and words. The "Back to Nature" challenge hosted by Sara Emily had me foraging in my yard for  flowers to press.

Tim Holtz Idea-Ology Quote Chips  Stampers Anonymous Entomology Tim Holtz Paper Dolls Ranger Distress Oxides For the Funkie Junkie Boutique
(click on each image for a closer look)

I am going to share the results of my flower pressing and how the addition of the words makes all the difference!

Many times when I am working through a design the sentiment or words or quotes are the design element that pulls together the art.

When pressing the flowers you end up with a beautiful soft background that you want to highlight but you also want to add something visual that pops.

On my card I ended up using the Quote Chips because they have dimension to add texture and they have few word with a larger font to really pop on the front of the card.

I started with the a scripted background (Stampers Anonymous - Entomology) to create a soft effect. I then pulled my dried lavender and the children and played around with a design.

Tim Holtz Idea-Ology Quote Chips  Stampers Anonymous Entomology Tim Holtz Paper Dolls Ranger Distress Oxides For the Funkie Junkie Boutique

After I laid them out I wanted to frame the design so that the dried flowers could be protected. I created a frame by cutting out a frame and embossing with the Sizzix Lumber Texture Fade embossing folder.

I laid out the design on the paper and then applied foam tape around the edges. I then attached acetate to the frame and laid the frame with acetate onto the foam tape. I accented the sentiment with the butterfly to highlight the quote!

Many times when creating a sympathy card I like to have a soft background and a beautiful sentiment as the focal point. The Darkroom Door Part of You sentiment is one of those that I love to use on a sympathy card.

It worked beautifully as the focal point with the soft imprints of the flowers after they were pressed.

Darkroom Door Part of You Stampers Anonymous Entomology Ranger Distress Oxide Lilac Blueprint Sketch Ranger Watercolor Marker For the Funkie Junkie Boutique

I started with the pressed flower image and trying to place where to put the sentiment to draw the eye to the sentiment and the flowers. I stamped the sentiment onto a scrap piece of vellum and moved it around the page until I liked the placement.
Then I inked up the sentiment and stamped it in coordinating brown ink.

I then mixed up some distress oxide inks to emulate the pretty bluish purple color and added some splattering of inks.

I finished with a few more touches of nature by stamping the bees and coloring them with a ranger watercolor marker (Wild Honey).

I used the reverse side of the pressed flower and created a second card:

Darkroom Door Part of You Stampers Anonymous Entomology Ranger Distress Oxide Lilac Blueprint Sketch Ranger Watercolor Marker For the Funkie Junkie Boutique

When looking for sentiments that fit with my nature theme I found the lovely sentiment from Wendy
Vecchi's Art in the Jar set. 

Idea-Ology Story Sticks Lavender Pressed Flowers Stampers Anonymous Entomology Tim Holtz Design Tape For the Funkie Junkie Boutique

I used the Wendy Vecchi Art in the Jar sentiment along with some more of my lavender pressed images.

I have also used the Tim Holtz Idea-Ology story stick tied to an index clip and attached with a fastener. The story sticks give you the chance to add a word or a number for a fun detail that enhances the design.

Wendy Vecchi Les Roses Stampers Anonymous Entomology Idea-Ology Story Sticks Idea-Ology Small Chat

Now onto the Pressed Flower Tutorial:

First thing I did was go flower gathering:

Lavender Flower Press Bigshot for The Funkie Junkie Boutique

I picked a variety of flowers fresh from the garden. I was soon to find out that some flowers work better than others in the pursuit of the pressed flower.

The lavender was one of my first flowers to play with and actually worked really well in the process. Because it has small petals and holds up well when drying it gives a great image. As a side benefit it also is very fragrant when crushed so my craft room smells delightful!

Lavender Flower Press Bigshot for The Funkie Junkie Boutique

I am going to take you through the process of how I experimented and give you a few tips/hints. This is all about trying it out and enjoying the process!

Steps:

1. I started with laying the flowers in a pattern I wanted to achieve for my background on a sheet of cardstock. I used regular cardstock with my projects but would recommend using a watercolor or mixed media paper because of the moisture from the flowers.
2. Lay a second sheet of cardstock over the flowers. (I used a folded piece of cardstock only because I had some already folded.) 

Helpful Hint:  Add wax paper or acetate as part of your outer layer to keep the extra juices from staining your plates. (I will talk about drying out the flowers at the end which will help with this as well)

Lavender Flower Press Bigshot for The Funkie Junkie Boutique

3.  Place the sheets of cardstock between the two plastic panels and run through with the all tabs and the base.

Variation:  You can use Tab 1 and one plate and an impression mat. This will give you a letterpress effect with the lavender imprint on the outside.  

4. Remove the plates and look at your result:

Lavender Flower Press Bigshot for The Funkie Junkie Boutique

5.  Let the flowers dry completely and scrape off excess flowers.

Variation/Helpful Hint: With the lavender because of it's petal and stems I was able to wait 4+ hours and still press them. Waiting with the lavender worked better because the moisture had decreased and they also left me with pressed / dried lavender that still gave me an impression and the flowers stayed together to give me a pressed dry flower. With this sample I didn't let them dry and you can see it disintegrated and stuck to the paper.

I ended up using my extra scraps of  dried up pieces for other projects. One of them I am sharing on Wednesday, so you will have to come back to see what the Funkie side of the Design Team created!

I created a variety of backgrounds using various flowers:

Coreopsis Cone Flower Lavender Flower Press Bigshot for The Funkie Junkie Boutique

Coreopsis(tickseed), Petunias, Roses, ConeFlowers, Phlox and Geraniums all were part of my experimentation with pressing of flowers.

Tip: The larger  the petals and stamen the more moist and messier the imprint.

Coreopsis Cone Flower Lavender Flower Press Bigshot for The Funkie Junkie Boutique
 
The smaller petals and stamen left more delicate impressions and less moisture:

Phlox  Flower Press Bigshot for The Funkie Junkie Boutique

I found with the lavender because of its structure it actually could be left out and dried without shriveling up.

Lavender Flower Press Bigshot for The Funkie Junkie Boutique

I also found that I could run the lavender through a second time and end up with a second imprint.

Lavender Flower Press Bigshot for The Funkie Junkie Boutique

I did a little online research and you can dry them and press them in the microwave. I decided to try that with the little purple flowers in my front yard.

Geranium Flower Press Bigshot for The Funkie Junkie Boutique

I took a few and put them in the microwave on a paper towel and heated them for 30 seconds on half power.  This dried them out and then I ran them through the big shot.  You can see the difference in the images. 

I hope you enjoyed the beautiful sentiments, words and quotes!

You still have time to join in on the "Back to Nature" Challenge!

Suzz

PRODUCTS FROM THE FUNKIE JUNKIE BOUTIQUE: