Friday, March 31, 2017

Friday Focus on Emerald Creek Embossing Powders & Gem Stones

Hello everyone and Happy Friday!  Linda here to tell you about a sensational new product line we are now carrying at The Funkie Junkie Boutique.  I'm excited that I had a chance to play around with these wonderful new embossing powders.  Emerald Creek Alure Embossing Powders are a deep rich enamel with a blend of clear thick embossig powder combined with metallic powders and other ingredients.  The result is a very unique look and feel to enhance your craft projects. 
Double click any image to zoom in for details.
I experiemented on the jumbo manila tags we sell at The Funkie Junkie Boutique.  They are not the heavy coated paper that the Tim Holtz tags are made of, but they have the advantage of being very economical and in most instances are a great substrate for craft projects.  
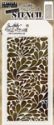
This is Fossilized Amber Distress Oxide ink over the manila tag using the Tim Holtz Flourish stencil.  The embossing powder is Burnt Copper Leaves.  Below, I have taken an ordinary bronze filigree metal and embossed it with the Burnt Copper Leaves.  
Isn't this gorgeous?

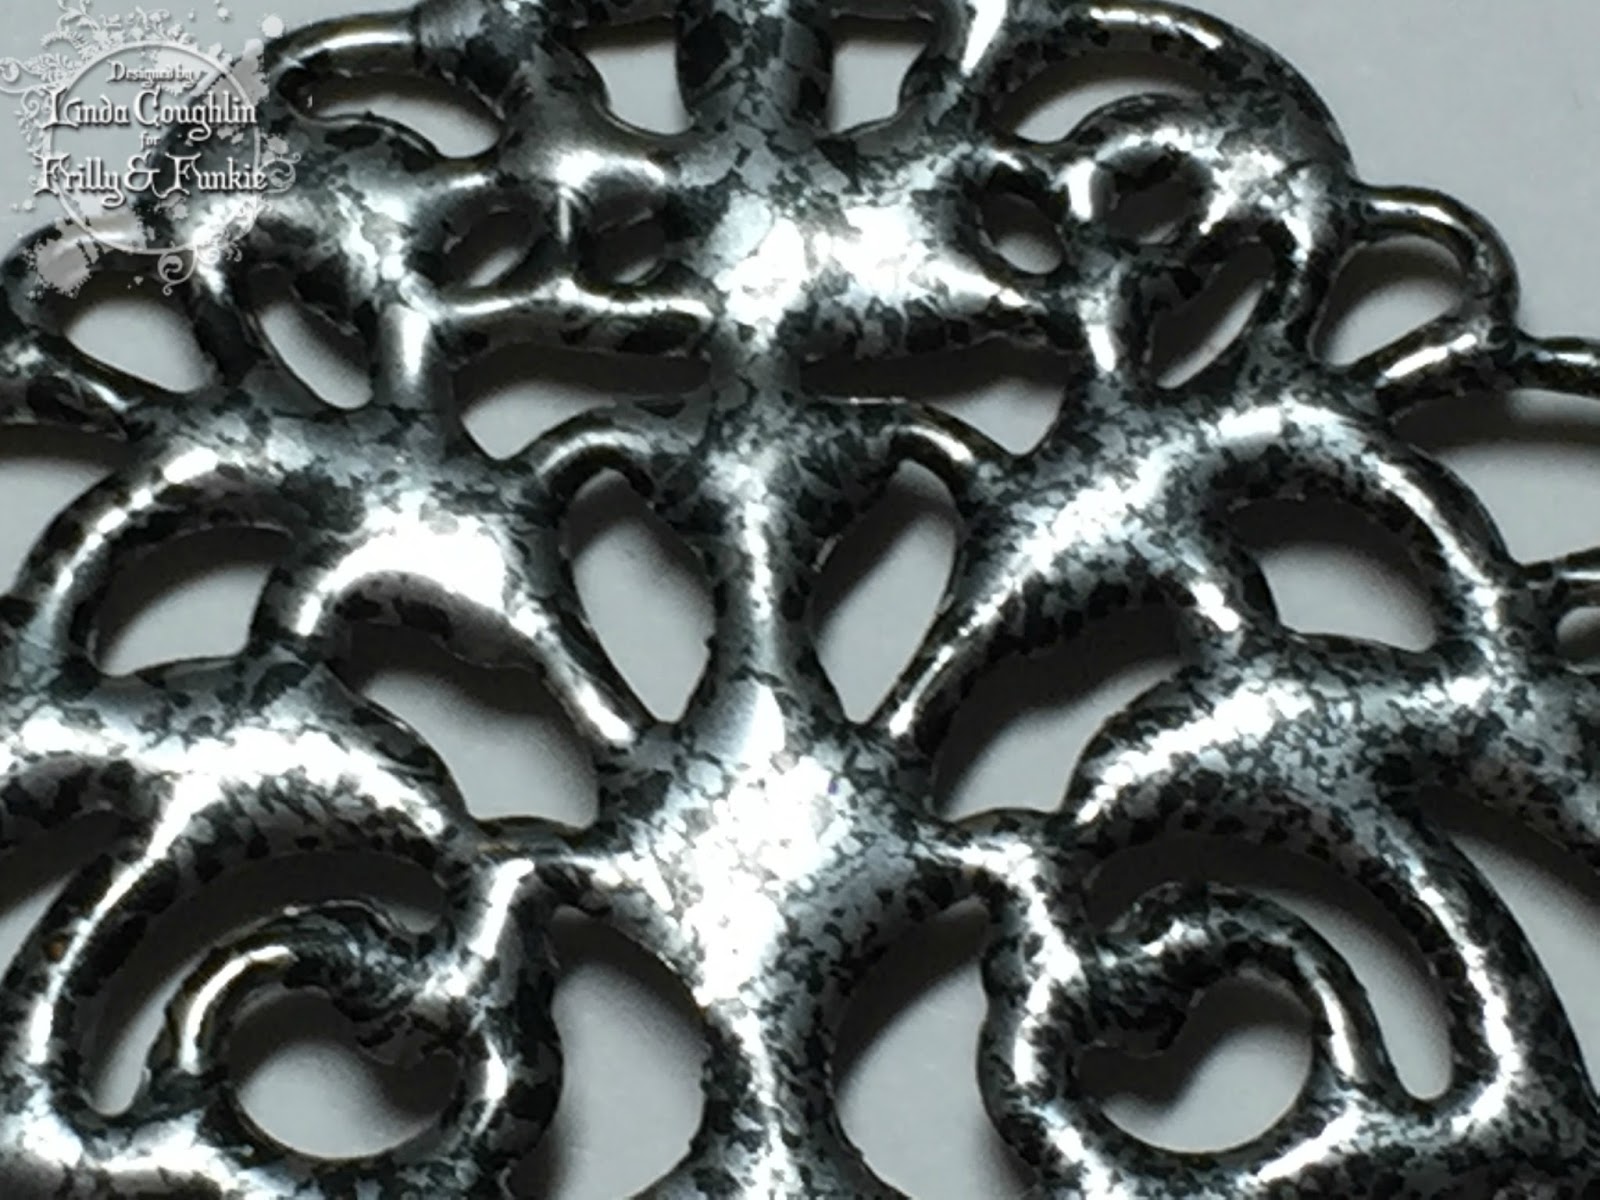
Here I grabbed another manila tag and smooshed three Distress Oxide Pads onto my craft sheet - Worm Lipstick, Peeled Paint and Vintage Photo.  
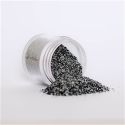
It was embossed with the Damask stencil and Hammered Metal embossing powder.  
Love the combo of rich thick silver with dots of black all melted together.  
What do you think?  Beautiful, huh?


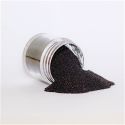
Next up is Oil Rubbed Bronze.  The Tim Holtz Clockwork stencil was the perfect design for showing off this amazing embossing powder.  It is layered over a tag stained with Vintage Photo Distress Oxide Ink.  It truly does look like oil rubbed metal.  
Here it is on the bronze filigree.  So amazing (sorry for my Broken China Oxide Ink stained nail - that suff is hard to remove - LOL)
Close up of the Oil Rubbed Bronze embossing powder over metal.


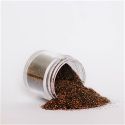
Next up is Weathered Wood over a Fired Brick stained tag.  What a beautiful combination!
And one more time on the bronze filigree. I especially like the way it looks on the filigree.

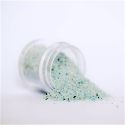
And last we have Fractured Ice Embossing Powder over a tag stained with Broken China Distress Oxide ink.  
Isn't this gorgeous.  The cool thing about the Fractured Ice is that it is translucent so the base color shows through.  This enables the embossing powder to take on so many different color characteristics.  
Love the way it looks using the Splash stencil and Broken China Distress Oxide ink!  One thing, though, is that I tried using it over metal and it did not alter the bronze.  There is too much clear EP in this mixture to effectively alter metal.  

These are just a few samples of the new Emerald Creek Embossing Powders we have in stock over at The Funkie Junkie Boutique.  Our prices are normally 20% off list and for our Friday Focus special, all our Emerald Creek products will be another 15% of through April 13th.  


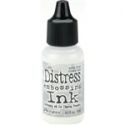
Here are the products used for this post.  They are available at The Funkie Junkie Boutique.


Thursday, March 30, 2017

Guest Designer - Maggi Harding

Please say hello and give a warm welcome to our Guest Designer for the Count Me In challenge.  Maggi Harding of Scrap, Travel & Bark was the Design Team's Top Pick for the Out of the Cold challenge.


Hi, I'm Maggi Harding and I am thrilled to be guest designing at the Frilly and Funkie Challenge Blog.

My style is all over the board as I do a little bit of everything, but two things I really love, are vintage styling and bright bold colors layered up. Paper art is an artistic adventure for me; I always ask myself, what can I create, how can I make this piece of paper come to life? I love the challenge of combining paper and medias to create a cohesive art piece. Paper art awakens my “inner artist” and satisfies the creative side of my brain that was long neglected during my career as a CPA. These days I am a happy retired, stay at home, crazy, paper loving scrap artist living with the loves of my life, my husband and my 2 standard poodles kids.


I am so thrilled to be guest designing for the Frilly and Funkie Challenge Blog today! The current challenge, "Count Me In" is right up my alley, because, before I retired, I was what is known as a number cruncher or a bean counter, LOL!! Yep, I am a retired CPA so I made my tag as a nod to my profession. The quote is fitting because after a long week at the office (especially during tax season) my art was my mental release and served to refocus my brain for the coming week.

I used the new Distress Oxide inks for the background of my tag. Believe it or not, the tag is actually a black tag. I love how the Oxide inks cover up dark colors! Once I was satisfied with the effect of the Distress Oxides, I used a crackle stencil to add some additional texture and then gave the entire tag a spritz of Lindy's Starburst Mist - Tibetan Poppy Teal.


I layered on some design paper from Graphic 45's Typography collection and added an old piece of newsprint behind the cut-apart that I popped up with a piece of cardboard. I thought it needed something else, so I splashed it with black paint. Finally, I like to add some "pretty" to my grunge so I popped on a couple of Petaloo blooms.

All that was left to do, was tie a fun bow at the top and that's it!

* * *
Pop over to Maggi's blog and check out the details of the fabulous tag and then come on back and share your creation with numbers. The Count Me In challenge runs until 11:55 pm EST on April 11th so you have lots of time to enter.

Wednesday, March 22, 2017

"You've Got to Know When to Fold "em" Challenge

Hello, Friends! It's Kathy here today to introduce you to the latest challenge here at the Frilly and Funkie Challenge Blog. I'm a huge fan of folded paper! Whether it's a fancy fold card, a one sheet wonder, a rosette or other folded embellishment, folds equal fun! So the theme for this challenge is "You've Got to Know When to Fold 'em." This challenge is all about using folded paper in a way that goes beyond just folding it in half. Create a vintage or shabby chic project that uses folded paper in a way that elevates the design. You can make a fancy fold card, or add folded embellishments to a card or layout. So get out those bone folders and start creasing!

As in the last two challenges, the Design Team is excited to be celebrating all things Wendy Vecchi. We will all be using her fabulous products, new and old, in our creations - you'll be blown away at how versatile they are since we all have different creative styles. When you enter the challenge, you are not required to use Wendy's products in your creation but it would be great if you did. Don't have any yet? Check out her product range at The Funkie Junkie Boutique.

The team will choose their top four picks with the winner being invited to join us in a Guest DT spot here at Frilly and Funkie and the next three will receive badges to display on their blogs. Everyone who enters and follows the rules will be entered into the draw to have the chance to win a $25 spending spree at The Funkie Junkie Boutique.

The guidelines for entering are simple; create a new vintage or shabby chic project following the challenge theme, link it below to your post (not just your blog) and also include a link back to this challenge in your post. You can combine our challenge with up to 10 challenges (including this one) to be in with a chance of winning. If you are entering through a public forum (such as Instagram) you'll need to include the words Frilly and Funkie Challenge. Also, please be sure to turn off your Word Verification so our Design Team can leave comments on your blogs. Make sure you follow these rules as unfortunately we have had to eliminate entrants from the prize draws in the past.

Here's some more inspiration, this time from the Funkie side of the team.

Suzanne Czosek - Suzz's Stamping Spot

Jenny Marples - Pushing The Right Buttons

Zoe Hillman - iGirlZoe

******************************************************
WEEK ONE

Here's some inspiration from the Frilly side of the team to get you started.

Kathy Clement - Kathy by Design

Cec Wintonyk - CW Card Creations

Nancy Dynes - Tattered Treasures

So now it's your turn. You have until 11:59PM EDT on Tuesday, March 28th to link up your folded project below. Don't forget to check back tomorrow to see what our latest Guest Designer has created for this challenge, and in one week for the big reveal of the Funkie Team's folding projects.

We can't wait to see what you make!

Cheerio,
kathy


Monday, March 20, 2017

Challenge Winners - Welcome, Spring!

Welcome to the beginning of a new week. Thank you so much to everyone who took the time to enter our 'Welcome, Spring!' challenge. The Design Team were totally spoiled for choice with so many amazing Spring projects from you all!


This time we've chosen Alison (Butterfly) as our overall winner. Alison transformed Tim Holtz new Tiny Houses and really captured the delicate fresh feeling of Spring with them. Congratulations Alison on being our favourite for the 'Welcome, Spring!' challenge and winning the opportunity to be a Guest Designer here at Frilly and Funkie for a future challenge.

And now for the three winners of our Frilly and Funkie Top 3 Badges for this challenge; the choices, in numerical order, are... #17 Maria, #23 Shelly, and #65 Jannet!!! Please email Linda at thefunkiejunkie@gmail.com for the codes for the Top 3 badges so that you can display them proudly on your blog.


And finally Random.org has chosen a lucky winner for the $25 gift certificate to The Funkie Junkie Boutique. Our congratulations this time go to #54 Claire C!

A big thanks from the Frilly and Funkie team to everyone who took part in this challenge and congratulations again to our winners. Once again, please email Linda at thefunkiejunkie@gmail.com for the codes for the winner's badge and to give us your email address for the Guest Designer details (Alison), for the Top 3 badges (Maria, Shelly and Jannet) and for the gift certificate details (Claire).

Our current challenge, 'You've Got to Know When to Fold "em"' runs through Tuesday, March 28th. We hope to see you entering this time around so that you too can be in with a chance to win.

Have a great week everyone!

Saturday, March 18, 2017

Saturday Step by Step - Dwell in Possibility

Hi everyone and welcome! It's Jenny here with a fun tutorial for a framed picture based on the new Distress Oxides and Sizzix Cityscape dies.


I started with a Tim Holtz Framed Panel and having given it a base coat of black gesso, moved on to cover it in a patchy dry-brushed fashion first with Ground Espresso Distress Paint, then Frayed Burlap Distress Paint using my Collage Brush.


The layers continued with a lighter coat of Iced Spruce Distress Paint and finally Antique Linen Distress Paint.


I have an absolute love affair with the new Tim Holtz Paper collection 'Memoranda' and selected a piece from the back to cover the frame base; I went to the trouble of stitching around the paper patchwork before adding it with the Crazing Distress Collage Medium.


Once dry I added some Ground Espresso Distress Crayon into the crazing to emphasise it before adding a little Evergreen Bough Distress Paint to the frame to coordinate it further.


Having put the frame together and created the scene inside I realised it looked a little too bright and clean, so added a layer of Vintage Collage Medium over the frame edge and base. In hindsight it would have been much more sensible to do that at this stage in the process rather than waiting to the end - hence my reason for including it here!


Now I got to play with those new Distress Oxides. I smooshed the Iced Spruce pad onto my craft mat, spritzed it with a little water, mopped it up with two thirds of a sheet of Mixed Media Heavy Cardstock and dried it with my heat gun. That process was repeated using the Vintage Photo pad, after which I spritzed and dried the card to get a beautiful mottled look.


The card was die cut with the two Cityscape Skyline dies (you need one and a half of each to fit the length of the frame) and the building portions of the Cityscape Suburbia dies. I edged each one with Walnut Stain Distress Oxide using a blending tool before covering them with Distress Glaze to fix the colour in place. Having applied the first Skyline towards the top of the frame (the one with the thinner bottom edge) I layered the second over it using Ranger Black Adhesive Foam to add dimension.


To add even further dimension (and fit with our current challenge theme of using folds) I folded a strip of the mottled card to create foam tape supported mounds onto which I added the Suburbia buildings.


Using the final third of the Heavy Cardstock I created smaller coloured pieces using a combination of Vintage Photo Distress Oxide ink first with Fossilized Amber ink, then with Fired Brick ink, then with Faded Jeans ink and finally with Peeled Paint ink. As before I spritzed each with water to mottle them before adding a coat of Distress Micro Glaze.


With the main Suburbia building portions already cut I used these coloured pieces to cut the roofs, window frames, balconies, trees, washing etc, gluing them in place before adding the finished buildings to their mounts.


To finish I added words from the Metallic Quotations Stickers, supporting them with more of the Black Adhesive Foam. I also glued the new Mini Foundations on the corners of the frame. And with that my framed vintage scene was complete! Here are some close ups to show the details;


I hope you've enjoyed seeing one idea for using the new Distress Oxides and Cityscape dies. You'll find links to all the products used below, now available to order from The Funkie Junkie Boutique for a permanently discounted price.

Remember our current challenge 'You've Got to Know When to Fold 'em' runs for another week and we'd love to see your folded creations. I'll be back with the rest of the Funkie side of the Design Team next Wednesday to unveil our inspiration for you.

Until then have a great weekend, take care of yourselves and have fun!
Jenny xxx