6448 SW 90 Street, Gainesville Florida 32608 thefunkiejunkie@gmail.com www.thefunkiejunkie.com |

Sunday, November 29, 2015
Cyber Monday Coupon!


Friday, November 27, 2015
Friday Focus - Distress Glitter
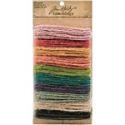
Welcome to the Friday Focus this week! Georgie here with you this time and today I'm focusing on Tim Holtz Distress Glitter.
Just perfect for Christmas and the holidays, makes great frosting or for giving an extra sparkle to a project, like this:

Adding glitter is great fun but it can be a little daunting to those that don't use it that often and aren't a fan of sparkle. This is why the Distress range is great because it is like a vintage mica, so the sparkle in much softer.
The above photo is a little teaser of the beautiful frosting you can put on winter flowers.

I created a winter card, 'Cast A Spell' because of the spell snow casts across the land when it falls - it's like magic!


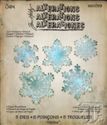
Adding the glitter to a die cut or a stamp (in this case I chose a die cut, but you can easily do the same to a fussy cut stamped image) is another way to make your glitter go further. Glossy Accents, or a very good strong glue, is the key here. I do this in stages as Glossy Accents can dry quite quickly, so it's worth doing half at a time otherwise it will look very fragmented.


Just perfect for Christmas and the holidays, makes great frosting or for giving an extra sparkle to a project, like this:
The above photo is a little teaser of the beautiful frosting you can put on winter flowers.
I created a winter card, 'Cast A Spell' because of the spell snow casts across the land when it falls - it's like magic!
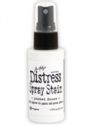
Using a gel medium through a stencil and then adding the glitter on top is a great way to add texture in a pattern. Do wait for it to dry thoroughly before going any further, but if you want to knock back some sparkle adding a few sprays of Picket Fence Distress Spray adds a lovely snowy effect and further interest to the texture.
Adding the glitter to a die cut or a stamp (in this case I chose a die cut, but you can easily do the same to a fussy cut stamped image) is another way to make your glitter go further. Glossy Accents, or a very good strong glue, is the key here. I do this in stages as Glossy Accents can dry quite quickly, so it's worth doing half at a time otherwise it will look very fragmented.
This one may be a little hard to see, but if you 'dollop' some glue on fine threads and other random places, then sprinkle some glitter over the top it catches and stays in this little ball of glitter deliciousness!!
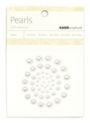
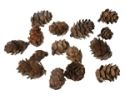
Here is some more 'frosting' added to the flower, mini pine cones and burlap flowers. Also pictured are some Kaisercraft pearls.
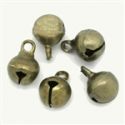
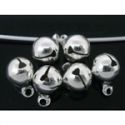
Linda also has in her shop some amazing metal embellishments for Christmas. I used some of the jingle bells for this wintery card.
Hope you enjoyed my focus and have a wonderful, sparkly day!
Hugs
Georgie
xx
 |  |  |  |  |
 |  |  |  |  |
 |  |  |  |  |
 |  |
Wednesday, November 25, 2015
An Altered State
Hello! It is Cec here to bring you the second week of the latest challenge. This time I am calling it An Altered State.
It is time to transform something you have sitting around or can pick up for a song and make it one of your works of art. It could be a frame, a bottle, an old cigar box, a discarded CD - the list is endless. Just make sure your final transformation is vintage or shabby chic.
This challenge will run for two weeks and then the Design Team will choose their top four picks. Our first place winner will be invited to join us in a Guest DT spot here at Frilly and Funkie. Three additional talented participants will receive badges to display on their blogs. Everyone who enters and adheres to the challenge guidelines will be entered into a drawing to win a $25 spending spree at The Funkie Junkie Boutique!
The guidelines for entering are simple; create a new vintage or shabby chic project following the challenge theme, link it below to your post (not just your blog) and include a link back to this challenge in your post. You can combine our challenge with up to 10 challenges (including this one) to be in with a chance of winning. Make sure you follow the guidelines, as unfortunately we have had to eliminate entrants from the prize draws in the past when they have entered too many other challenges. If you are entering through a public forum please use keyword F&F. Also, please be sure to turn off your Word Verification so our design team can leave comments on your blogs.
The Funkie side of the team are up this week with their wonderful altered items. To get a closer look and find out all the details, just click on their blog name and you will be taken directly to their blog.#

Sue Carrington - Stamping Sue Style

Jenny Marples - Pushing The Right Buttons

Zoe Hillman - iGirlZoe

The Frilly side of the team are up now with their wonderful altered items. To get a closer look and find out all the details, just click on their blog name and you will be taken directly to their blog.


I hope you will join us and we look forward to seeing your wonderful altered items.
We'll be back on Friday with a brand new Friday Focus so make sure you join us here for that.
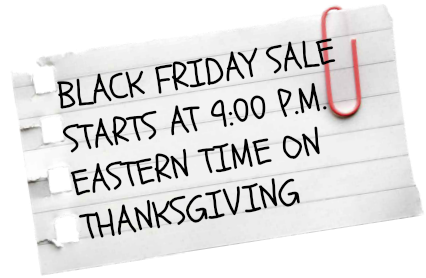
And don't forget, Black Friday sale pricing at The Funkie Junkie Boutique will go into effect at 9:00 pm Eastern Time on Thursday November 26th! Everything in the shop will be discounted an additional 15% off our already discounted prices - that's 35% off list for (almost) everything! That includes all the new dies and stamps that came out for the season, embellishments, ribbons, inks, stains, paints.
It is time to transform something you have sitting around or can pick up for a song and make it one of your works of art. It could be a frame, a bottle, an old cigar box, a discarded CD - the list is endless. Just make sure your final transformation is vintage or shabby chic.
This challenge will run for two weeks and then the Design Team will choose their top four picks. Our first place winner will be invited to join us in a Guest DT spot here at Frilly and Funkie. Three additional talented participants will receive badges to display on their blogs. Everyone who enters and adheres to the challenge guidelines will be entered into a drawing to win a $25 spending spree at The Funkie Junkie Boutique!
The guidelines for entering are simple; create a new vintage or shabby chic project following the challenge theme, link it below to your post (not just your blog) and include a link back to this challenge in your post. You can combine our challenge with up to 10 challenges (including this one) to be in with a chance of winning. Make sure you follow the guidelines, as unfortunately we have had to eliminate entrants from the prize draws in the past when they have entered too many other challenges. If you are entering through a public forum please use keyword F&F. Also, please be sure to turn off your Word Verification so our design team can leave comments on your blogs.
The Funkie side of the team are up this week with their wonderful altered items. To get a closer look and find out all the details, just click on their blog name and you will be taken directly to their blog.#
Shelly Hickox - Stamptramp

Sue Carrington - Stamping Sue Style

Jenny Marples - Pushing The Right Buttons

Zoe Hillman - iGirlZoe

*************************************************
WEEK ONE
The Frilly side of the team are up now with their wonderful altered items. To get a closer look and find out all the details, just click on their blog name and you will be taken directly to their blog.
Pamellia - My Little Craft Things

Cec Wintonyk - CW Card Creations

Georgie - Little Blue Craft Box
Nancy Dynes - Tattered Treasures

I hope you will join us and we look forward to seeing your wonderful altered items.
We'll be back on Friday with a brand new Friday Focus so make sure you join us here for that.
And don't forget, Black Friday sale pricing at The Funkie Junkie Boutique will go into effect at 9:00 pm Eastern Time on Thursday November 26th! Everything in the shop will be discounted an additional 15% off our already discounted prices - that's 35% off list for (almost) everything! That includes all the new dies and stamps that came out for the season, embellishments, ribbons, inks, stains, paints.
Monday, November 23, 2015
Get Ready - Black Friday's Coming!
|


Challenge Winners - Let there be light!
Welcome to the beginning of a new week here at Frilly and Funkie. It's time to announce the winners of the 'Let there be light!' challenge. Thank you so much to everyone who took the time to enter with some gorgeous light inspired projects. The Design Team cast their votes and our winner on this occasion is #4 Butterfly (Alison).

We loved the way the night sky was lit up both by the paint splatters, pearls and tiny light bulbs. Congratulations Alison on being our favourite for the 'Let there be light!' challenge and winning the opportunity to be a Guest Designer here at Frilly and Funkie for a future challenge.
And now for the next three winners of our Frilly and Funkie Top 3 Badges. In numerical order they are... #2 Sara Emily (sarascloset), #12 Lia and #16 Lisa H!!! Please email Linda at thefunkiejunkie@gmail.com for the codes for the Top 3 badges so that you can display them proudly on your blog.

A huge thanks from the Frilly and Funkie team to everyone who took part in this challenge and congratulations again to our winners. Please email Linda at thefunkiejunkie@gmail.com for the codes for the winner's badge and to give us your email address for the Guest Designer details (Alison) for the Top 3 badges (Sara Emily, Lia and Lisa H) and for the gift certificate details (Jane).
Our current challenge, 'An Altered State', runs through Tuesday, December 1st. The Funkie side of the team will be back this coming Wednesday, November 25th with more inspiration for you. We hope to see you entering this time around so that you too can be in with a chance to win. And please make sure you follow our rules as sadly we've had to discount entries from previous challenges.
For now have a great week everyone!

We loved the way the night sky was lit up both by the paint splatters, pearls and tiny light bulbs. Congratulations Alison on being our favourite for the 'Let there be light!' challenge and winning the opportunity to be a Guest Designer here at Frilly and Funkie for a future challenge.
And now for the next three winners of our Frilly and Funkie Top 3 Badges. In numerical order they are... #2 Sara Emily (sarascloset), #12 Lia and #16 Lisa H!!! Please email Linda at thefunkiejunkie@gmail.com for the codes for the Top 3 badges so that you can display them proudly on your blog.
And finally Random.org has chosen a winner for our $25 gift certificate to The Funkie Junkie Boutique. Our congratulations this time go to #1 Jane (Jane's Journal)!
A huge thanks from the Frilly and Funkie team to everyone who took part in this challenge and congratulations again to our winners. Please email Linda at thefunkiejunkie@gmail.com for the codes for the winner's badge and to give us your email address for the Guest Designer details (Alison) for the Top 3 badges (Sara Emily, Lia and Lisa H) and for the gift certificate details (Jane).
Our current challenge, 'An Altered State', runs through Tuesday, December 1st. The Funkie side of the team will be back this coming Wednesday, November 25th with more inspiration for you. We hope to see you entering this time around so that you too can be in with a chance to win. And please make sure you follow our rules as sadly we've had to discount entries from previous challenges.
For now have a great week everyone!
Saturday, November 21, 2015
Saturday Step by Step: Faux Metal Mailbox

Hello and welcome to all my crafty friends! It's Nancy here, and I'm honored to be hosting this weeks Saturday Step by Step.
I wanted to try something totally new to me - a weathered metal technique. It was risky, because I didn't know how it would turn out, but I persevered until I got the look I was going for. I embraced a rich, seasonal color palette for this altered 'cornucopia' style mailbox overflowing with earthy autumn delights. I made two of them. One is to be a gift for a dear friend. I'll be using mine as a centerpiece on our Thanksgiving table.

We'll transform this paper mache mailbox in to a rusty, weathered metal finish. You can find this mailbox at Michael's, AC Moore, or Hobby Lobby. I've had mine in my craft closet for a couple of years! You can also use this technique on any chipboard or paper mache piece you have in your stash.

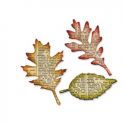
When fall is in the air I start craving hot cider and pumpkin donuts. But it doesn't end there. My other addiction is this Tim Holtz Tattered Leaves die. If you've been to my blog you may have noticed I've used it on several creations this season. For this project we will cut 7 leaves of your choice using this die.

You'll need a few simple supplies. Here I have a tiny bird's nest from Michaels, some purchased paper flowers, and a twine bow. Feel free to improvise with your embellishments depending on what you have on hand.

Some moss, lichen, and berries add elements of nature to the project. I picked these up last year at Michael's when they went on sale.

Now it's time to prepare the embellishments. I dampened the nest with water then sprayed it with Vintage Photo Distress Ink to darken it a little. After it dried I adhered small pieces of moss here and there.

I dampened the paper flowers with my mini mister and sprayed them with Tim Holtz Distress Inks in various colors. I used three different colors on each flower for a variegated look. I'll leave a complete list of the colors I used at the bottom of the post.

The leaves receive the same Distress Stain treatment as the flowers. I like the way the orange leaves turned out the best. I also pressed the orange leaves into the paper towel I used to spray on. It left a nice pattern on the leaves.
I guess I got over-excited about trying a new technique, because I totally forgot to take photos of the first three steps. I'll demonstrate each step on a piece of chipboard instead.

I started by prepping the mailbox with a light coat of gesso.

My next step was to spread random areas of texture paste and whipped spackle, then left it to air dry.

After the mailbox was completely dry I gave it a coat of brown acrylic paint. When it dried I noticed a some tiny white spots remaining. They will be completely covered in the next step.

Now it's time to apply two good coats of Antiqued Bronze Distress Stain. Some of the brown paint continues to show through. This exactly what I wanted. I dried the stain with my heat gun. It caused the paint to bubble, adding even more texture.

Finally I sprayed on a light coat of Walnut Stain Distress Spray and dried it with my heat gun.

I re-attached the mailbox flag. I had to punch new holes because the original ones were covered in coats of paint.

When adding embellishments I work from largest to smallest. In this case I started by adhering the nest at the opening of the mailbox, placing it as far to the left as possible.

The leaves came next. I placed them in three areas, fanning them out to form a semi circle around the mailbox.


The leaves become a guide for the placement of the flowers, as shown in the photo below.

In the below photo all the flowers have been added.

Now add some moss and lichen...

The final touch...berries and a twine bow!

I've included a few close ups below.


Thank you so much for joining me! Don't forget to check out our latest challenge here on the Frilly and Funkie blog. Sending wishes to all for a happy Thanksgiving!
Hugs,

 |  |  |  |  |
 |  |  |  |  |
 |  |  |  |  |
 |  |  |  |  |
 |  |  |  |  |
 |  |  |  |  |
 |

Subscribe to:
Posts (Atom)