

Hello and welcome to all my crafty friends! It's Nancy here, and I'm honored to be hosting this weeks Saturday Step by Step.
I wanted to try something totally new to me - a weathered metal technique. It was risky, because I didn't know how it would turn out, but I persevered until I got the look I was going for. I embraced a rich, seasonal color palette for this altered 'cornucopia' style mailbox overflowing with earthy autumn delights. I made two of them. One is to be a gift for a dear friend. I'll be using mine as a centerpiece on our Thanksgiving table.

We'll transform this paper mache mailbox in to a rusty, weathered metal finish. You can find this mailbox at Michael's, AC Moore, or Hobby Lobby. I've had mine in my craft closet for a couple of years! You can also use this technique on any chipboard or paper mache piece you have in your stash.

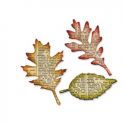
When fall is in the air I start craving hot cider and pumpkin donuts. But it doesn't end there. My other addiction is this Tim Holtz Tattered Leaves die. If you've been to my blog you may have noticed I've used it on several creations this season. For this project we will cut 7 leaves of your choice using this die.

You'll need a few simple supplies. Here I have a tiny bird's nest from Michaels, some purchased paper flowers, and a twine bow. Feel free to improvise with your embellishments depending on what you have on hand.

Some moss, lichen, and berries add elements of nature to the project. I picked these up last year at Michael's when they went on sale.

Now it's time to prepare the embellishments. I dampened the nest with water then sprayed it with Vintage Photo Distress Ink to darken it a little. After it dried I adhered small pieces of moss here and there.

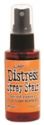
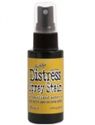
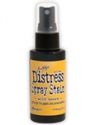
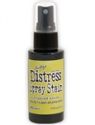
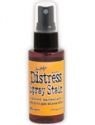
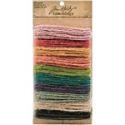
I dampened the paper flowers with my mini mister and sprayed them with Tim Holtz Distress Inks in various colors. I used three different colors on each flower for a variegated look. I'll leave a complete list of the colors I used at the bottom of the post.

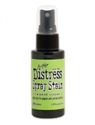
The leaves receive the same Distress Stain treatment as the flowers. I like the way the orange leaves turned out the best. I also pressed the orange leaves into the paper towel I used to spray on. It left a nice pattern on the leaves.
I guess I got over-excited about trying a new technique, because I totally forgot to take photos of the first three steps. I'll demonstrate each step on a piece of chipboard instead.

I started by prepping the mailbox with a light coat of gesso.

My next step was to spread random areas of texture paste and whipped spackle, then left it to air dry.

After the mailbox was completely dry I gave it a coat of brown acrylic paint. When it dried I noticed a some tiny white spots remaining. They will be completely covered in the next step.

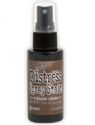
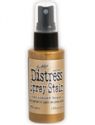
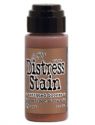
Now it's time to apply two good coats of Antiqued Bronze Distress Stain. Some of the brown paint continues to show through. This exactly what I wanted. I dried the stain with my heat gun. It caused the paint to bubble, adding even more texture.

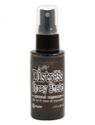
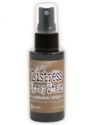
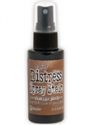
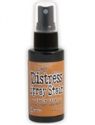
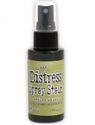
Finally I sprayed on a light coat of Walnut Stain Distress Spray and dried it with my heat gun.

I re-attached the mailbox flag. I had to punch new holes because the original ones were covered in coats of paint.

When adding embellishments I work from largest to smallest. In this case I started by adhering the nest at the opening of the mailbox, placing it as far to the left as possible.

The leaves came next. I placed them in three areas, fanning them out to form a semi circle around the mailbox.


The leaves become a guide for the placement of the flowers, as shown in the photo below.

In the below photo all the flowers have been added.

Now add some moss and lichen...

The final touch...berries and a twine bow!

I've included a few close ups below.


Thank you so much for joining me! Don't forget to check out our latest challenge here on the Frilly and Funkie blog. Sending wishes to all for a happy Thanksgiving!
Hugs,

 |  |  |  |  |
 |  |  |  |  |
 |  |  |  |  |
 |  |  |  |  |
 |  |  |  |  |
 |  |  |  |  |
 |

Breathtaking creation! Sooo beautiful!
ReplyDeleteThank you so much, Lucyna!!
DeleteAbsolutely stunning, you must be really pleased with the result!!
ReplyDeleteThank you, Helene!
DeleteI'm almost at a loss for words for how brilliant this is Nancy!!! The faux metal is extraordinarily realistic - thank you for sharing that as I WILL be trying it! - and the way you've used the bird's nest, flora and fauna around the mailbox is perfect. I hope this remains on display long after Thanksgiving and Christmas are over. Jenny xxx
ReplyDeleteThank you so much, Jenny! So much of my inspiration comes from YOU!! Seeing your gorgeous techniques gave me the confidence to go outside of my comfort zone. You are drawing me to the Funkie side, project by project:-))
DeleteAbsolutely gorgeous. I love the faux metal and your foliage and flowers are stunning. Love how,you used the nest . Tracy x X
ReplyDeleteThank you so much, Tracy!!
DeleteGorgeous! I love how it is a cornucopia feel with the mailbox!
ReplyDeleteThank you, Suzanne!!
DeleteWow Nancy, what an amazing tutorial!! I just put a number of things into my shopping cart that I didn't even know I needed!! Thanks for the great photos so I can zoom in and see all the beautiful colours! hugs :)
ReplyDeleteThank you so much, Pamellia! I do the same thing when I visit your projects/blog-lol! I can't tell you how many times you have been my shopping enabler:-))
DeleteFantastic! Looks like I need distress sprays now that I have seen this wonderful step x step.
ReplyDeleteHugs!
Cec
Thank you, Cec!! I'm completely addicted to the Tim Holtz sprays and markers. I told my husband I wouldn't mind a Christmas stocking full of them:-))
DeleteSuch a fabulous transformation x you are so lucky to have a Michaels x it's time they came over here to the UK
ReplyDeleteTFS Annie x
Thank you so much, Annie! Michaels is great when you need to quickly pick up a few things. Their wood and paper mache aisle is my favorite part of the store. Do they have something similar in the UK?
DeleteMarvelous step-by-step, and fantastic results!! Absolutely love this beautiful little mailbox! xx Lynn
ReplyDeleteThank you so much, Lynn!
DeleteWow Nancy, what a showstopping creation, absolutely love it and great to see all your stages. Stunning.
ReplyDeleteJulie x
Thank you so much, Julie!!
DeleteI knew this morning that my IPhone was not going to do this justice, so I waited till I could get on the BIG screen. This is a Masterpiece, Nancy you keep taking my breath away with your creations, I am totally amazed at this piece, I want to run down the basement to see what I can find to see what and if I can get any where near this and I doubt that very much. Thanks again for sharing your God giving talent with all of us.
ReplyDeleteHugs,
Gretchen
You are the sweetest, Gretchen! I'm incredibly grateful for your kind words. I'm so happy you enjoyed the tutorial. I sure wish we could get together for a day of crafting in real life! I hope you had a wonderful Thanksgiving!!
DeleteHugs,
Nancy
Absolutely stunning Nancy! What an amazing centre piece this will for your Thanksgiving table. Sue C x
ReplyDeleteThank you so much, Sue!
DeleteI enjoyed this so much! Was so glad to read in the details that you dyed purchased flowers. I couldn't imagine making each of these for one project! They look fantastic with your leaves, a perfect match! Couldn't wait for this step by step, but it was worth it! TFS!
ReplyDeleteThank you so much!! As fun as it is to make flowers there are often times I incorporate purchased ones as well. Especially since I discovered the Tim Holtz spray stains and markers. You can choose vibrant color or water it down for a pastel look.
DeleteHugs,
Nancy