Wednesday, April 30, 2014

On The Runway

Welcome back to the second week of our challenge here at Frilly & Funkie. The theme is called On The Runway and all you have to do is create a vintage or shabby chic project that depicts sewing and/or fashion.

The Top Pick chosen by the Design Team will earn a Guest DT spot here at Frilly and Funkie and one randomly chosen entry will win a $25 spending spree at The Funkie Junkie Boutique!

The guidelines for entering are simple: create a new project, link it below and make sure you add a link in your post (not just your blog) back to this challenge. You can combine our challenge with up to 10 challenges (including this one) to be in with a chance of winning.

Please make sure you follow these rules as unfortunately we have had to eliminate entrants from the prize draws in the past when they have entered too many other challenges. Also, please be sure to turn off your Word Verification so our Design Team can leave comments on your blogs.

Alongside the Funkie part of the Design Team we are thrilled to have Vada Schutz joining us as a special Guest Designer. Please make sure you drop by her blog to see more of her fabulous work. In fact, to get details and even more inspiration from each of the projects shared by the Design Team, just click on their name and you will be taken directly to their blogs.

Vada Schutz, Guest Designer - Stamps, Ink & Paper

Jenny Marples (Buttons) - Pushing The Right Buttons

Linda Coughlin - The Funkie Junkie

Sue Carrington - Stamping Sue Style

****************************************************
WEEK ONE

Welcome to a new two-week challenge here at Frilly & Funkie. It is Cec and I will be your hostess this time. The theme is called On The Runway and all you have to do is create a vintage or shabby chic project that depicts sewing and/or fashion

The Top Pick chosen by the Design Team will earn a Guest DT spot here at Frilly and Funkie and one randomly chosen entry will win a $25 spending spree at The Funkie Junkie Boutique!

The guidelines for entering are simple: create a new project, link it below and make sure you add a link in your post (not just your blog) back to this challenge. You can combine our challenge with up to 10 challenges (including this one) to be in with a chance of winning.

Please make sure you follow these rules as unfortunately we have had to eliminate entrants from the prize draws in the past when they have entered too many other challenges. Also, please be sure to turn off your Word Verification so our Design Team can leave comments on your blogs.

The Frilly side of the Design Team have created some gorgeous projects for your inspiration. To get details, just click on their name and you will be taken directly to their blog.

Rebecca Deeprose ~ Paper Primrose

Cec Wintonyk - CW Card Creations

Nancy Dynes ~ Tattered Treasures 

Linda Coughlin - The Funkie Junkie

So now it's over to you. We look forward to seeing your vintage/shabby chic creation, be it frilly or funkie so you can be in with a chance of winning. Make sure you pop back next week when the Funkie side of the Design Team will be sharing some more inspiration.

Cec

Monday, April 28, 2014

Challenge Winners - Flights of Fancy

Welcome everyone to the Frilly and Funkie challenge blog for the start of a new week. It's time to announce the winners of  the 'Flights of Fancy' challenge. Thank you so much to all of our talented entrants for choosing to take the time to link up some magnificent projects. We had some fantastic and varied entries for this one and the standard was so high. The Design Team had to take quite some time to decide on their favourite and finally the votes went to #23 Astrid.


We loved the layers of colour and texture Astrid created throughout this little handmade book using a mixture of stamping and stencilling. Congratulations Astrid  on being our favourite for the 'Flights of Fancy' challenge and winning the opportunity to be a Guest Designer here at Frilly and Funkie for a future challenge.


And Random.org has chosen a winner for our $25 gift certificate to The Funkie Junkie Boutique. Our congratulations go to #25 Hazel H.

A huge thanks from the Frilly and Funkie team to everyone who took part in this challenge and congratulations again to our winners. Please email Linda at thefunkiejunkie@gmail.com for the codes for the winner's badge and to give us your email address for the Guest Designer details (Astrid) and for the gift certificate details (Hazel H).

Our current challenge, 'On The Runway', runs through Tuesday, May 6th. We hope to see you entering this time around so that you too can be in with a chance to win. And remember, you can enter up to 10 challenges including ours, and a maximum of 3 entries per person to our challenge. Please remember to link back to our challenge in your entry and mention in your post that you are entering this Frilly and Funkie challenge.

Have a great week!

Saturday, April 26, 2014

Saturday Step X Step - Mini Sewing Album

It is Cec here and I am back to show you the pages in the mini album that I teased you with on Wednesday for the current challenge.  The album is my nod to a sewing shop and the ideas they can present to a customer.


First I made the album itself and used 5 pieces of medium weight chipboard that I have had sitting around in my craft room for eons.  Each piece was cut to 4" x 5 7/8".  Since I was covering the chipboard with patterned paper, I used it as it was but if you want to do some different techniques on it and skip the paper, you should cover both sides and all the edges with Gesso.

The next step was to join the chipboard together.  I used a paper hinge method, which was super easy and works well but I did discover after I was finished that the depth of some of my embellishments didn't allow it to fold flatter.  The next time I will work on a fastening system or a better binding system and if I get something that I like, I will show you in another tutorial.


To make the hinges, I cut four pieces of heavy card stock 2" x 3 1/2" and scored each piece at the 1" mark on the long side and folded them.  Next I opened them up again and lay them on my work surface with the inside of the fold facing down.  Then I added double sided tape along the complete length 1/8" in from fold line and right up against each outer edge.


The next step was to add each side of each hinge to a piece of chipboard.  To do this I centred the hinge along the right hand 4" edge of the first piece of chipboard with the fold hanging over the edge by 1/8", which means that that tape was now right up against the edge of the chipboard.  Once one side of the hinge was fastened, I fastened the left hand 4" edge of the next piece of chipboard to the other side of the hinge as shown.  Then I folded that second piece of chipboard over and added one side of the next hinge to it in the same manner as I had done the first one making sure that everything was lined up.  I continued added the hinges until all five pieces of chipboard were held together with all four hinges.

You can change your hinge length to suit the size of your chipboard but I would recommend that the folded width be kept at 1".  I would also suggest that if you use as many dimensional embellishments as I did that you don't make your album any bigger or it will be difficult to keep it closed.

Once my chipboard and hinges were all put together the next step was to ink the folds of the hinges and all the edges of the chipboard with Vintage Photo Distress Ink.

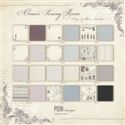
The next step was to add all the patterned paper but I did not add the spine paper until after I embellished the inside in case the spine edge expanded.  Each piece of patterned paper was cut to 4" x 6" and the edges inked with VP Distress Ink before they were adhered making sure I aligned them against the fold of the hinge.  The front and back cover paper is something I created myself in Photoshop using vintage sewing ads from The Old Design Shop and The Graphic Fairy.  The inside papers and the spine were all papers from Pion Designs.

Next I embellished each of the inside pages and did all the left pages starting from the back and then all the right pages starting from the front - that meant every time I turned the page I working on a flat surface.  Once all the inside pages were embellished I added the spine and then embellished the back cover.

Finally I embellished the front cover and since I already told you about the front cover in my post for the current challenge I won't repeat it but you can check it out here.  Now I am going to show you each page as it appears in the book with a brief description.


Using a Dylusions stencil and Vintage Photo Distress Ink, I added the dots first.  Then I used a scrap of paper to cut the corner, cut the long edge with a fancy pair of Fiskars scissors, embossed it with a Tim Holtz French Script embossing folder and highlighted it with Vintage Photo Distress Ink.  Next I added the vintage fashion ads and finally the metal flower with a button that has been covered in Treasure Gold Classic.


First I used Jet Black Archival Ink and stamped the image from the Flapper Fashions stamp set from Artistic Outpost on an oval and inked the edges with Scattered Straw Distress Ink.  The fabric scraps are from my sewing room and the pin from the dollar store.  Then I added the gold mesh and a little floral applique.


Using Stormy Sky Distress Ink I stenciled the harlequin design.  Next came a Wilton doily and another vintage fashion ad.  The flower is just strips of the Pion paper and the button centre came from my bag of buttons.  Finally I added a few pearl flourishes from the dollar store.


I stamped the next image from the same set and inked the edges with Stormy Sky Distress Ink.  Next I added more fabric scraps from my sewing room and another dollar store pin.  The "belt" was made with some of the white fabric and a rhinestone belt buckle.


I used Vintage Photo Distress Ink and a new stencil from Crafter's Workshop to create the upper corner.  Then I added another vintage fashion ad and a couple pieces of elastic from my sewing room with a brad from the dollar store.  The crinkled seam binding came with one of my orders from The Funkie Junkie Boutique and the little collage was another gift and I added the buttons.


Again, I stamped another image from the stamp set and inked the edges with Tattered Rose Distress Ink.  The fabric swatches came from my sewing room and the pin from the dollar store.  I inked a piece of Venise lace with more Tattered Rose Distress Ink and added a string of pearls.


The stenciling was done with Bundled Sage Distress Ink.  I placed the stencil down a second time to get more dots.  Next I added a vintage fashion ad and a sign I made on the computer with some pearl stickers on the side.  The safety pins came from my sewing room and are fastened to a piece of crinoline.  I also inked a little section cut from a piece of Venise lace and inked it with the Vintage Photo Distress Ink.


The final inside page has another vintage fashion ad along with a button card containing some carved coconut shell buttons.  A little metal hanger from my stash completes this page.


The back cover gives you a better idea of the paper I created and the only embellishment here is some Venise lace inked with Vintage Photo Distress Ink.

The following items used in the creation of this project can be found at The Funkie Junkie Boutique.

Friday, April 25, 2014

Friday Focus - Prima Products

Hello and welcome! I'm so happy you're here and that I can share my creation with you~ Today at Frilly and Funkie, it's Friday Focus which means a 15% discount off of today's focus on Prima products! They are one of my all-time favorite companies...

RebeccaDeeprose bird-1

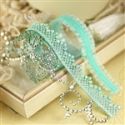
This card began with Prima's 'Lace and Gems Border' called Melody. Their combination borders are exquisite and I've been wanting to work with this beautiful jade/aqua sort of combination for too long! I found a die cut birdcage in my stash and from there, I was off and running!

RebeccaDeeprose Bird-2

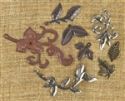
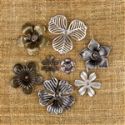
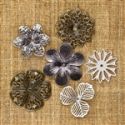
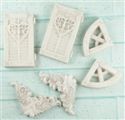
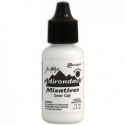
Using Ranger's Snow Cap Mixative with Vintage Patinas on an alcohol ink applicator on Primas's 'Vintage Mechanical Flowers' and 'Vintage Mechanical Leaves', I created flowers that mix some paper layers (that were colored with Distress Reinkers) to add that wonderful 'hard/soft' contrast. These coordinated with the colors of the trim and die cut. For the paper flowers, I placed drops of the Distress Reinkers in each of the colors (listed at the bottom of this post) onto my non-stick craft mat and, with a small paint brush, added light touches of the inks and then spritzed them with lots of water to cause the colors to migrate through the paper and blend. When the paper was fully saturated, I rubbed the surface lightly with my finger tip, which aided the blending and then shaped the petals and dried them with a heat tool...

RebeccaDeeprose Bird-3

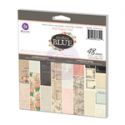
The patterned paper is from Prima's new 'Something Blue' 6x6 collection. The pad is full of really yummy patterns!

This was truly a quick card. Preparing the metal and paper flowers took a few minutes and the rest, just required positioning! Working with things you love also seems to make time evaporate!

Don't forget, all Prima products will have that 15% discount applied at The Funkie Junkie Boutique this week.

Sending you ((hugs)) and blessings,


These products used to make the card above are available at The Funkie Junkie Boutique where Ranger/Tim Holtz/Prima and most other name brand products are always 20% belowMSRP.


Thursday, April 24, 2014

Welcome to today's Guest Designer, Sandy !

It's Thursday which means it's time to welcome today's Guest Designer, Sandy Diller of My Crafty Life on the internet. Sandy was chosen by the DT as the winner of the Time after Time challenge. So, let's move on and hear what Sandy has to say.


I’m “Sew Happy” to be a guest designer here at Frilly and Funkie to share my latest project with you.  With the theme, “On The Runway”, anything sewing or fashion related, I’m truly in my element.  This theme is near and dear to my heart and it all started when my grandmother taught me how to sew.  I love the vintage style and that shabby, tattered feeling that I’ve used in my shadow box. 

My formal training is in an entirely different field but I have always loved crafting and have been making things for as long as I can remember.  We are retired in sunny Arizona and travel by RV in the summer to escape the heat.


On our adventures I delight in visiting all kinds of shops, stores and flea markets.  My stash is filled with my fabulous finds, like the real tape measure I used to make the bow on this project. 

I hope you enjoy my Sewing Shadow Box and will drop my blog www.sandydiller.blogspot.com (My “Crafty” Life On The Internet) to see more photos and a short tutorial. 

Fantastic project Sandy and loads more inspiration for the current challenge 'On the Runway'. Thank you for joining us here at Frilly and Funkie.

If you would like to be a Guest Designer here too, you need to do join in with the Frilly and Funkie challenge. 

Saturday, April 19, 2014

Saturday Step by Step: Shabby Chic Tag Tutorial


Hello! It's an honor to be back presenting the Saturday StepxStep this week. Tomorrow is Easter and we have been busy with our preparations. Each year I make tags to to give as gifts, and one of my wonderful blog friends recently requested a tutorial for these tags. I thought it would be the perfect time to showcase my favorite Pion Fairytale of Spring line. (editor's note:  unfortunately this collection is retired and no longer available).  I adore the soft vintage images and coordinating papers. These are not just for Easter. I make them throughout the year for all occasions. Pion designs luscious papers and vintage images for every season. Linda carries several Pion Design collections at The Funkie Junkie Boutique, and as always offers 20% off MSRP!


The above photo is of my gathered supplies. I put my things in front of me to begin work and realized how pretty everything looked before I even began assembling my project. I deemed it photo worthy.

The below photo demonstrates my cutting measurements. The long card stock strip is for the base of the tag. The blue design paper is the base for the vintage image, which is framed by the smaller card stock section. These measurements can be adjusted to fit the size of your image.


The next step is to prepare your image by adhering it to the card stock frame. You can easily do this with adhesive. I added stitching to mine (very inexpertly) because I'm trying to learn to sew. I don't sew well, but rationalize that because these are shabby chic it is okay if there are imperfections. I'll call it character.


Now it's time to emboss your base. It's a small project so I chose this small, simple dot folder. It looks sweet and doesn't detract from the beautiful papers.


Once the embossing is complete I use a punch to create a pretty lace border on the bottom of the tag.


Next I use a punch to create the tag corners. You can do this with a pair of scissors or any corner tool you have in your craft room.


I use a Cropodile to punch my tag holes, but you can use any hole punch you have handy.


Now I adhere the designer paper to the tag base. For this tag I leave a little more room on the bottom of the tag than the top, allowing a bit of extra space for the ribbon embellishment.


Adhere the prepared image to the center of the coordinating Pion paper.


Adhere lace strips to both ends of the background paper. I cut the lace strips to about 3 1/4 inches each and adhere them around to the back of the tag for a cleaner look. I like to use the red line tape for this because it's the strongest and most reliable (and most invisible) I've found for holding lace.


For this tag style I like the look of really crinkly seam binding. To achieve this I prepare it a day in advance. Each tag uses about 2 yards of seam binding. I saturate the seam binding with hot water, roll it up into a tight ball inside a paper towel, and microwave it for 30 seconds, then leave it inside the paper towel overnight.


In the morning I remove the seam binding from the bundle, gently untangle it, and spritz it with cheap hairspray. The hair spray goes a long way in holding a good crinkle, as well as giving it some interesting texture. You don't need to have dozens of colors of seam binding in your craft room to get the color you want. Plain white seam binding is the most versatile. It's simple to die using re-inkers or distress stains. 


I like to bring in the eyelash yarn at this point. It's soft and feminine. I love the way it looks and feels!


I've used two lengths of ivory seam binding and one length of blue to create a triple ribbon. I tied them all together with the eyelash yarn. The middle looks a bit messy but it will be covered up, so no worries.


Adhere the ribbon to the bottom of the tag and glue a flower in the center. I had these fabric flowers in my stash, but you can use any small flower you have or even make one yourself. At this point I use my hot glue gun. It adheres chunky embellishments quickly and effectively.


Cut two more lengths of ivory seam binding, one length of colored seam binding and a double length of eyelash yarn. I thread one length of seam binding through the tag hole and tie the rest of the fibers around it. This way you end up with a nice full topper for your tag.


That's all there is to it! In just a few minutes you have a tag ready for anything your heart desires! I have several more photos of the tags I made using the Fairytale of Spring collection below, just to give you an idea of how really lovely these papers and images are.  Since the Fairytale of Spring collection is out of print now, I'd like to suggest downloading and printing your own vintage images.  I found a couple of Pinterest boards with lovely vintage Easter collections.  Check here and here.    I have also included a list of the other products used at the bottom of this post.


Thank you so much for joining us here at the Frilly and Funkie! It's been a pleasure sharing these tags with you. I wish you a joyful Easter!!

Hugs,
 

Links to products used and alternative suggestions;


Other Products Used: Cuttlebug embossing folder, Martha Stewart punch, Stampin Up corner punch, Cropadile hole punch, hot glue gun, lace strips and eyelash yarn from my stash