Thursday, December 31, 2015

Today's Guest Designer - Alison Bomber

It is time to introduce our Guest Designer for this challenge.  Please welcome Alison Bomber a.k.a. Butterfly. Alison was the winner of our Let Their Be Light challenge.


Hello all, Alison (a.k.a. butterfly) here from Words and Pictures, and I’m absolutely thrilled to be a guest here at Frilly and Funkie for Pamellia’s lovely Holiday Hues challenge. Frilly and Funkie was one of the very first challenge sites I discovered when I started this whole crafting game a few years ago, so it’s a real delight to be here.

My creativity never used to be on the visual side - I was more the words, music, books, theatre type. When I became a freelancer in Spring 2012 after eight years at the Royal Shakespeare Company as a Text and Voice Coach, it was supposed to give me more time for friends and family.

I had no idea that literally within days I would be in thrall to a whole new creative passion - stamps/inks/paints/texture/stencils... you name it, I want to play with it! There's so much to learn, discover and explore. Now I have to balance the two worlds - hence the name of my blog, Words and Pictures. So much for friends and family...

My blog is Words and Pictures - www.alisonbomber.blogspot.com
I’m also on Pinterest at www.pinterest.com/f1utterby69/

The Holiday Hues project I’ve created is a variation on one of my Christmas projects. We’re right in the middle of the 12 Days of Christmas, so I decided to stick with that as my holiday, and I’ve altered an old book in my own favourite Christmas colours... neutrals, whites and the essential holiday greenery. I hope you like it.


* * *
Pop over to Alison's blog to check out all the details of her project and if you too would like an opportunity to join us as a Guest Designer, then all you need to do is participate in our current challenge - Holiday Hues. The winner of the challenge, as chosen by the Design Team will be invited to be a Guest Designer.

Monday, December 21, 2015

Challenge Winners - 'Tis The Season

So here we are! As many of us finalise preparations for upcoming holiday celebrations, here at Frilly and Funkie it's the last challenge winners post of 2015. 

Before that, it's always hard to see any of our Design Team leave us, and as this term finishes we are sad to say 'goodbye' to the wonderful Shelly Hickox and Georgie Connelly. These two special ladies have delighted us with their incredible creations and educated us with so many amazing tutorials. They have been a joy to work with and we want to thank them both, wishing them every success as their journeys continue to move forwards.

And now for those final challenge winners of 2015, this time for the 'Tis The Season' challenge. Thank you so much to everyone who took the time to enter; we were blessed with a huge number of outstanding entries to choose from and the Design Team had a really hard task to narrow it down in the end. After much deliberation we chose our winner, #59 Julie Lavalette (Juliz Design Post).


We were all pretty much at a loss to put into words how much we loved Julie's incredible altered bird house - quite simply it's a stunning transformation!!! Congratulations Julie on being our favourite for the 'Tis The Season' challenge and winning the opportunity to be a Guest Designer here at Frilly and Funkie for a future challenge.

And now for the next three winners of our Frilly and Funkie Top 3 Badges. In numerical order they are... #19 Amanda Pink, #37 Wendy Koorevaar and #43 Katy Leitch!!! Please email Linda at thefunkiejunkie@gmail.com for the codes for the Top 3 badges so that you can display them proudly on your blog.

And finally Random.org has chosen a winner for our $25 gift certificate toThe Funkie Junkie Boutique. Our congratulations this time go to #55 Inkysplatters!


A huge thanks from the Frilly and Funkie team to everyone who took part in this challenge and congratulations again to our winners. Please email Linda at thefunkiejunkie@gmail.com for the codes for the winner's badge and to give us your email address for the Guest Designer details (Julie) for the Top 3 badges (Amanda, Wendy and Katy) and for the gift certificate details (Inkysplatters).

You'll be pleased to know we will be back on December 30th for the start of a brand new challenge (and of course almost a new year!) For now, from all of us here at Frilly and Funkie, we wish you a very Merry Christmas.

Saturday, December 12, 2015

Saturday Step by Step: 'Tis the Season Holiday Card


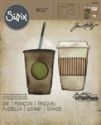
Hello everyone and welcome, Zoe here. Today I am excited to host my first Saturday Step by Step with Frilly and Funkie. To me the holidays start with those little red Starbucks cups and Tim Holtz’s fresh brewed die was just the ticket to create some fun holiday cards.


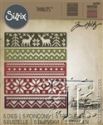
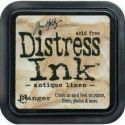
Step 1: Emboss distress watercolor cardstock with the Tim Holtz holiday knit texture fade folder. Blend with antique linen and vintage photo distress ink. Distress the edges and blend in walnut stain with a mini blending tool. Spritz with a distress sprayer and set aside to dry.


Step 2: Once dry, run a mini collage glue stick lightly around the edges of the watercolor cardstock, place a foil sheet from Ranger Ink over the top and burnish using your finger.

Step 3: Die cut distress watercolor cardstock, corrugated card, gold deco sheet and clear packaging with the Tim Holtz fresh brewed die.
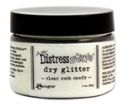

Step 4: Create a candy cane die cut straw using the festive berries distress marker. Swipe picket fence distress paint over the clear die cut cup lid and corrugated card cup holder. Punch a ribbon from silver deco sheet and die cut metallic kraft core with the holiday knit thinlits die.


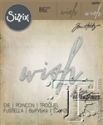
Step 5: Die cut gold and silver deco sheets with the bigz wish die. Cover the silver "wish" and ribbon with red pepper alcohol ink. Peel the back on the gold wish die cut and overlay on top of the red to create a shadow.


Step 6: Blend fired brick distress ink into the cup die cut and walnut stain distress ink into the sides of the cup. Once dry, flick picket fence distress paint onto the cup with the new distress splatter brush.


Step 7: Once dry start to assemble the cup using glossy accents. Adhere the clear top to the top of the cup and the straw underneath. Finally add the corrugated card cup holder.


Step 8: Add the deco sheet die cut circle and the bow, just attached at the center so it’s lifted slightly at each side to give depth. Finally add die cut metallic kraft core from the holiday knit thinlits set. Add a little alcohol ink to age.


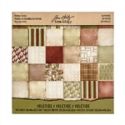
Step 9: Cut a piece of paper from the Tim Holtz Yuletide paper stash, distress the edges and adhere to your card. Adhere the embossed watercolor cardstock over the top.


Step 10: Add the "wish" die cut to the base of the card with glossy accents and the assembled cup above it.

I hope you enjoyed the step by step and have a great weekend.

Zoe


Friday, December 11, 2015

Friday Focus - Wendy Vecchi Embossing Powder and Archival inks

Hello ! It's Sue here with the last Friday Focus of 2015 and today I'm focussing on Wendy Vecchi embossing powders and Archival inks, available at The Funkie Junkie Boutique. Now if you saw the second week of the current challenge 'Tis The Season' on Wednesday you will already have seen this project, so today I'm sharing how it all came together.


I started by cutting 5 arches using the Tim Holtz die then I got some colour down on all of the pieces using Distress Inks.


I then used the Wendy Vecchi Script background stamp and with Leaf Green and Red Geranium Archival inks and stamped over all of the pieces and did some spritz and flick.


I used Fern Green Archival ink through the Tim Holtz snowflake stencil. For the holly I used the Wendy Vecchi stencil and pressed a Versamark ink pad over it and then sprinkled Fern Green embossing powder over the top and heated it.


I wanted to add a little sparkle to the panels so I used the snowflake stencil again but this time with Wendy Vecchi's gold embossing paste. You can just about see the shine on the above photo. I added some splatters using a white Sharpie pen and flooding the nib then flicking it at all ofthe pieces.


For the berries on the large holly leaves I grabbed some of the really cute sleigh bells that Linda sells in The Funkie Junkie Boutique, pressed them on to the Versamark pad and rolled them in Red Geranium embossing powder and heated them.


I die cut some greenery using the Tim Holtz Thinlits die and sprinkled it with Fern Green embossing powder before glueing it into place.


I stamped the sentiments and added some white dots using a Sharpie pen and also did some stamping over everything using the Wendy Vecchi Basket Weave stamp with Fern Green Archival ink.


The panels were all stuck to die cut thick cardboard that is joined together with seam binding.

I hope you've enjoyed today's project and search out those Wendy Vecchi items from The Funkie Junkie Boutique. Make sure you return tomorrow for the final Saturday Step by Step of the year with the lovely Zoe.

Sue x


Wednesday, December 9, 2015

'Tis the Season!

Hello and welcome! It's Nancy here, and I'm excited to be hosting our last Frilly and Funkie challenge before we break for the festive season.

With Christmas quickly approaching I've chosen the theme of: 'Tis the Season!' I'm keeping it super simple. You may create any type of vintage or shabby chic holiday themed project - whatever winter holiday you celebrate!

At the end of the challenge the team will choose their top four picks. Our first place winner will be invited to join us in a Guest DT spot here at Frilly and Funkie. Three additional talented participants will receive badges to display on their blogs. Everyone who enters and adheres to the challenge guidelines will be entered into a drawing to win a $25 spending spree at The Funkie Junkie Boutique!

The guidelines for entering are simple; create a new vintage or shabby chic project following the challenge theme, link it below to your post (not just your blog) and include a link back to this challenge in your post. You can combine our challenge with up to 10 challenges (including this one) to be in with a chance of winning. Make sure you follow the guidelines, as unfortunately we have had to eliminate entrants from the prize draws in the past when they have entered too many other challenges. If you are entering through a public forum please use keyword F&F. Also, please be sure to turn off your Word Verification so our design team can leave comments on your blogs.

The Funkie team is here with some inspiration for you (click on each photo for a closer look):

Shelly Hickox - Stamptramp

Sue Carrington - Stamping Sue Style 

Jenny Marples - Pushing The Right Buttons

Zoe Hillman - iGirlZoe


*******************************************
WEEK ONE

The Frilly team is here with our first week's inspiration (click on each photo for a closer look):


Cec Wintonyk - CW Card Creations


Nancy Dynes - Tattered Treasures

Y'all are the ones who make our challenges truly amazing. We love your projects and can't wait to see what you're putting together in your craft rooms. We hope you'll take some time to share them with us here!
  
Remember to check back with us on Friday for our final Friday Focus of the year with the lovely Sue Carrington. May this day and season find you surrounded by peace, love, and many crafty diversions!

Hugs,