Showing posts with label Filigree metals. Show all posts

Friday, October 13, 2017

Friday Focus - 15% off Filigree Metals and Charms

Happy Friday folks!  Autumn here with the latest edition of Friday Focus. For the next two weeks we're focusing on our exquisite collection of Filigree Metals and Charms. The entire range will be on sale for an additional 15% off. You can find them HERE in the Funkie Junkie Boutique.


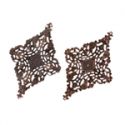
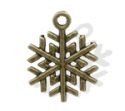
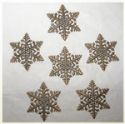
I thought it would be fun to show you ways to alter your filigree embellishments.  I worked out this Christmas card design and decided to cut some of the Snowflake Filigree Metals in half to balance my design and stretch my stash.  You can use your Tim Holtz Tonic Studios Snips or a pair of jewelry wire cutters to do this.


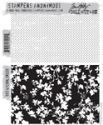
My first thought was to allow the metal to show through for a very rustic look.  I accomplished this by giving the piece a light coat of Picket Fence Distress Paint, then gluing on Clear Rock Candy Distress Glitter.  I absolutely loved this result and am sharing to give you alternate ideas.  In the end I embossed over my glittered pieces because I didn't have enough contrast with my blue Postage Stamp Frame panel.


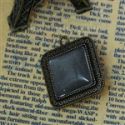
To emboss your metals, simply rub the surface with a Versamark pad and then apply embossing powder.  The result is a beautiful faux enamel finish.


You can see how the glitter showed through in the larger embossed snowflakes.  I was really pleased with this added texture.  These pieces are quite dimensional too, much more so than a paper die cut.


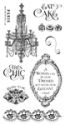
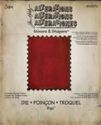
I repeated the glitter effect on my Vintage Tidings Peace die.  I had to mount it onto stained chipboard to give it the heft of the embossed snowflakes.


The embossed charm is such a fun touch.  I attached it to silver cord and adhered to my loopy bow.  I'm imagining embossing other filigree metals and charms in a variety of colors, such as the new range by Wendy Vecchi.  


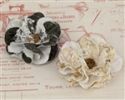
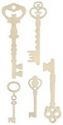
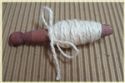
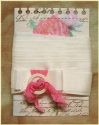
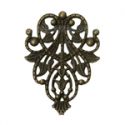
I thought I would throw in a couple of extra projects in which I've used the beautiful filigree charms.  These have not been altered.  They are truly so beautiful on their own!  This handmade journal features the beautiful 4 Piece Antiqued Bronze Filigree Pieces.


I tucked it in my layers of embellishments at the top and bottom.  See the color variation that comes naturally with the metal?


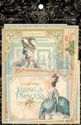
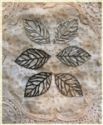
My Wild and Free Mini Album Tutorial features our 6 Piece Bronze Leaf Embellishments, which worked beautifully with the Prima paper collection.  It reminded me of the feathers printed on several of the designs.


I hope you've enjoyed this spotlight into our beautiful Filigree Metals and Charms collection and will take a moment to visit the Funkie Junkie Boutique and examine the range in full.  Thanks for visiting this Friday, Autumn


Saturday, October 24, 2015

Saturday Step By Step - Shabby Chic Art Journal Page

Hi Peeps

Georgie here with a Saturday Step By Step for you!

I've been loving playing in art journals recently so I thought I do a 'how to' on how I do a layout for my pages, and in particular, this shabby chic page:


So, without further ado...

(Please excuse my lighting, for the images below, where I'm set up to get messy has quite poor lighting)

Step 1
Using heavy watercolour paper, washi tape the edges to secure the paper as it will want to warp with all the moisture. Then apply some random stamping, this helps to create depth.


Step 2
Using a stencil apply some texture to the page.


Step 3
Apply splashes and drops of colour, then knock back with a white spray.


Step 4
Cut some strips of paper and some lace, and add to the page. Here I use Glossy Accents, this is the one glue that has never failed me.


Step 5
Punch out some leafy texture, I used the Laurel Leaf by Tim Holtz, then embossed with white embossing powder.


Step 5
Make a bow, then work out it's placement, with a flower but don't glue down just yet.


Step 6
Grab some other embellishments, anything can be used that you can get your hands on. Here I used a wooden element and some metal pieces. Give this a chance to dry a little before going over with a coat of gesso.


Step 7
Whilst waiting for the paint to dry, I created the charm. I gave this a few coats of gesso and fussy cut a Maja Design butterfly to go inside.


Step 8

Spray some colour again, using the same ones as before, then knock back with gesso and white spray again.


Step 9
After all the layer have dried add all the pieces as laid out above, add the leaves and then splatter some of the sprays to tie it all in. Then carefully remove the washi tape. Voila, ready to be stuck into your journal.

Here are some close ups in much nicer natural light:


Although the washi tape is quite garish, as soon as you peel it away it changes the feel of the page.


I added some Stickles to the centre of the flower and then added a button. 


Here you can see the beautiful shadows and texture of the stencil, creating some added interest to the page.


The metal embellishment just tucked underneath.


Here you can see some of that initial stamping, so even though it looks like you're completely covering it up, you'll be surprised at how little bits peek through.


The butterfly charm peering through and giving the eye something else to focus on other than the flower.


Finishing up with another view of the page. A list of products is included below, hope you enjoyed this post today and thank you so much for stopping by.

Big hugs
Georgie
xxx