
I wanted to create a background that was the perfect complement to my sentiments, quotes and words. The "Back to Nature" challenge hosted by Sara Emily had me foraging in my yard for flowers to press.

(click on each image for a closer look)
I am going to share the results of my flower pressing and how the addition of the words makes all the difference!
Many times when I am working through a design the sentiment or words or quotes are the design element that pulls together the art.
When pressing the flowers you end up with a beautiful soft background that you want to highlight but you also want to add something visual that pops.
On my card I ended up using the Quote Chips because they have dimension to add texture and they have few word with a larger font to really pop on the front of the card.
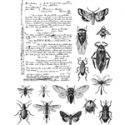
I started with the a scripted background (Stampers Anonymous - Entomology) to create a soft effect. I then pulled my dried lavender and the children and played around with a design.

I laid out the design on the paper and then applied foam tape around the edges. I then attached acetate to the frame and laid the frame with acetate onto the foam tape. I accented the sentiment with the butterfly to highlight the quote!
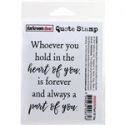
Many times when creating a sympathy card I like to have a soft background and a beautiful sentiment as the focal point. The Darkroom Door Part of You sentiment is one of those that I love to use on a sympathy card.
It worked beautifully as the focal point with the soft imprints of the flowers after they were pressed.

I started with the pressed flower image and trying to place where to put the sentiment to draw the eye to the sentiment and the flowers. I stamped the sentiment onto a scrap piece of vellum and moved it around the page until I liked the placement.
Then I inked up the sentiment and stamped it in coordinating brown ink.
I then mixed up some distress oxide inks to emulate the pretty bluish purple color and added some splattering of inks.
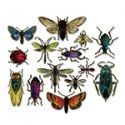
I finished with a few more touches of nature by stamping the bees and coloring them with a ranger watercolor marker (Wild Honey).
I used the reverse side of the pressed flower and created a second card:

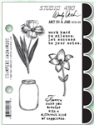
When looking for sentiments that fit with my nature theme I found the lovely sentiment from Wendy
Vecchi's Art in the Jar set.

I used the Wendy Vecchi Art in the Jar sentiment along with some more of my lavender pressed images.
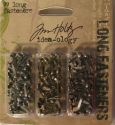
I have also used the Tim Holtz Idea-Ology story stick tied to an index clip and attached with a fastener. The story sticks give you the chance to add a word or a number for a fun detail that enhances the design.

First thing I did was go flower gathering:

I picked a variety of flowers fresh from the garden. I was soon to find out that some flowers work better than others in the pursuit of the pressed flower.
The lavender was one of my first flowers to play with and actually worked really well in the process. Because it has small petals and holds up well when drying it gives a great image. As a side benefit it also is very fragrant when crushed so my craft room smells delightful!

I am going to take you through the process of how I experimented and give you a few tips/hints. This is all about trying it out and enjoying the process!
Steps:
1. I started with laying the flowers in a pattern I wanted to achieve for my background on a sheet of cardstock. I used regular cardstock with my projects but would recommend using a watercolor or mixed media paper because of the moisture from the flowers.
2. Lay a second sheet of cardstock over the flowers. (I used a folded piece of cardstock only because I had some already folded.)
Helpful Hint: Add wax paper or acetate as part of your outer layer to keep the extra juices from staining your plates. (I will talk about drying out the flowers at the end which will help with this as well)

3. Place the sheets of cardstock between the two plastic panels and run through with the all tabs and the base.
Variation: You can use Tab 1 and one plate and an impression mat. This will give you a letterpress effect with the lavender imprint on the outside.
4. Remove the plates and look at your result:

5. Let the flowers dry completely and scrape off excess flowers.
Variation/Helpful Hint: With the lavender because of it's petal and stems I was able to wait 4+ hours and still press them. Waiting with the lavender worked better because the moisture had decreased and they also left me with pressed / dried lavender that still gave me an impression and the flowers stayed together to give me a pressed dry flower. With this sample I didn't let them dry and you can see it disintegrated and stuck to the paper.
I ended up using my extra scraps of dried up pieces for other projects. One of them I am sharing on Wednesday, so you will have to come back to see what the Funkie side of the Design Team created!
I created a variety of backgrounds using various flowers:

Coreopsis(tickseed), Petunias, Roses, ConeFlowers, Phlox and Geraniums all were part of my experimentation with pressing of flowers.
Tip: The larger the petals and stamen the more moist and messier the imprint.

The smaller petals and stamen left more delicate impressions and less moisture:

I found with the lavender because of its structure it actually could be left out and dried without shriveling up.

I also found that I could run the lavender through a second time and end up with a second imprint.


I took a few and put them in the microwave on a paper towel and heated them for 30 seconds on half power. This dried them out and then I ran them through the big shot. You can see the difference in the images.
I hope you enjoyed the beautiful sentiments, words and quotes!
You still have time to join in on the "Back to Nature" Challenge!
Suzz
PRODUCTS FROM THE FUNKIE JUNKIE BOUTIQUE:
 |  |  |  |  |
 |  |  |  |  |
 |  |  |  |  |
 |  |  |  |  |
 |  |  |  |  |
 |  |  |  |  |
 |  |

Oh WOW Suzz! I've learned so much from this tutorial and love how you've used the sentiments and quotes perfectly to compliment those gorgeous pressed flower prints. Bookmarking this one for sure! Thanks for sharing xx
ReplyDeleteI love that you used your pressed flowers both to make an impression and as embellishments. So clever and oh so beautiful! I always learn so much from your posts! Thank you!
ReplyDeleteThis is amazing. Thank you so much for sharing how we can preserve nature's beauty on paper. This is a true eye opener! Amazing, absolutely amazing.
ReplyDeleteAWESOME and amazing, I followed your tips using geraniums and then took my grandaughters to vegetable farm and pressed in browns, we picked flowers in yellows and oranges. Those all pressed out as browns, so they added touches of color to them in their projects. I will be posting something soon on my blog https://inkylageney.wordpress.com/
ReplyDeleteGlad you enjoyed this with your granddaughters! Can't wait to see your results!
DeleteSuzz, I'm sorry to be late, but am I ever thankful I was able to get over to see/read this fantastic tutorial! I've never seen this done before--what a genius idea! And your process has yielded some amazing cards with lovely soft colors and wonderful designs and sentiments. Thank you for your hard work and inspiration! Hugs!
ReplyDeleteYour content you put in your blog is blog amazing. To read more short quotes click here
ReplyDelete