Thursday, May 10, 2012

Alter it !

Hello Frilly and Funkie friends.  We're back with Week 2 of our Alter It! challenge.  This week, our Funkie designers have their altered projects to share.  We're sure you will want to stop by their individual blogs to read all about how they have created their wonderful projects.

There is still an entire week to go for this challenge - plenty of time to alter something and link it up to share with us - and maybe win a prize.  The design team's pick will get the Funkie Favorite badge and there will be one random winner receiving a $15 gift certificate to shop in the Funkie Junkie Boutique.

So without further ado, here are the Funkie Design Team's altered projects:


Marjie Kemper - She Who Stamps and Scraps

Anita Houston - The Artful Maven Haven


Week One - Frilly Design Team's Altered Projects

Hello to all you Frilly and Funkie fans ! What amazing talent there is out there ! We have so enjoyed visiting you and seeing your projects for the 'RePurpose to UpCycle' challenge. Make sure you check back on Monday to see who the winners are.

So, onto the challenge for the next 2 weeks. It's Sue here and I have fallen in love with altering different, everyday objects. We've all got ordinary, everyday items in our homes that would benefit from some love and attention, right ?

For this challenge we would like you to take an ordinary item, doesn't matter whether it's been bought especially to alter or if you've got something sitting on a shelf that you've had your eye on just waiting for the right moment.Using your craft products, transform it into a piece of art,  let your imagination run wild ! Alter it!

This week the Frillies have created some fabulous projects to give you some inspiration and next week the Funkies will show you some more. Remember you can make your project in either style of the Frillies or the Funkies at any time over the next 2 weeks. This challenge theme will run through Tuesday 15 May. There will be the usual 2 winners, one chosen randomly will receive a $15 gift certificate to spend in the Funkie Junkie Boutique and the other will be chosen by the DT and receive a winner's badge to display on their blog.


Sue Carrington - Stamping Sue Style 

Teresa Kline - Paperie Blooms

Tammy Roberts - Paperie Sweetness

Linda Coughlin - The Funkie Junkie


Monday, May 7, 2012

RePurpose to UpCycle Winner

Good Monday morning to you, Frilly and Funkie friends!  The design team has all weighed in now on the entries for the RePurpose to UpCycle challenge that closed last week and we have a winner.  Our Funkie Favorite is Kate from The Scrap Yard with this sensational altered shadow box.
Congratulations Kate on your wonderful upcycled project.  You did a stunning job altering that mini truck box!  We would love to have you display the Funkie Favorite winner's badge on your blog.  Please email Linda at thefunkiejunkie@gmail.com to get your badge code.  

And there is another winner too!  This time Random.Org has selected #8 Suzanne B. as the winner of the $15 gift certificate for the Funkie Junkie Boutique!  Suzanne, please email me at thefunkiejunkie@gmail.com to pick up your coupon code for shopping with me.  
Congrautlations to both winners! And a huge thank you to everyone who played along with us in our challenge, and also to those who visited us and left encouraging comments. We are so grateful to you all for your visits!

Sunday, May 6, 2012

Sunday Share

Welcome back to Sunday Share, our weekly linky party where you can share anything you have made with items from The Funkie Junkie Boutique on Zibbet or on Etsy.  We had six talented crafters who shared their lovely work with us this past week.  Thank you so much to all who joined in the fun with our Sunday Share this week.

One lucky participant, Kimberly from ArtJoyStuff, was selected by the Random.Org generator as our winner this week and she wins a 25% discount coupon to The Funkie Junkie Boutique.  Congratulations Kimberly.  I know you have shopped with me in the past and now you'll be able to shop again with a 25% discount.  Please email me at the funkiejunkie@gmail.com to get your coupon code.
Look at this totally yummy piece of eye candy Kimberly has shared with us using products from The Funkie Junkie Boutique.  Kimberly creates these beautiful pieces out of vintage cabinet cards.  You can find her blog here and her Etsy shops here and here.  
What is Sunday Share all about? Since this blog is sponsored by The Funkie Junkie Boutique, we want to have a place where our customers can share what they have made with items from the boutique. It's a linky party and you can share any creation here that has not been shared on this blog. It does not need to be a new project but you cannot share the same thing here more than once. If you need some guidance in knowing how to share your work here, read this post and let us know if you need further assistance.
Each Sunday Share will run from 5:00 a.m. ET until midnight on Saturday night. We will do a random drawing of all the entires that week and the winner will receive a coupon to shop with a 25% discount at the shop. This is our little way of rewarding those who shop at The Funkie Junkie Boutique. What are you waiting for. I know lots of you have already purchased items from The Funkie Junkie Boutique. Link them up here - it's a great opportunity to share your work with us and you just might shop next time for 25% OFF!
Thanks again to all who played in Sunday Share this past week.

Saturday, May 5, 2012

Saturday StepXStep: Rosettes with Altered Edges


Marjie Kemper here, hosting today's StepXStep.  I played with my Sizzix Rosette paper dies and varied the flowers by altering their edges before assembling.   I did this with the two different sized Sizzix Rosette dies (three flower sizes), border punches, and an old pair of deckle edge scissors.  First I cut some scraps of patterned paper with the rosette dies:


Then following a tip Tim Holtz shares in the Compendium of Curiosities II, I flipped them over and added strips of tissue tape to reinforce them:

I took the smallest ones "as is" and folded them accordion-style, then inked the edges and the raised folds with black soot distress ink:


I cut the remainder with different border punches and scissors:


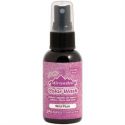
Here they are assembled.  All the pieces have been edged with the Black Soot Distress Ink before assembling.  I've added Dyan Reaveley's Ink Sprays to some (Pink Bubblegum and Vibrant Turquoise) and Perfect Pearls Biscotti to others, but I left most plain.


This is a great way to use up your paper scraps, and put a bit of a personalized spin on your embellishments.  The sprays really liven up the papers, too.  One other tip I'll share is they are more sturdy if you glue a second circle (or even just a scrap of paper) to the back.

Thanks for visiting today!  Remember we also have a Sunday Share feature, so tune in tomorrow and feel free to add your creations to the linking tool.  Someone will receive a discount code for 25% off merchandise at The Funkie Junkie Boutique just for linking a project using at least one product purchased in the shop.

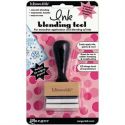
These are the products I used for the StepXStep:

Friday, May 4, 2012

FRIDAY FOCUS - Distress Markers

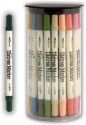
Woohoo! It's Friday Frilly & Funkie's! Anita Houston here, and it's my turn to host the Friday Focus. I decided that since so many of you are just now receiving your fantastic Distress Markers, that I would show you two quick techniques using them, that I learned from Tim. For those of you who haven't taken the leap to purchase them yet, consider yourself lucky! You can pick them up, as the Friday Focus item for 15% off the already discounted price of $89.95, at the Funkie Junkie Boutique. There is no price anywhere lower than that!
NOTE:  Our supply of distress markers has sold out - not a surprise at that amazing sale price!  You can still purchase them at the sale price of $76.46 as a PRE-ORDER.  Just go to the store and purchase them.  They will be ordered for you and you will receive them first come/first served.  

#1 Stamping With Distress Markers:
Color directly onto the stamp using your Distress Markers. The markers will not contaminate each other, but if you see a slight color change on the nib, then all you have to do is swip the tip on your craft sheet a few times to clean it off.
Once your stamp is covered, give it a good huff of breath and stamp onto your paper. Specialty Stamping paper or manila work really well. DO NOT clean your stamp afterwards.
There is still lots of ink left on the stamp. Lightly mist water in the air and catch it on your stamp (like you spray perfume). You will see the image refreshen. Stamp it on to your project. You can do this until your stamp is clean.
I was able to stamp this four times with the same ink. WOW!!! That not only saves time but money as well, and it gives a very 3D look to your image, and a soft watercolor look as well. Dry your image with a heat tool to set it in well.
Distress Marker Ink also acts as a resist (coolest part). You can ink over this in Distress Ink and your Marker image is unscathed. You can also color on top of the Distress Ink without contamination. I colored in a sun...see below.
I further colored in the berries with Picket Fence Distress Marker. It magically appears after you color it in, to a brilliant white.
#2 Watercoloring With Distress Markers:
Stamp an image using Archival Ink onto watercolor paper, so there is no smearing when you use water.
Choose various colors in the same family, and color in only the inside edges of your image, leaving the rest blank. Use a Fine Tip Water Brush to lift your color and blend it to a desired spot.
Continue blending until your desired look is achieved.
For the background, the process is the same, except you apply color to the outer borders of your image. Use a Broad Tip Water Brush to grab and blend the color.
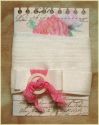
I mounted this onto a manila tag that was color washed with Adirondack Color Wash in Wild Plum, and then inked around the edges with Broken China Distress Ink. The seam binding and flowers were also color washed.
Supplies: