Friday, March 14, 2014

Friday Focus: Maja Papers!


Hello dear friends! The end of the week has arrived, bringing with it the Frilly and Funkie Friday Focus. I'm incredibly excited to be presenting this week because the focus is on one of my favorite products, Maja Design Papers. Remember, this also means Linda will be offering a 15% discount on all Maja Design Papers this week at The Funkie Junkie Boutique. That's enough to have me jumping for joy!

I thought long and hard about how I could introduce these papers to those of you who might not be familiar with them. I decided on a tutorial for these layered paper flowers. I make these often because of their simplicity and romantic, shabby appeal. I also enjoy the freedom of choosing colors and patterns to coordinate specifically with my project.

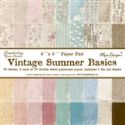
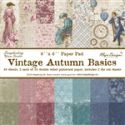
I crafted two sets of flowers. One showcases Vintage Autumn Basics, the other Vintage Summer Basics. This way you can compare the two lines and their amazing scope of color and designs.
   

The above flowers are from the Vintage Autumn Basics collection, and the flowers below are from Vintage Summer Basics.


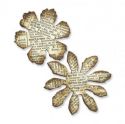
The first step is to die cut or punch 6 five petal flowers. I used a Spellbinders die because the size was right for my project, but you can use anything you like. Cut 1 large petal, 3 medium petals, and two small petals.    

The next step is to lightly moisten your small petals with water. Shape one of them as pictured below to for the base of your center bud. The second small petal should just be squished together. It is going to become the center of the bud. For petal shaping I use a tool kit and shaping mat from Susan's Garden. You can find similar tools and mats in other brands. You can even use a mouse pad!


Now that your bud is shaped it's time to to move on to your larger petals. Moisten them all lightly with water then gently scrunch and twist them into something that resembles the photo below. It seems like this would tear them apart, but it doesn't. Maja Design papers are strong.


After you have scrunched and twisted you very gently un-scrunch and un-twist them. This is where you want to be quite careful. They will be all crumpled and twisty. That's good. Leave them that way, place them on a baking sheet and put them in the oven at 225 degrees Fahrenheit for a few minutes to dry them out. Just a few minutes is all it takes, and remember not to walk away from your oven while baking paper. The photo below is of the baked petals. You may be tempted to skip the baking, but it really cements the shape of the crinkled petal and adds even more dimension and texture.


The next step is to take the two small petals and glue them together to form your center bud. You can work with the middle petal, put some glue in the center and scrunch it into a bud like shape before adhering it inside the small outer petal.


Now adhere the 3 medium petals together, staggering the petals and alternating the patterned side with the solid side as demonstrated below.


At this point you are ready to glue in your center bud. It will appear similar to the photo below:


The final step is to adhere the large petal to the bottom. Voila! You now have a finished bloom in colors that will match your project perfectly!


They also make beautiful gifts. Mine are already packaged and ready to ship to a crafty friend (along with a couple of pads of matching Maja Design papers!)


Thank you so much for stopping in today and checking out the Friday Focus. Don't forget, Linda will be offering a 15% discount on all Maja Design Papers this week at The Funkie Junkie Boutique.

It has been a pleasure to share my love of these papers with you. I hope this day brings you joy and lots of crafty inspiration! 
Hugs,
Nancy

Thursday, March 13, 2014

Welcome to today's Guest Designer, Julie !

Today we're welcoming Julie of Juliz Design Post, as our Guest Designer. Julie was the DT's chosen winner of the 'Bloomin' Marvellous' challenge. So, let's hear what Julie has to say about herself and also what project she's sharing.


Hi, I’m Julie a.k.a Juliz Design Post from Scotland, UK. I am absolutely thrilled to be showcasing my very first ever GD spot and can’t think of a better way than with Frilly and Funkie. I started blogging a mere 3 months ago, with help from my Husband Chris, who takes all my photos and updates my blog. As a child, my dad worked in the Merchant Navy and we would be lucky enough to go on the Ship for trips with him. Armed with our school books and very little toys, we had to find things to amuse ourselves. I can remember my sister and I being given a pile of A5 card that previously had Menu’s typed on them. This is my earliest memory of totally changing a piece of card, as we crafted 3D little houses and cars. It amused us for hours. Years passed, I dabbled in knitting, sewing, salt dough and dolls house craft, but my love of paper craft was reignited when Chris and I decided to get married 8 years ago and I needed Wedding Invitations. I love all things Vintage and Fussy crafting, taking sometimes a couple of weeks to finish one project. I find paper crafting to be one of the best medicines in life.


I was delighted to be told the challenge this fortnight was to be Die-cuts... but a neglected one. I did panic initially, as I use all my dies regularly, but I soon realised after rummaging through them I had this one from Cheery Lynn, that was sadly neglected. I cut it out and studied it for some time thinking how I could give it the WOW Factor and worthy of being used for my GD Spot. It took me almost to the following day for my project to be planned in my head. I wanted this to look like a Pergola in a Stately Home, with a Shabby Vintage feel and have light reflecting properties, with lots of detail to look at.


I cut out my die 4 times, edged with distress ink, mounting onto the reverse white-washed coffee sticks, this would make my item more rigid when it came to gluing. I layered parchment paper on to the frame so it would give a shadow effect the fretwork panels. The Bride and Groom were both edged with distress ink to create a shadow effect too, and I layered a piece of lace ribbon over her. I modelled her veil on the style of my mums and added a little metal wire covered in Flower Soft for her Headdress. I also scattered Flower Soft down her veil and onto the flooring to give the effect of confetti and fresh flowers.


The flooring was again made out of coffee sticks, cut, gesso’d and edges distressed and a little pen mark to resemble a nail in the floor and laid in a diagonal pattern. I mounted it onto a box, I made using my Scorpal Board, distressing edges and layering lace and ribbon flowers onto it. My steps were etched with the same die cut I used on my plant pots and rubbed over with distress to give a Shabby feel.


My trellised roof was made with sticks being white washed. I distress stained paper and stamped small leaves on to give texture and shade before die cutting the pieces, layering up and adding Flower Soft.

My trees were made from wooden beads glued onto garden plant sticks. I wrapped some twine around the sticks coated with Gesso and placed into a small wooden pot I had painted, adorned with a die cut and distressed. Topped with a little glue to which I poured on some sand and made a little bow to decorate. Finally. I placed lots of pearls onto it. My favourite embellishment.

Thanks for having me at Frilly and Funkie. I hope I have inspired you all to re-look at any of your neglected dies and I’d love if you pop over to my blog for many more photos and details on this project.
Julie x

I'm sure you will all agree Julie's project is absolutely stunning! A truly beautiful work of art, and what amazing inspiration to dig out your dies and see what you can make for the current challenge, 'Neglected Dies'.

Saturday, March 8, 2014

Saturday Step by Step - Something Scrappy

Hi everyone. Jenny here hosting another Saturday Step by Step for Frilly and Funkie. I recently purchased one of the Sizzix quilting dies to help tackle an ever growing mound of scraps that are left over from finished projects or are abandoned in despair. I'll show you the finished card before taking you through how I made it.


I started by cutting up those scraps and an abandoned tag, keeping the colours to pinks, greens and whites. There were paper offcuts, painted card, clear embossed paper and card that had inks and stamping all over. Whilst I used a die you could just as easily cut them into squares or rectangles.


The pieces were then reassembled and glued down in a random pattern onto a square of card.


A thin coat of Picket Fence Distress Paint, dried, then very light misted with coordinating ink sprays created a more uniform look. As the paint and inks dried I wiped over the surface gently with a cloth to ensure the embossing and some of the deeper colours still showed through.


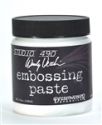
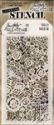
White embossing paste was applied to the dry surface through a stencil, covering the whole card.


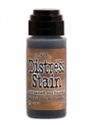
It is important to let the paste dry naturally as it gives it time to soak up some of the ink from the papers below. To give a more aged appearance Brushed Corduroy Distress Stain was dabbed on the edges. If you want to add tiny drips of other inks you can do at this stage (I added a little more of the green).


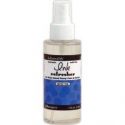
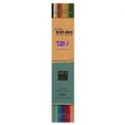
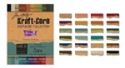
While this is drying I created some 'suede' flowers. The kraft side of some Kraft-Core card was spritzed liberally with Ink Refresher and worked into the card with my fingers until it became soft and pliable.


As the Kraft-Core dried I scrunched it up to form wrinkles so that the colour side could be sanded lightly. The same techniques were used on plain parcel paper (you get plenty of this when ordering from The Funkie Junkie Boutique). Flowers were die cut from the Kraft-Core and parcel paper and layered together.


An important tip from Tim Holtz here - after die cutting delicate shapes like leaves from Kraft-Core card sand them before you remove them from the card to prevent accidentally tearing the shapes.


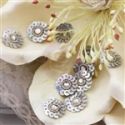
With all the elements coming together it was time to start putting the card together. I used the offcuts from the Kraft-Core and parcel paper to add a base strip for the flowers, hand sewing through some of this. A strip of die cut lace border was stained and a metal embellishment was cut in half before being glued into place. I used some silver Prima flower centres for the suede flowers, adding Spun Sugar Distress Paint and drops of Gold Mixative Alcohol Ink to them.


And here are some close ups of the finished card. I tucked a little stained seam binding in between the flowers to add to the vintage look. The texture and colour from the scraps really gives the stencilled background an added depth and dimension.


I hope this inspires you to reach for those scraps and stencils to create your own new backgrounds. And you still have time to enter our current challenge, 'Stencils and texure' as it runs through to March 11th.

Have a great weekend and get time to be creative.
Jenny xxx