Hi all! Hope your weekend is off to a great start. It's Shelly with you today, sharing my first StepxStep for Frilly and Funkie! For my project, I've combined some of my favorite techniques and dies to create a grungy vintage travel journal. It's nice and compact so you can tuck it in a bag or pocket to jot down your travel notes and add ephemera and photos as well. Let's get started!
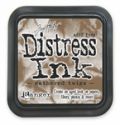
Begin by cutting three pieces of medium weight chipboard in the following sizes: 2 panels at 4" x 6" and 1 panel at 1 1/4" x 6". Stamp the front and back of the larger pieces with Tim Holz's Linen stamp using Gathered Twigs Distress ink. Round the outer edges slightly and ink all outer edges with the same color. Using an idea-ology Large Ring Binder, mark the location for the holes in the center panel and punch.
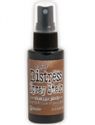
Next, we'll make the spine covering. Cut two pieces of Natural Sticky Back Canvas - one measuring 3" x 5" and one measuring 3" x 11". Mist with Vintage Photo Distress Spray Stain. Set aside to dry.
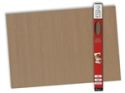
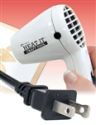
To make the front panel for the book, cut a piece of Ranger Manila Cardstock to 3 1/2" x 5 7/8". Spritz a non-stick craft sheet with Vintage Photo, Peeled Paint, and Tumbled Glass Distress Spray Stains. Lay the paper into the stains and lift off. Dry with a heat tool and continue pressing into the ink until you get the desired look.
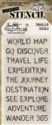
When the stained panel is dry, cover with the Traveler stencil and spray with Vintage Photo Distress Spray Stain. Let dry.
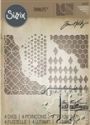
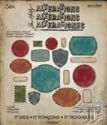
Using the Sizzix Mixed Media die, cut the bottom right corner as shown. Adhere panel to one of the book covers.
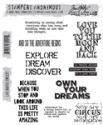
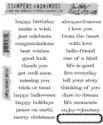
Stamp the wanderlust definition from the Life Quotes stamp set onto manila cardstock using Jet Black Archival ink. Cut out with label die. Set aside.
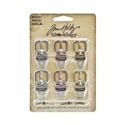
To create the belt for the book, cut a strip of Grungepaper to 1/2" x 11". Ink both sides with Gathered Twigs Distress ink. Using your finger, apply a coating of Glossy Accents to the front. When dry, attach an idea-ology Buckle and punch holes.
Finally we can start assembling our book! With the panels lined up as shown (making sure the cover panel is in the correct position), remove the backing and adhere the short piece of stained canvas, connecting the covers. Punch holes and attach ring binder.
Carefully line up the longer piece of canvas, starting just below the ring binder (to make placement easier, peel back just a bit of the backing at a time). Flip the book over and adhere the canvas to the outside spine/cover. Trim to fit and fold the top into place as shown above. Using your fingers, press down along the edges and grooves in canvas to make sure it's completely adhered to the chipboard.
To create pages for the book, cut lightweight white cardstock to 4 1/2" x 5 1/2". Spray randomly with Vintage Photo Distress Stain Spray and saturate with water. This will give the pages a worn, handmade look. Let the pages dry completely, punch holes and add to journal.
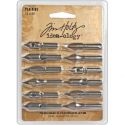
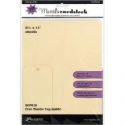
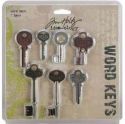
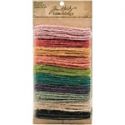
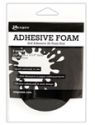
To finish the book, adhere the stamped panel with adhesive foam and embellish with an idea-ology Pen Nib and Philosophy Tag. Tie a length of Jute String around the front cover and add a Word Key. Finally, wrap the journal with your handmade belt and you're done!
I love how worn and rustic this journal looks - you'd never know it was brand new! I have two upcoming trips and I can't wait to fill my book with journaling and photos. I hope you're inspired to make one of your own!
Thanks so much for stopping by today - have a fantastic, creative weekend!
Shelly
Begin by cutting three pieces of medium weight chipboard in the following sizes: 2 panels at 4" x 6" and 1 panel at 1 1/4" x 6". Stamp the front and back of the larger pieces with Tim Holz's Linen stamp using Gathered Twigs Distress ink. Round the outer edges slightly and ink all outer edges with the same color. Using an idea-ology Large Ring Binder, mark the location for the holes in the center panel and punch.
Next, we'll make the spine covering. Cut two pieces of Natural Sticky Back Canvas - one measuring 3" x 5" and one measuring 3" x 11". Mist with Vintage Photo Distress Spray Stain. Set aside to dry.
To make the front panel for the book, cut a piece of Ranger Manila Cardstock to 3 1/2" x 5 7/8". Spritz a non-stick craft sheet with Vintage Photo, Peeled Paint, and Tumbled Glass Distress Spray Stains. Lay the paper into the stains and lift off. Dry with a heat tool and continue pressing into the ink until you get the desired look.
When the stained panel is dry, cover with the Traveler stencil and spray with Vintage Photo Distress Spray Stain. Let dry.
Using the Sizzix Mixed Media die, cut the bottom right corner as shown. Adhere panel to one of the book covers.
Stamp the wanderlust definition from the Life Quotes stamp set onto manila cardstock using Jet Black Archival ink. Cut out with label die. Set aside.
To create the belt for the book, cut a strip of Grungepaper to 1/2" x 11". Ink both sides with Gathered Twigs Distress ink. Using your finger, apply a coating of Glossy Accents to the front. When dry, attach an idea-ology Buckle and punch holes.
Finally we can start assembling our book! With the panels lined up as shown (making sure the cover panel is in the correct position), remove the backing and adhere the short piece of stained canvas, connecting the covers. Punch holes and attach ring binder.
Carefully line up the longer piece of canvas, starting just below the ring binder (to make placement easier, peel back just a bit of the backing at a time). Flip the book over and adhere the canvas to the outside spine/cover. Trim to fit and fold the top into place as shown above. Using your fingers, press down along the edges and grooves in canvas to make sure it's completely adhered to the chipboard.
To create pages for the book, cut lightweight white cardstock to 4 1/2" x 5 1/2". Spray randomly with Vintage Photo Distress Stain Spray and saturate with water. This will give the pages a worn, handmade look. Let the pages dry completely, punch holes and add to journal.
To finish the book, adhere the stamped panel with adhesive foam and embellish with an idea-ology Pen Nib and Philosophy Tag. Tie a length of Jute String around the front cover and add a Word Key. Finally, wrap the journal with your handmade belt and you're done!
I love how worn and rustic this journal looks - you'd never know it was brand new! I have two upcoming trips and I can't wait to fill my book with journaling and photos. I hope you're inspired to make one of your own!
Thanks so much for stopping by today - have a fantastic, creative weekend!
Shelly