Hi there, Cec here with the Friday Focus segment and this time it is about Idea-ology. For the next two weeks these products will be available in The Funkie Junkie Boutique for a 15% discount (editor's note: Friday Focus 15% off sale does not apply to the brand new Yuletide Christmas Idea-ology collection that just arrived in the store this week), which is a fabulous buy since they are already discounted from the suggested retail price.
I have made two cards to show you. I did this on the few days we had rain this past week so there are some missing photos because they just didn't turn out, but I know you will be able to picture what I did from my description.
I used Idea-ology products I had in my stash but there are so many
others to choose from so I will give you alternatives at the end of the post if you want
to make cards/projects for different occasions.
I started by pulling a piece of Tim Holtz Color Core card stock to create the blank for this card that could be used for winter or Christmas and then added a couple layers of paper from the Maja Design Vintage Frost pad that I distressed around the edges and topped with some Deco Art Snow Writer.
The next step was to add some Idea-ology Frosted Film to some more of the Color Core card stock and to a scrap of white card stock to give them a bit of a sheen and then cut snowflakes using the Tim Holtz Paper Snowflakes Thinlits die. Note: The snowflakes did not cut as cleanly with the frosted film added as the card stock would have on its own so I added a thin piece of card stock to the sandwich and also used a blunt tapestry needle to coax the pieces out - there is always a workaround. I inked the edges of the snowflakes with some Weathered Wood Distress Ink and added some Idea-ology Mirrored Stars to the centres.
Next I cut a sled from Idea-ology Grunge Paper using my Cameo. This stuff cuts like butter and can be altered in so many ways. In this case I coated it with some Brushed Corduroy Distress Stain first and then went over it randomly with some Walnut Stain Distress Ink. I added some burlap string for the "rope" to pull it.
I took some white paint and covered an Idea-ology Christmas Word Band and then immediately wiped the paint off so that it only remained in the text recesses. Then I added a piece of the burlap string and added it to the bottom of an Idea-ology Found Relative card from the Occasions set.
So for this winter card I used five different Idea-ology products - Frosted Film, Word Band, Mirrored Stars, Grunge Paper and Found Relatives.
For this Halloween card, I started with more Color Core card stock for the blank and added a piece of paper from the Tim Holtz Regions Beyond paper pad for the background, also an Idea-ology product.
I cut a haunted house from Grunge Paper with my Cameo and then coated it with Clear Rock Candy Crackle Paint and when it was dry I inked it with some Vintage Photo DI. I didn't think it looked spooky enough so I also inked it with Black Soot DI after I took this photo.
Next I drew the outline of the house on some acetate and added some Frosted Film to it. I didn't care if there were bubbles since the glass in an old house would not be perfect anyway. After I cut the house shape out I attached it to the back of the Grunge Paper house and then added some Sunshine Yellow Alcohol Ink to the acetate side where the windows were.
Next I added some spiderweb stamping with a stamp from the Tim Holtz Ultimate Grunge set and Jet Black Archival Ink. In this photo, you can see the coloured windows.
I cut the tree and fence from scraps of black card stock using my Cameo and covered them with Wendy Vecchi Black Embossing Paste by patting it on with a palette knife so it would look rough. The skeleton is an Idea-ology charm from the Adornments - Oddities set and he has been coated with Wendy Vecchi Watering Can Embossing Powder and hangs from the tree by some burlap string.
I cut a circle of card stock and inked it with Scattered Straw and Wild Honey DI and then crumpled it up and smoothed it out to make the moon. The cobwebs are pieces of cheesecloth dyed with Black Soot DI and the bats are just clipart as are the gravestone, evil pumpkin and scary cat.
This card has four Idea-ology products - Patterned Paper, Grunge Paper, Frosted Film and Skeleton charm. but I saw quite a few neat new Halloween themed Idea-ology products in Linda's store that I wish I had been able to get my hands on.
If you are making cards/projects for other occasions, here are some suggestions for different Idea-ology items you might want to consider:
Frosted Film -can be replaced with Tissue Wrap (not self adhesive like Frosted Film but is thicker than gift wrapping tissue, adheres beautifully with a thin layer of glue, is see through and acts as a resist if you want)
Word Bands - come in many different sets or can be replaced with Typed Tokens in different sets (all can be altered with paint or alcohol ink if you want some colour)
Mirrored Stars - can be replaced with Gumdrops (come clear but can be coloured with alcohol ink), Star Fasteners, Brads of many types
Skeleton Charm - can be replaced with other charm sets or metal embellishments (can also be altered with alcohol ink or embossing powder for colour)
Halloween Paper - can be replaced with Christmas papers or Florals to name a few
Found Relatives - come in other sets and there are also Photo Booth strips
There are lots of embellishments for a variety of creative styles and I could go on and on but would encourage you to check out the Funkie Junkie Boutique to see what is available in this line that suits your creative style.
I hope I have given you a few ideas and since my teammates also use lots of Idea-ology in their projects check their creations out for even more ideas and then let's see what you are creating. There are still a few days left to join our current challenge 'Stamps Be Gone!'.
Friday, September 18, 2015
Wednesday, September 16, 2015
Stamps Be Gone!
Hello Everyone!! Pamellia here and I am hosting our next challenge here at Frilly and Funkie. How would you decorate your project if you didn't own any stamps? Embossing folders, stencils, or perhaps a little hand doodling? Well, let's put it to the test for this challenge. Other than a small sentiment, I would ask that you use no stamps at all on your vintage or shabby chic creations.
The team will choose their top four picks with the winner being invited to join us in a Guest DT spot here at Frilly and Funkie and the next three will receive badges to display on their blogs. Everyone who enters and follows the rules will be entered into the draw to have the chance to win a $25 spending spree at The Funkie Junkie Boutique.
The guidelines for entering are simple; create a new vintage or shabby chic project following the challenge theme, link it below to your post (not just your blog) and also include a link back to this challenge in your post. You can combine our challenge with up to 10 challenges (including this one) to be in with a chance of winning. Make sure you follow these rules as unfortunately we have had to eliminate entrants from the prize draws in the past when they have entered too many other challenges. If you are entering through a public forum please use keyword F&F. Also, please be sure to turn off your Word Verification so our Design Team can leave comments on your blogs.
This week we have some inspiration from the fabulous Funkie team! (click on each image for a closer look)
And now for some inspiration from the talented Frilly team! (click on each image for a closer look)
Cec Wintonyk - CW Card Creations
Wow, look at all those creative decorating ideas! I hope we have inspired you to head to your craft room and start crafting! We can't wait to see what you create!
Tomorrow we'll be back to share the incredible artwork of our latest Guest Designer, and next week the Funkie team will provide you with their own inspiration.
Hugs, Pamellia :)
The team will choose their top four picks with the winner being invited to join us in a Guest DT spot here at Frilly and Funkie and the next three will receive badges to display on their blogs. Everyone who enters and follows the rules will be entered into the draw to have the chance to win a $25 spending spree at The Funkie Junkie Boutique.
The guidelines for entering are simple; create a new vintage or shabby chic project following the challenge theme, link it below to your post (not just your blog) and also include a link back to this challenge in your post. You can combine our challenge with up to 10 challenges (including this one) to be in with a chance of winning. Make sure you follow these rules as unfortunately we have had to eliminate entrants from the prize draws in the past when they have entered too many other challenges. If you are entering through a public forum please use keyword F&F. Also, please be sure to turn off your Word Verification so our Design Team can leave comments on your blogs.
This week we have some inspiration from the fabulous Funkie team! (click on each image for a closer look)
Sue Carrington - Stamping Sue Style
Pamellia - My Little Craft Things
Cec Wintonyk - CW Card Creations
Nancy Dynes - Tattered Treasures
Linda Coughlin - The Funkie Junkie
Tomorrow we'll be back to share the incredible artwork of our latest Guest Designer, and next week the Funkie team will provide you with their own inspiration.
Hugs, Pamellia :)
Monday, September 14, 2015
Challenge Winners - Touch of Gold
Here we are at the start of a brand new week and it's time to announce the winners of the 'Touch of Gold' challenge. First off, thank you so much to everyone who took the time to enter. The Design Team poured over the gorgeous entries before casting their votes and our winner this time is #20 Suzanne C.
We thought this project was truly magical and perfectly demonstrated how a touch of gold can bring a piece to life. Congratulations Suzanne on being our favourite for the 'Touch of Gold' challenge and winning the opportunity to be a Guest Designer here at Frilly and Funkie for a future challenge.
And now for the next three winners of our Frilly and Funkie Top 3 Badges. In numerical order they are... #1 Alison (Butterfly), #26 Kathy and #33 Maryvonne!!! Please email Linda at thefunkiejunkie@gmail.com for the codes for the Top 3 badges so that you can display them proudly on your blog.
We thought this project was truly magical and perfectly demonstrated how a touch of gold can bring a piece to life. Congratulations Suzanne on being our favourite for the 'Touch of Gold' challenge and winning the opportunity to be a Guest Designer here at Frilly and Funkie for a future challenge.
And now for the next three winners of our Frilly and Funkie Top 3 Badges. In numerical order they are... #1 Alison (Butterfly), #26 Kathy and #33 Maryvonne!!! Please email Linda at thefunkiejunkie@gmail.com for the codes for the Top 3 badges so that you can display them proudly on your blog.
And finally Random.org has chosen a winner for our $25 gift certificate to The Funkie Junkie Boutique. Our congratulations this time go to #41 Mac Mable!
A huge thanks from the Frilly and Funkie team to everyone who took part in this challenge and congratulations again to our winners. Please email Linda at thefunkiejunkie@gmail.com for the codes for the winner's badge and to give us your email address for the Guest Designer details (Suzanne) for the Top 3 badges (Alison, Kathy and Maryvonne) and for the gift certificate details (Mac Mable).
Our current challenge, 'Stamps Be Gone!' runs through Tuesday, September 22nd. We hope to see you entering this time around so that you too can be in with a chance to win. And please make sure you follow our rules as sadly we've had to discount entries from previous challenges; you can enter up to 10 challenges including ours, and a maximum of 3 entries per person to our challenge. Please remember to link back to our challenge in your entry and mention in your post that you are entering this Frilly and Funkie challenge.
Have a great week everyone!
A huge thanks from the Frilly and Funkie team to everyone who took part in this challenge and congratulations again to our winners. Please email Linda at thefunkiejunkie@gmail.com for the codes for the winner's badge and to give us your email address for the Guest Designer details (Suzanne) for the Top 3 badges (Alison, Kathy and Maryvonne) and for the gift certificate details (Mac Mable).
Our current challenge, 'Stamps Be Gone!' runs through Tuesday, September 22nd. We hope to see you entering this time around so that you too can be in with a chance to win. And please make sure you follow our rules as sadly we've had to discount entries from previous challenges; you can enter up to 10 challenges including ours, and a maximum of 3 entries per person to our challenge. Please remember to link back to our challenge in your entry and mention in your post that you are entering this Frilly and Funkie challenge.
Have a great week everyone!
Saturday, September 12, 2015
Journal cover - Step x Step
Hello, it's Sue here and first of all I need to apologise for being slightly late ! Having been on holiday for 2 weeks I've definitely got the relaxed feeling and also completely lost track of the date ! Anyway let's crack on with today's project.
I originally made this journal for the Stitch in Time challenge and promised to come back to share how it all came together.
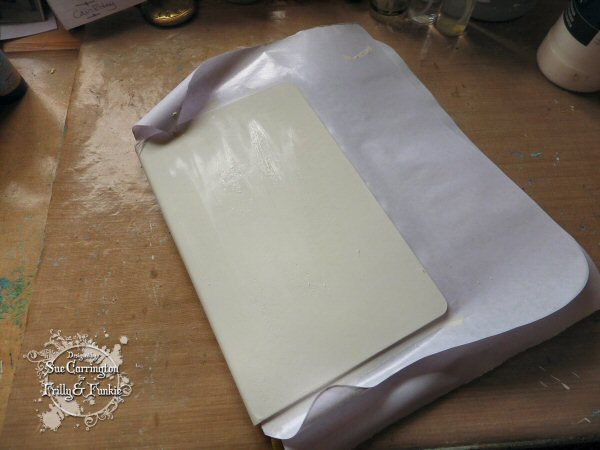
I started with a note book and my original thought was to stencil directly onto the cover so my first step was to coat it with Gesso. However, I changed my mind !
I then grabbed a piece of Claudine Hellmuth's natural sticky back canvas and covered the whole book with it, much better ! I spritzed the canvas with water before brushing a light layer of chalk arcylic paint over it. The water is needed otherwise when you try to brush paint over the material is just sucks it straight in and you're left with a blotchy mess. I stencilled the numbers using the 'Bumping' technique, I always like to start with the larger stencilled images first then move to the smaller ones.
I used Wendy Vecchi's Quilt stencil and went over the whole of the cover using chalk acrylic paint, really love this stencil !
Next up is Wendy's Add a Stencil and I've started to group where I'm stencilling.
One of the things I love about using stencils is that you can pick out just little bits to use, so when I used Wendy's Old Ledger stencil I've only used the grid part of it and I've used a shade of brown to start to add some contrast. Wendy's Alphabets stencil is perfect for adding the lettering and moved to a shade of grey, still grouping the stencilling.
At this point I decided it was way to clean and bright looking so I used my finger and with some Gesso rubbed it over the canvas. This knocks back the stencilling and gives a much more muted, shabby look.
To bring some detail to the forefront I've used heavy Gesso through a TCW stecnil to add more interest and as the Gesso has some body to it, it creates some subtle texture.
I then used an old plastic card and dipped it into some Gesso and rubbed it over the canvas to create the white lines.
One of the things I love to do is use the lids from various bottles as stamps, the one I'm using here is from a hair mousse can ! It's dipped into Gesso again and pressed onto the canvas.
For the clock I used the Tim Holtz Weatherd Clock die and cut it from card that I'd covered with the sticky back canvas. I zipped around the edges with my sewing machine then using my finger I rubbed chalk acrylic paint and Gesso over it.
Before I glue anything into place I always lay out what I want the design to look like, and quite often I'll leave it overnight and come back the next day to see if I still like it !
Happy with the layout I glued everything into position and then painted over the arrangement.
I wanted to add a shadow around the clock so I lightly drew around it using a Stabilo pencil then using a water brush blended it out a little.
I unwrapped the elastic pieces from the masking tape and it was only then that I realised that it was grey which blends in beautifully with the colour palette I'd chosen !
This is the reverse of the journal and I've just followed the same design through to it.
Whenever I'm looking for a meaningful sentiment I always look to Wendy Vecchi and she rarely disappoints !The sentiment is stamped onto white card painted with chalk acrylic paint then cut up and all the pieces are edged with grey chalk acrylic point.
I took this journal away on holiday with me and so it has already captured it's first set of memories !
I hope you enjoyed today's step x step.
Sue
x
I originally made this journal for the Stitch in Time challenge and promised to come back to share how it all came together.
I started with a note book and my original thought was to stencil directly onto the cover so my first step was to coat it with Gesso. However, I changed my mind !
I then grabbed a piece of Claudine Hellmuth's natural sticky back canvas and covered the whole book with it, much better ! I spritzed the canvas with water before brushing a light layer of chalk arcylic paint over it. The water is needed otherwise when you try to brush paint over the material is just sucks it straight in and you're left with a blotchy mess. I stencilled the numbers using the 'Bumping' technique, I always like to start with the larger stencilled images first then move to the smaller ones.
I used Wendy Vecchi's Quilt stencil and went over the whole of the cover using chalk acrylic paint, really love this stencil !
Next up is Wendy's Add a Stencil and I've started to group where I'm stencilling.
One of the things I love about using stencils is that you can pick out just little bits to use, so when I used Wendy's Old Ledger stencil I've only used the grid part of it and I've used a shade of brown to start to add some contrast. Wendy's Alphabets stencil is perfect for adding the lettering and moved to a shade of grey, still grouping the stencilling.
At this point I decided it was way to clean and bright looking so I used my finger and with some Gesso rubbed it over the canvas. This knocks back the stencilling and gives a much more muted, shabby look.
To bring some detail to the forefront I've used heavy Gesso through a TCW stecnil to add more interest and as the Gesso has some body to it, it creates some subtle texture.
I then used an old plastic card and dipped it into some Gesso and rubbed it over the canvas to create the white lines.
One of the things I love to do is use the lids from various bottles as stamps, the one I'm using here is from a hair mousse can ! It's dipped into Gesso again and pressed onto the canvas.
For the clock I used the Tim Holtz Weatherd Clock die and cut it from card that I'd covered with the sticky back canvas. I zipped around the edges with my sewing machine then using my finger I rubbed chalk acrylic paint and Gesso over it.
Before I glue anything into place I always lay out what I want the design to look like, and quite often I'll leave it overnight and come back the next day to see if I still like it !
Happy with the layout I glued everything into position and then painted over the arrangement.
I wanted to add a shadow around the clock so I lightly drew around it using a Stabilo pencil then using a water brush blended it out a little.
I unwrapped the elastic pieces from the masking tape and it was only then that I realised that it was grey which blends in beautifully with the colour palette I'd chosen !
This is the reverse of the journal and I've just followed the same design through to it.
Whenever I'm looking for a meaningful sentiment I always look to Wendy Vecchi and she rarely disappoints !The sentiment is stamped onto white card painted with chalk acrylic paint then cut up and all the pieces are edged with grey chalk acrylic point.
I took this journal away on holiday with me and so it has already captured it's first set of memories !
I hope you enjoyed today's step x step.
Sue
x
Thursday, September 10, 2015
Welcome to today's Guest Designer, Jane!
Today we are welcoming Jane of Jane's Journal as our Guest Desginer. Jane was chosen by the DT as the winner of the Things of Wings challenge. So, without further ado let's move on to hear from Jane.
Hello I am Jane from Jane's Journal and I am delighted to be here today for the second time this year as the Guest Designer for the new challenge here at Frilly and Funkie. I live in Surrey in the UK and have been a make and do girl all my life. I work part time as an NHS physiotherapist and dabble in all things crafty in my leisure time. I have a garden studio where I can disappear to and get as inky as I like. My main love is all things papercraft and most recently mixed media and using calligraphy in my art journals. I am also a keen photographer, silversmith, cake decorator, gardener...there are never enough hours in the day are there!
For the Stamps Be Gone challenge I decided to make a spell book for my darling granddaughter, Daisy Jane. She is nearly 2 and I wanted to make her something for Halloween which she can keep and add to as she gets older. I also thought that when she is older it could even be a fun Halloween prop for her. I have had a set of eyes in my stash for ages and remembered that in the Disney film Hocus Pocus there is a spell book with an eye on it....so that is how my design started. I tried to tone down the scaryiness a little and made the eye more of a tree elf than anything more frightening! Even the snakes I made are tame and toddler friendly. I wanted lots of texture too so that she can touch it.
The book started life as a plain £1 hard back notebook and I have a step by step over at my blog if you would like to say how it came together. I would be delighted to see you over there. Thanks so much again for inviting me here today.
I'm sure you'll all agree that Jane's spell book it fantastic and Daisy Jane is going to love it !
If you would like to be in with the chance to join us as Guest Designer all you need to do is join in with the current challenge 'Stamps Be Gone'.
Hello I am Jane from Jane's Journal and I am delighted to be here today for the second time this year as the Guest Designer for the new challenge here at Frilly and Funkie. I live in Surrey in the UK and have been a make and do girl all my life. I work part time as an NHS physiotherapist and dabble in all things crafty in my leisure time. I have a garden studio where I can disappear to and get as inky as I like. My main love is all things papercraft and most recently mixed media and using calligraphy in my art journals. I am also a keen photographer, silversmith, cake decorator, gardener...there are never enough hours in the day are there!
For the Stamps Be Gone challenge I decided to make a spell book for my darling granddaughter, Daisy Jane. She is nearly 2 and I wanted to make her something for Halloween which she can keep and add to as she gets older. I also thought that when she is older it could even be a fun Halloween prop for her. I have had a set of eyes in my stash for ages and remembered that in the Disney film Hocus Pocus there is a spell book with an eye on it....so that is how my design started. I tried to tone down the scaryiness a little and made the eye more of a tree elf than anything more frightening! Even the snakes I made are tame and toddler friendly. I wanted lots of texture too so that she can touch it.
The book started life as a plain £1 hard back notebook and I have a step by step over at my blog if you would like to say how it came together. I would be delighted to see you over there. Thanks so much again for inviting me here today.
I'm sure you'll all agree that Jane's spell book it fantastic and Daisy Jane is going to love it !
If you would like to be in with the chance to join us as Guest Designer all you need to do is join in with the current challenge 'Stamps Be Gone'.
Friday, September 4, 2015
Friday Focus - IndigoBlu
Hi everyone and welcome. Jenny here with your regular Friday Focus slot here at Frilly and Funkie where we turn the spotlight on a product or range currently available at The Funkie Junkie Boutique. And even better news, that range has an extra 15% discount added for the next two weeks! This time the honour falls to all things IndigoBlu.
As promised on Wednesday I've got a step by step tutorial for this tag card today, sharing a few ideas for using IndigoBlu FlitterGlu and Mega Flakes, so let's go...
Apply some FlitterGlu to a piece of Phat Foam (a tutorial for this part is shown in THIS POST) and spread in random portions over a giant tag. Add Chariot of Fire Mega Flakes, rub down with your fingers to ensure the flakes are attached firmly to the glue, then rub off any excess with a Scoochy sponge.
Add Walnut Stain Distress Paint and a little water in patches to a craft mat. Smooch your tag into it and semi-dry with a heat tool.
Repeat the process with Vintage Photo Distress Paint, allowing some of the wet Walnut Stain paint to blend with the new layer. Dry thoroughly.
Blend a mix of Mermaid Lagoon and Peacock Feathers Distress Paints over the whole tag. Spritz and flick with water, drying with your heat too.
Blend Walnut Stain around the edges of the tag and onto some of the gilded/painted areas. Repeat the spritz and flick technique.
Use the Tim Holtz Tiles Texture Fades folder to emboss the tag.
Gently drag the Phat Foam over the raised areas on the tag and apply more Mega Flakes to them, removing all the excess.
Applying a layer of FlitterGlu to the Heart Flourish Dinkie Stamp, stamp it onto coordinating card.
Add Mega Flakes to the stamped areas, rub with your fingers to bond the flake and glue, and remove any excess with a Scoochy. Cut out the heart shape, leaving a border.
Add a band of Venise Lace and Antique Gold Mesh Ribbon.
Add a layer of FlitterGlu to an antique bronze filigree flower and when tacky, add Mega Flakes.
As promised on Wednesday I've got a step by step tutorial for this tag card today, sharing a few ideas for using IndigoBlu FlitterGlu and Mega Flakes, so let's go...
Apply some FlitterGlu to a piece of Phat Foam (a tutorial for this part is shown in THIS POST) and spread in random portions over a giant tag. Add Chariot of Fire Mega Flakes, rub down with your fingers to ensure the flakes are attached firmly to the glue, then rub off any excess with a Scoochy sponge.
Add Walnut Stain Distress Paint and a little water in patches to a craft mat. Smooch your tag into it and semi-dry with a heat tool.
Repeat the process with Vintage Photo Distress Paint, allowing some of the wet Walnut Stain paint to blend with the new layer. Dry thoroughly.
Blend a mix of Mermaid Lagoon and Peacock Feathers Distress Paints over the whole tag. Spritz and flick with water, drying with your heat too.
Blend Walnut Stain around the edges of the tag and onto some of the gilded/painted areas. Repeat the spritz and flick technique.
Use the Tim Holtz Tiles Texture Fades folder to emboss the tag.
Gently drag the Phat Foam over the raised areas on the tag and apply more Mega Flakes to them, removing all the excess.
Applying a layer of FlitterGlu to the Heart Flourish Dinkie Stamp, stamp it onto coordinating card.
Add Mega Flakes to the stamped areas, rub with your fingers to bond the flake and glue, and remove any excess with a Scoochy. Cut out the heart shape, leaving a border.
Add a band of Venise Lace and Antique Gold Mesh Ribbon.
Add a layer of FlitterGlu to an antique bronze filigree flower and when tacky, add Mega Flakes.
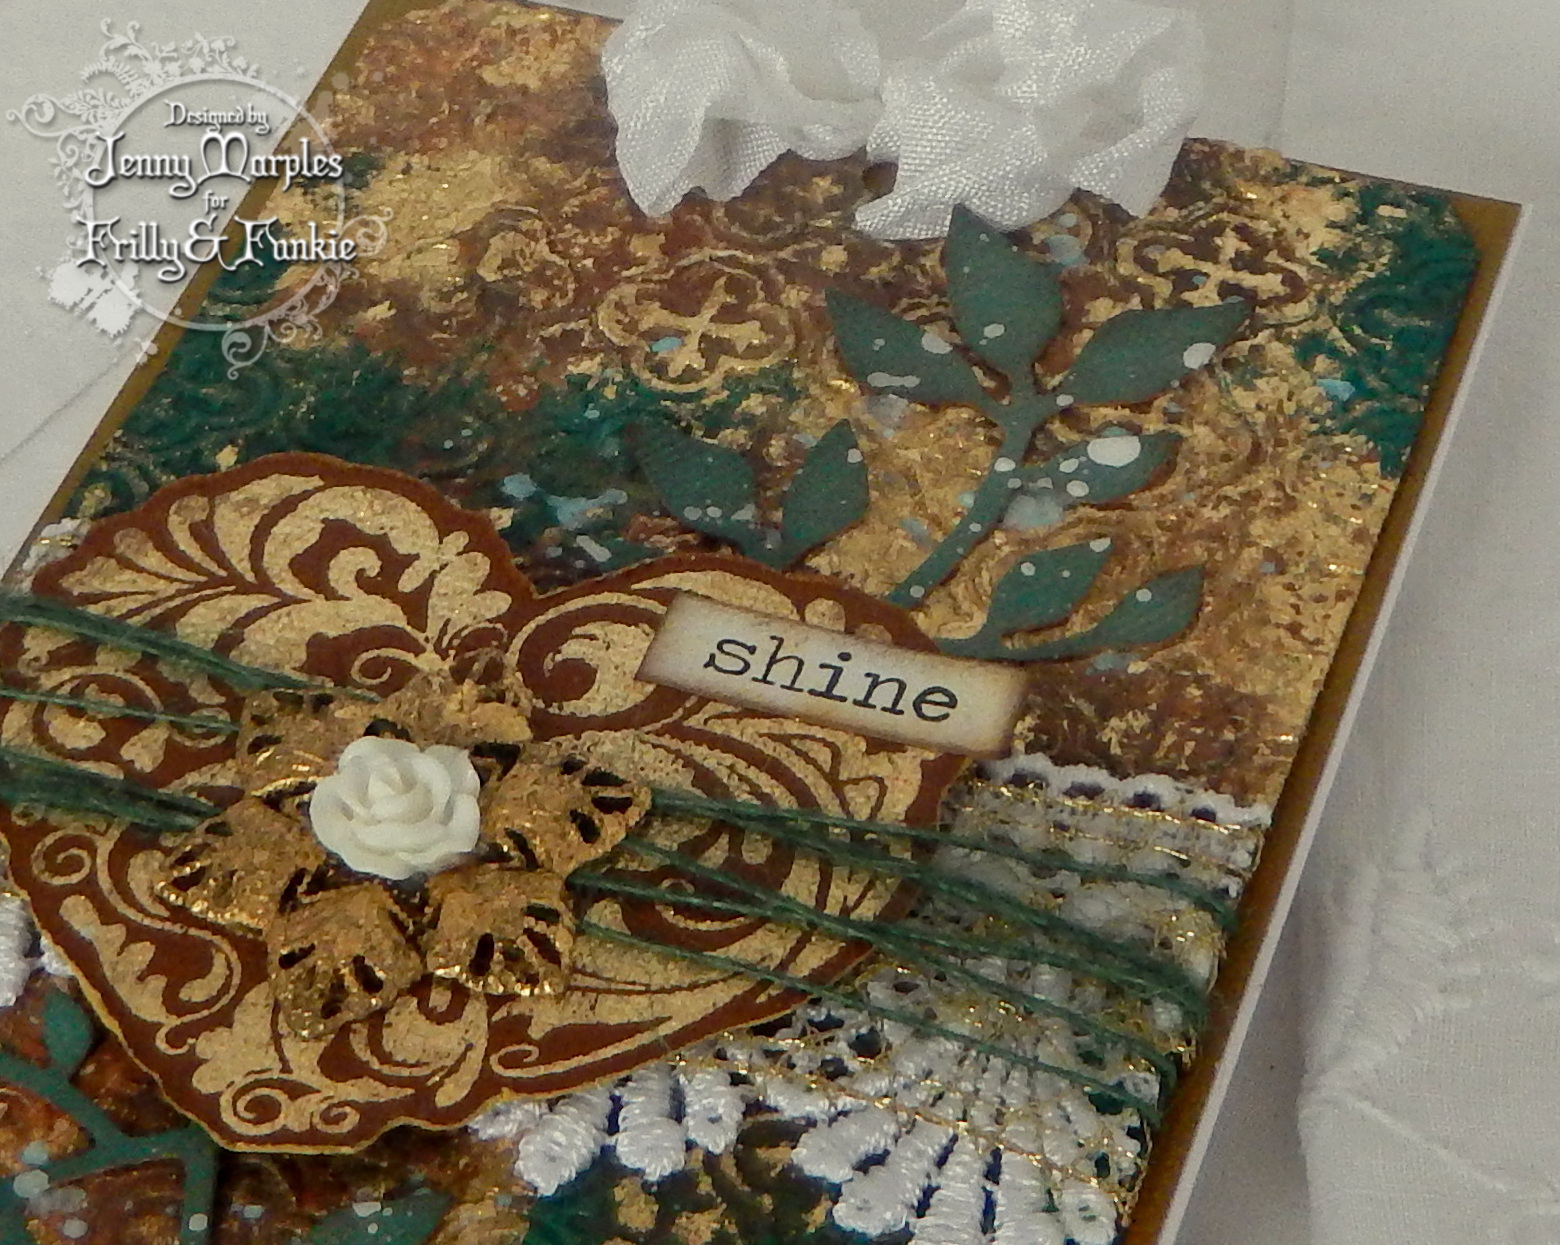
Assemble as shown on the finished card above; with the heart layered over the ribbon band, tie burlap string over the top; add an Heirloom Rose to the centre of the filigree flower and adhere to the centre of the heart; die cut leaf stems and attach from underneath the heart; splatter a little watered down white gesso over the leaves; finally add an appropriate Big Chat sticker and a seam binding bow at the top.
Here are a couple of close ups of the finished card...
I hope you've enjoyed today's tutorial and feel ready to give FlitterGlu and Mega Flakes a go (if you haven't done already) to add a touch of elegance to your cards and other projects. If you have any questions please ask and I'll do my best to help.
And don't forget, there's that special Friday Focus 15% discount applied to all things IndigoBlu at The Funkie Junkie Boutique through the next two weeks.
Wednesday, September 2, 2015
A Touch of Gold
Hello friends and visitors,
We are back here today with Georgie's 'Touch of Gold' challenge (all the details are given below). It's time to get in touch with our Funkie side as we check out the inspiration provided by the Funkie side of the design team. We hope you will play along. There is still one full week of challenge time left in this one. All the details and link up are found below in the Week #1 post. And to get you started, check out the great makes by the Funkie team. Hope you will stop by their blogs and leave them sone love!
Sue Carrington - Stamping Sue Style
+++++++++++Week 1 Post - Challenge Details and Inspiration++++++++++++++
Hi there!! Georgie here with you today to host our next challenge - A Touch Of Gold. Metal elements, glitter, embossing powder, paint, ribbon, whatever it is lets see a splash of gold in your vintage or shabby chic projects!!
The guidelines for entering are simple; create a new vintage or shabby chic project following the challenge theme, link it below to your post (not just your blog) and also include a link back to this challenge in your post. You can combine our challenge with up to 10 challenges (including this one) to be in with a chance of winning. Make sure you follow these rules as unfortunately we have had to eliminate entrants from the prize draws in the past when they have entered too many other challenges. If you are entering through a public forum please use keyword F&F. Also, please be sure to turn off your Word Verification so our Design Team can leave comments on your blogs.
Here are some amazing creations from my fabulous Frilly teamies;
Pamellia - My Little Craft Things
Georgie C - Little Blue Craft Box
Over to you lovely people now, we can't wait to see what you create!
Tomorrow we'll be back to share the incredible artwork of our latest Guest Designer, and next week the Funkie team will provide you with their own inspiration.
Hugs,
Georgie xx
Subscribe to:
Posts (Atom)