Hello! It's Nancy here, and I'm thrilled to be presenting the Saturday Step by Step. You're probably thinking, "Oh no, another flower tutorial"- lol! I
do love making flowers, and I
did think about it. In the end I decided to change things up a bit with this Tag and Pocket Mini Album.
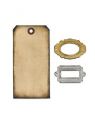
I was playing with my Alterations Tag and Bookplates die, planning a tag mini album for a friend. I wanted a different look than my usual tag mini's, so I created my own pockets to perfectly fit each Alterations tag. The pocket doubles the space for photos, journaling and embellishments, and they are amazingly simple to create.
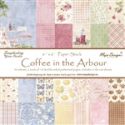
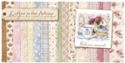
1. Cut a piece of cardstock to 7 1/2 inches wide by 7 3/4 inches high. You can cut your pockets out of plain cardstock and cover them with design paper, or you can cut them from a sturdy weight design paper. I used Maja Design's Coffee in the Arbour for my album.
2. Score the 7 3/4 inch side at 1/2 inch and again at 4 inches.
3. Turn paper to 7 1/2 side and score bottom at 3/4 inches.
4. Fold along score lines.
5. Cut away the two sections indicated on the diagram.
6. Round the corners of the bottom fold.
7, Using a 1 1/4 inch circle punch, punch a half circle in the center of the pocket, as indicated in the diagram. You may punch the half circle on both sides if desired.
8. Apply Wonder Tape to the inside of the 3/4 inch bottom fold and the outer edge of the 1/2 inch side fold.
9. Carefully line up the 1/2 inch side fold to the the side of the pocket and adhere .
10. Carefully fold the 3/4 inch fold over the bottom of the pocket and adhere.
11. Punch holes to bind your album. I used a Cinch, but you can use any type of hole punch or binding system you have. This simplest hole punch will work well. You may punch as few holes as you wish. The pocket album can easily be held together with one ring binder.
12. Die cut desired number of tags for each pocket you create, using the Alterations Tag and Bookplates die.
Now for the fun part... embellishing!! I layered, distressed, and stitched the papers for my cover, popping everything up with Ranger foam tape.
I added a vintage photo as a focal point, which I stitched to a frame of design paper.
I stamped my sentiment in Ranger Jet Black Archival Ink.
I colored white paper flowers using Tim Holtz Distress Markers. This is a great technique when you don't have time to make your own flowers from the paper collection. The variety of colors in the complete set allows you to match the shade of your flowers to whatever paper collection you're using. I dust my flowers with a bit of Gesso for a shabby look.
I added a twine bow. I love the simplicity of twine bows.
I added a twine bow to the top of each tag to act as a handle.
The inside pages are embellished simply. I chose coordinating patterns from the paper collection. The first page is a 'faux envelope' I created with the Spellbinders Oval Floral die. The second page contains a sentiment and a punched 'faux pocket'. All of the tags are created with the Alterations Tag and Bookplates die in coordinating Maja Design paper.
You may personalize your albums in any way you desire. You may make your embellishments as detailed as you wish. No two albums need ever be alike (unless you want them to)!
It's an honor to be with you today. I hope this gets you in the mood to make minis! These are so fun and easy. You can create them in bulk for seasonal albums and holiday gifts. It's never too soon to start working on your Christmas list! Also, we have a new challenge underway at The Frilly and Funkie Blog. Don't forget to check it out and get in on the fun and prizes!
Hugs,