Wednesday, August 19, 2015

Stitch in Time - with a twist!

Hello! It's Sue here and I am your host for the current challenge which is 'Stitch in time'. I love to incorporate sewing into projects. Be it real or faux, it always adds an extra dimension to your artwork. So, for this challenge I want to see stitching somewhere on your vintage or shabby chic projects, real or faux will do! BUT, I would also like to see a timepiece too!
The team will choose their top four picks with the winner being invited to join us in a Guest DT spot here at Frilly and Funkie and the next three will receive badges to display on their blogs. Everyone who enters and follows the rules will be entered into the draw to have the chance to win a $25 spending spree at The Funkie Junkie Boutique.

The guidelines for entering are simple; create a new vintage or shabby chic project following the challenge theme, link it below to your post (not just your blog) and also include a link back to this challenge in your post. You can combine our challenge with up to 10 challenges (including this one) to be in with a chance of winning. Make sure you follow these rules as unfortunately we have had to eliminate entrants from the prize draws in the past when they have entered too many other challenges. If you are entering through a public forum please use keyword F&F. Also, please be sure to turn off your Word Verification so our Design Team can leave comments on your blogs.

Here's your Week Two inspiration from the Funkie side of the DT (click on each image for a closer look);

Sue Carrington - Stamping Sue Style 

Shelly Hickox - Stamptramp

Jenny Marples - Pushing The Right Buttons

And, from Week One, here's what the Frilly side of the DT have created for your inspiration;


Cec Wintonyk - CW Card Creations

Georgie C - Little Blue Craft Box  

Nancy Dynes - Tattered Treasures

I hope you will join us for this challenge and we look forward to seeing your projects!


Monday, August 17, 2015

Challenge Winners - Things With Wings

Welcome to the start of a new week. Here at Frilly and Funkie it's time to announce the winners of the 'Things With Wings' challenge. Thank you so much to everyone who took the time to enter with so many fabulous projects. Once again we were spoiled for choice when picking the winner. In the end the Design Team voted for #48 Jane (Jane's Journal).


We thought she'd totally transformed something really useful with beautiful colours and fun textured embellishments. Congratulations Jane on being our favourite for the 'Things With Wings' challenge and winning the opportunity to be a Guest Designer here at Frilly and Funkie for a future challenge.

And now for the next three winners of our Frilly and Funkie Top 3 Badges... #12 Samra #40 Max and #65 Suzanne!!! Please email Linda atthefunkiejunkie@gmail.com for the codes for the Top 3 badges so that you can display them proudly on your blog.


And finally Random.org has chosen a winner for our $25 gift certificate to The Funkie Junkie Boutique. Our congratulations this time go to #2 Dodie (One Crafty Creature)!

A huge thanks from the Frilly and Funkie team to everyone who took part in this challenge and congratulations again to our winners. Please email Linda at thefunkiejunkie@gmail.com for the codes for the winner's badge and to give us your email address for the Guest Designer details (Jane) for the Top 3 badges (Samra, Max and Suzanne) and for the gift certificate details (Dodie).

Our current challenge, 'Stitch In Time - with a twist!' runs through Tuesday, August 25th. We hope to see you entering this time around so that you too can be in with a chance to win. And please make sure you follow our rules; you can enter up to 10 challenges including ours, and a maximum of 3 entries per person to our challenge. Please remember to link back to our challenge in your entry and mention in your post that you are entering this Frilly and Funkie challenge.

Have a great week everyone!

Saturday, August 15, 2015

Tag and Pocket Mini Album


Hello! It's Nancy here, and I'm thrilled to be presenting the Saturday Step by Step. You're probably thinking, "Oh no, another flower tutorial"- lol! I do love making flowers, and I did think about it. In the end I decided to change things up a bit with this Tag and Pocket Mini Album.


I was playing with my Alterations Tag and Bookplates die, planning a tag mini album for a friend. I wanted a different look than my usual tag mini's, so I created my own pockets to perfectly fit each Alterations tag. The pocket doubles the space for photos, journaling and embellishments, and they are amazingly simple to create.    


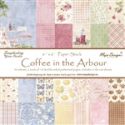
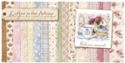
1. Cut a piece of cardstock to 7 1/2 inches wide by 7 3/4 inches high. You can cut your pockets out of plain cardstock and cover them with design paper, or you can cut them from a sturdy weight design paper. I used Maja Design's Coffee in the Arbour for my album. 
     

2. Score the 7 3/4 inch side at 1/2 inch and again at 4 inches. 
3. Turn paper to 7 1/2 side and score bottom at 3/4 inches.
4. Fold along score lines.   


5. Cut away the two sections indicated on the diagram. 


6. Round the corners of the bottom fold. 


7, Using a 1 1/4 inch circle punch, punch a half circle in the center of the pocket, as indicated in the  diagram. You may punch the half circle on both sides if desired.         


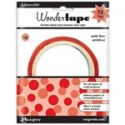
8. Apply Wonder Tape to the inside of the 3/4 inch bottom fold and the outer edge of the 1/2 inch side fold. 


9. Carefully line up the 1/2 inch side fold to the the side of the pocket and adhere .
10. Carefully fold the 3/4 inch fold over the bottom of the pocket and adhere.  


11. Punch holes to bind your album. I used a Cinch, but you can use any type of hole punch or binding system you have. This simplest hole punch will work well. You may punch as few holes as you wish. The pocket album can easily be held together with one ring binder.   


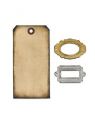
12. Die cut desired number of tags for each pocket you create, using the Alterations Tag and Bookplates die.   
                    

Now for the fun part... embellishing!! I layered, distressed, and stitched the papers for my cover, popping everything up with Ranger foam tape.  


I added a vintage photo as a focal point, which I stitched to a frame of design paper. 


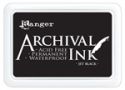
I stamped my sentiment in Ranger Jet Black Archival Ink. 


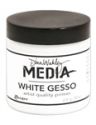
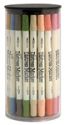
I colored white paper flowers using Tim Holtz Distress Markers. This is a great technique when you don't have time to make your own flowers from the paper collection. The variety of colors in the complete set allows you to match the shade of your flowers to whatever paper collection you're using. I dust my flowers with a bit of Gesso for a shabby look. 
    

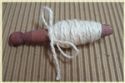
I added a twine bow. I love the simplicity of twine bows. 


I added a twine bow to the top of each tag to act as a handle. 


The inside pages are embellished simply. I chose coordinating patterns from the paper collection. The first page is a 'faux envelope' I created with the Spellbinders Oval Floral die. The second page contains a sentiment and a punched 'faux pocket'. All of the tags are created with the Alterations Tag and Bookplates die in coordinating Maja Design paper.  


You may personalize your albums in any way you desire. You may make your embellishments as detailed as you wish. No two albums need ever be alike (unless you want them to)!   


It's an honor to be with you today. I hope this gets you in the mood to make minis! These are so fun and easy. You can create them in bulk for seasonal albums and holiday gifts. It's never too soon to start working on your Christmas list! Also, we have a new challenge underway at The Frilly and Funkie Blog. Don't forget to check it out and get in on the fun and prizes!       

Hugs,