Saturday, May 4, 2019

Saturday Showcase - Eileen Hull Designs Notebook featuring Tim Holtz Typography Collage Paper


Hi everyone and welcome to another Saturday Showcase, the Design Team's chance to share tutorials and products available from The Funkie Junkie Boutique with you and kick start your creative weekend. Today I'm sharing a tutorial for the notebook project created for the current challenge 'Spring is in Full Bloom' using Eileen Hull Designs Scoreboards L Die 'Notebook' featuring Tim Holtz Wildflower Stems Thinlits Dies and his Typography Collage Paper.


The Tutorial


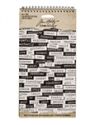
Begin by sticking a strip of Tim Holtz Typography Collage Paper width wise to the top of a sheet of Stick-Back Canvas using Distress Collage Medium Matte. Once dry cut along the bottom edge of the collaged piece of canvas. Since the canvas is 8 1/2 x 11 inches and the Collage Paper is 6 inches wide this should give you a piece that measures 8 1/2 x 6 inches.

(click on each photo for a closer look)


Die cut a Notebook using Eileen's Notebook Scoreboards Die from Matboard (or similar). The spine will already be scored for you in the cutting process. Using a sharp blade cut the spine from the covers along the two outer score lines.


Remove the backing to the covered Sticky-Back Canvas piece and place the die cut notebook pieces onto it, right side facing down, as shown below. The outer edges of the two covers should lie along the edges of the canvas first, then you can centre the spine more easily without the need for measuring. This gives you a perfect 1/4 inch gap between the spine and each cover with no measuring involved!


Fold over the 1/2 inch covered canvas at the top and bottom and stick to the inside of the covers and spine. Use a bone folder or similar to ensure the canvas strips between the spine and covers are stuck firmly in place. Cut a piece of plain Sticky-Back Canvas from the un-collaged leftovers wide enough to fit between the two covered strips on the back of the notebook. Your covers and spine should now be completely covered in canvas so they have level surfaces on the inside and out.


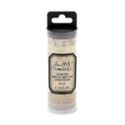
Use strips of Design Tape over each end of the covers to finish them neatly. The Remnants Design Tape collection coordinates with the Typography Collage Paper perfectly.


Apply little pieces of Typography Collage Paper with Distress Collage Medium Matte to the top of one of the smaller Lace Baseboard Frames. Once dry it is easier to trim away any excess by sanding it gently with a nail file. Paint the edges of the frame with White Gesso.


Before gluing the frame on the front cover I applied a little White Gesso over both the outside of the cover and the frame using a spatula to give it a more shabby chic look. It's not an essential step if you'd prefer your book to look 'cleaner'.


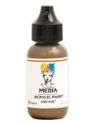
Die cut the smaller butterfly from thick card using Tim Holtz Tattered Butterfly Bigz Die. Paint it with 'Ancient' Dina Wakley Media Acrylic Paint before sticking in place on the front cover as shown below. I used some foam tape under the wings to give them extra support when the book is used/handled.


For this portion of the tutorial I followed the guide found on this website How to Bind Your Own Hardback Book by instructables.com to create the text block and bind it to the cover.

Cut pages from copier paper measuring 4 7/8 x 7 inches and fold in half as shown below. I tea stained my copier paper in advance to coordinate with the cover. You will need two sheets for each signature (which can be cut from one sheet of copier paper) and I included 20 signatures (20 sheets) in total to my book.


Once folded and assembled stack your 20 two sheet signatures together with the spines facing towards you and draw a pencil line across the centre and an inch from each end. This should give you level marks for punching stitching holes through each signature with a Retractable Craft Pick or similar.


You can now stitch the signatures together using thick thread. I tend to refer to a helpful video tutorial for stitching text blocks which can be found here; DIY Kettle Stitch Bookbinding Tutorial by Sea Lemon.


Having cut a piece of plain calico cotton the same length as the spine and roughly 5 times as wide I glued the spine to the centre of the cloth, applying the glue to the fabric rather than the spine. This helps to stop the glue from seeping down between the pages. When dry you can add extra glue to the outside of the fabric on the spine for even more strength.


Once dry I glued each side of the fabric to the inside covers of the book, taking care only to add glue to the covers, not the spine or indented parts. This needs to dry thoroughly so it's a good idea to support each side of the text block with something heavy like tins.


Two extra pages were cut from another piece of copier paper, this time measuring 4 7/8 x 7 1/4 inches. Fold the paper so you have one side measuring 4 7/8 x 3 1/2 inches and the other side measuring a quarter inch wider at 4 7/8 x 3 3/4. Open the book out flat and apply glue to the first page of the text block, sticking the page that is 3 1/2 inches wide over it (it should match perfectly).


When dry add glue to the cover as shown below (again taking care not to add glue to the spine parts) and stick the 3 3/4  side of the page to it. When dry repeat these two steps at the back of the book. You should now have a completed hardback book which will open fully.


To finish decorating the front cover die cut stems and flowers from thick card using Tim Holtz Wildflower Stems Thinlits Die Sets (it may help to cut a couple of each from thinner card and stick them together to make thick pieces for durability). Paint the first stem with 'Lime' Dina Wakley Media Acrylic Paint to give the card a non-porous surface on with to add a mix of 'Sublime' and 'Alchemy' Alcohol Pearl inks.


Paint the second stem with 'Ruby' Dina Wakley Media Acrylic Paint before applying 'Deception' Alcohol Pearl ink on top.


For the final flower paint the stem with 'Evergreen' Acrylic Paint and the flower head with White Gesso both from Dina Wakley Media. Then apply 'Sublime' Alcohol Pearl ink to the stem and a mix of 'Enchanted' Alcohol Pearl ink with 'Pearl' Alcohol Ink Mixative. Stick the stems and flowers to the front of the book cover over the butterfly ensuring each is firmly glued in place before adding the next.


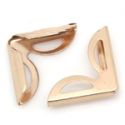
Linda stocks these beautiful Rose Gold Corner Protectors in The Funkie Junkie Boutique. Add them to each corner of the book covers, pressing them firmly together to fix in place.


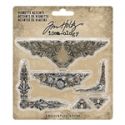
Take a couple of the small metal corners from Tim Holtz Vignette Accents set and cover them with White Gesso. When dry sand them slightly to reveal some of the metal underneath. Glue these in place over two of the Lace Baseboards Frame on the cover.


To finish use Glossy Accents to stick Transparent Wings over the top of the flower bundle and wrap a little string and wire around the bottom of the stems. Add a Big Chat sticker to a piece of thick card and glue in place on the frame.


I hope you've enjoyed seeing today's Saturday Showcase tutorial and find the links helpful too. Don't forget there's still time to enter the current Frilly and Funkie challenge 'Spring is in Full Bloom' HERE.

Have a great weekend!
Jenny xxx

Links to the products used from The Funkie Junkie Boutique;

Eileen Hull Designs Sizzix ScoreBoards L Die - Notebook


Wednesday, May 1, 2019

Spring is in Full Bloom Challenge!

This is my favorite time of the year. Here in the south the trees and shrubs are all blooming and showing their splendor. Many are busy planting their vegetable gardens. The migrating birds have returned to build nests and raise a new family. Your challenge is to create a vintage or shabby chic project that illustrates the magic of spring in bloom!

The winner will earn the chance of a Guest Designer spot here at Frilly and Funkie, and everyone who enters and follows the rules will go into the draw for the chance to win a $25 spending spree at The Funkie Junkie Boutique. And there are Top 3 Badges for three further outstanding entries, chosen by the Design Team, because choosing just one winner is so hard!

The guidelines for entering are simple; create a new vintage or shabby chic project following the challenge theme, link it below to your post (not just your blog) and also include a link back to this challenge in your post. You can combine our challenge with up to 10 challenges (including this one) to be in with a chance of winning. If you are entering through a public forum (such as Instagram) you'll need to include the words Frilly and Funkie Challenge. Also, please be sure to turn off your Word Verification so our Design Team can leave comments on your blogs. Make sure you follow these rules as unfortunately, we have had to eliminate entrants from the prize draws in the past.

This week's inspiration is brought to you by the Funkie side of the team. Let's see what clever ideas they have cooked up to share with you today;

Suzanne Czosek - Suzz's Stamping Spot 

Tim Holtz Idea-ology collage paper travel Stampers Anonymous Entomology Dina Wakely Media Tape Sizzix Wildflowers Stems #1 Distress Stain Spray Picked Raspberry Ranger Layering Stencil Nordic Holiday Knit for The Funkie Junkie Boutique

Sara Emily - sarascloset


Jenny Marples - Pushing The Right Buttons


*******************************************
WEEK ONE

This week's inspiration is brought to you by the Frilly side of the team. Let's see what clever ideas they have cooked up to share with you today;

Cec Wintonyk - CW Creations


Kathy Clement - Kathy by Design


Maggi Harding - Scrap, Travel and Bark!


We can't wait to see your take on this creative challenge. Link your project up using the Linky tool below before 11:59PM EDT on Tuesday, May 7th. And be sure to check back next week to see what delights the Funkie side of the team has cooked up for you. Until then, we wish you loads of joy and creativity!

Monday, April 29, 2019

Challenge Winners - Re-Purpose, Re-Use, Recycle

Today we announce our winners from the 'Re-Purpose, Re-Use, Recycle' challenge. Thank you to everyone who shared their amazing creations using all sorts of things that might otherwise have been discarded. We loved seeing them all.


Yet again it was a very close run thing and we could easily have picked several overall winners but our final choice this time was #4 Tracey Fairgrieve who transformed a journal cover. We loved how she cleverly included so many bits and bobs to add detail and transformed packaging into wonderful flowers. Make sure to check out Tracey's journal HERE. Congratulations to Tracey on being our favorite and winning the opportunity to be a Guest Designer here at Frilly and Funkie for a future challenge. You will be contacted with all the details.

And now our picks for the three winners of the Frilly and Funkie Top 3 Badges for this challenge. As already mentioned it was so difficult to choose between these entries and we recommend you hop on over to take a look at them all; #6 Kerstin F, #7 Cathy Frailey and #11 Tindaloo. Please email Linda at thefunkiejunkie@gmail.com for the codes for the Top 3 badges so that you can display them proudly on your blog.


And finally we have a randomly chosen lucky winner for the $25 gift certificate to The Funkie Junkie Boutique. Our congratulations this time go to #15 Esther Asbury! Again, please do make sure you check out her amazing project for this challenge. Please email Linda at thefunkiejunkie@gmail.com for the gift certificate details.

Thank you again from all of us here at Frilly and Funkie to everyone who took part in this challenge and congratulations to all our winners. The current challenge, 'Spring is in Full Bloom' runs through Tuesday, May 7th and the Funkie side of the Design Team will be back here this Wednesday, May 1st with some more inspiration for you. We look forward to seeing your entries!

Have a great week everyone.

Saturday, April 27, 2019

Saturday Showcase - Tim Holtz Metallic Kraft Stock

It is Saturday and it's Cec here with another Saturday Showcase.  I am going to share some Christmas cards I have made with Tim Holtz Metallic Kraft Stock.

I know it is only April but I decided an early start would help alleviate that last minute rush I have every year.

Since my main objective was to show you the versatility of this paper I didn't use a bunch of techniques so there are no process photos but I will describe how each project came together and you will see that each is different from the last.  The only common thread besides the use of the Metallic Kraft Stock is that they are flat enough to mail with regular postage - WIN!

I only have the Metallic (gold and silver), Metallic 2 (rose gold and copper) and the Metallic Jewels (multiple deep toned colours).  I wish I had the Metallic Confections (lighter tones) but it was out of stock.


The first card was made with a mat of deep blue metallic followed by a panel of swirly paper that I printed from a digital freebie.  I printed the sentiment on a band of white card stock and punched a snowflake border on each side.  The borders were inked with Stormy Sky Distress Ink (Tim Holtz).  Next I cut some snowflakes from silver, deep blue and turquoise metallic using the Paper Snowflakes die (Tim Holtz) and a couple of punches.  Don't you love the way the light picks us the shine and even changes it slightly when hit with bright light?


For the next card I used a pine branch punch to cut a pile of green metallic along with some scraps of regular green card stock.  All these pine branches were glued into a wreath shape using Collage Medium (Tim Holtz).  To finish it off I added some red dollar store gems and a little organza bow.


The next card started with a panel of paper from a paper pad in my Funkie Junkie Boutique stash called Sweet Peppermint (Prima).  I inked the edges with some Aged Mahogany DI (Tim Holtz).  Next I die cut some large poinsettia petals from red metallic and small ones from rose gold metallic .  I also cut some green using the Holiday Greens die (Tim Holtz).  Once all the pieces were cut, I used a sanding block to scuff them up.  The poinsettias were layered and a few Champagne adhesive pearls (Kaisercraft) were added to the centres.  The sentiment cut by my husband was added last.


I changed up the card shape and size with the next two cards.  The first one is simply a panel of silver metallic  that has been run through an embossing folder and then I added some little dollar store gems.  The word "JOY" was cut from red using the Alphanumeric die (Tim Holtz).


For this card I thought I would try stamping on the Metallic Kraft Stock.  First I tried it with Archival ink and it beaded up and even after I dried it with the heat gun, it rubbed off.  The same thing happened with Distress Ink so I pulled out some Versamark (Tsukineko) and stamped the snowflake from the Christmas Blueprints set (Tim Holtz) in my stash onto some turquoise metallic  using Winter's Mistake Embossing Powder (Emerald Creek).  That worked but next time I would remember to use a chalk pouch on the Metallic Kraft Stock before I stamped.  Before I added the snowflake panel and the sentiment to the card blank, I added a panel of paper from the Zella Teal pad (Prima) in my Funkie Junkie Boutique stash that was inked with Tumbled Glass DI.


When I was looking for a suitable embossing folder to make the silver card I came across some little folders that I don't think I have ever used so I created some little gift tags with them and some of the metallic scraps.

So, as you can see there is lots you can do with Metallic Kraft Stock - punch it, die cut it, scuff it, run it through an embossing folder, heat emboss on it and use it as a mat.  I don't own any of the 3D embossing folders or Impresslits from Tim Holtz but they do look fantastic with this Metallic Kraft Stock.  I will provide a link to them in the store and if you check out this link to one of Tim's videos, you will be inspired to add some to your cart as I plan to.

I have done some pretty simple things but I will bet that many of you will have other ideas on how you can use these papers so I hope you share them with us.

Link to The Funkie Junkie Boutique for products used (individually or category) or suggested alternatives:

Metallic Kraft Stock
Sizzix Thinlits Die Set 14PK - Paper Snowflakes, Mini by Tim Holtz
Sizzix Alternations Tim Holtz Thinlits Dies - Holiday Greens 658759
Tim Holtz Alphanumeric Thinlets dies
Tim Holtz Distress Ink Pads
Stampers Anonymous Tim Holtz Rubber Stamps - Swirly Snowflakes
Embossing Powders
Versamark
Scor Tape
KAISERCRAFT Pearls - Self Adhesive - Champagne
Impresslits
Texture Fades

Saturday, April 20, 2019

Saturday Showcase - The Colorful World of Dyan Reaveley

Hello friends, Maggi here to share with you the colorful world of Dyan Reaveley! I adore her bright quirky style that is just a little to the left of reality. My approach, as usual, is to simply sit down and "play" with my supplies. I don't usually have any concrete ideas in mind, I just let my projects evolve.


I started out by gathering up my Dylusions supplies: stamps, paint , paint pens, quotes and mists.  The Funkie Junkie Boutique carries a great line of Dyan's Dylusions products, take a look here.


My Inspiration

I recently returned from a cruise to the ABC Islands and fell in love with the bright colored buildings that populate the islands. I took a look at the flamingo head stamp and remembered the beautiful flamingos we observed on Bonaire, ha! My first idea, this silly fun flamingo representing the beautiful colorful island of Bonaire.

The Process

Step 1:
I began by using a sea sponge and dabbing Dylusions paints onto paper made for mixed media applications. After that dried, I stamped the parts I wanted onto the painted paper using archival ink and then fussy cut the pieces. You can apply the Dylusions paint anyway that you want. I watched some of Dyan's videos and she uses different things including baby wipes and ink applicators.


Step 2:
I followed the same process applying blue and white Dylusions paint to the paper and then stamping on this image. Be sure to use archival ink for stamping so that the image doesn't smear if you use any other medias over the stamped image.


Step 3:
Ok, now lets prep our tag. I'm recycling a Graphic 45 large product tag. I used paper from the Graphic 45 Kaleidoscope Patterns and Solids pad and G45's large tag die to cut a cover for the product packaging tag. Now it looks brand new. At the bottom of the tag, I used the burlap stencil and Vanilla Custard Dylusions paint. At the top I used the Rosette stencil, Vibrant Turquoise and a little White Linen.


Step 4:
Next I wanted to add a slash of bright green and I wanted to specifically use just a part of the stencil. This is easy to do, just use tape (I find Timmy's tissue tape works great for this) to cover the part of the stencil you don't want.


Step 5:
Now it's just a matter of assembling the bird and layering on the pieces. I first added the blue pieces representing water and waves. I cut two pieces and layered one over the other and popped up some parts to create dimension. Then added the flamingo and flowers. Her hat is something I drew free hand and then fussy cut.


Step 6 - How to resurrect chipboard!
I made a boo-boo, it happens right? Well it was the only chipboard piece I had that spelled out Bonaire and I really wanted to use it. I had first painted it green and then covered it with Baked Velvet embossing powder. Well that was pretty BUT it got lost over the green stenciling. What to do, what to do?? Ok here goes nothing I thought as I peeled the layer of embossed chipboard off leaving a distressed looking piece of chipboard. So I painted that orange, then applied Sedona Baked Velvet embossing powder. Well at that point, it looked ok but kind of rough. IDEA! Try some UTE embossing enamel on it. Oh yeah baby, I covered it with clear thick (UTE) embossing powder and that did the trick! I just love it when something like this works out.


Add some flowers, a bow, whatever your heart desires and you've got a funky colorful tag!


A Garden Tag

It's springtime and of course, I start thinking about gardening and that was the inspiration for this tag. I just love this caterpillar on legs. Seriously, how fun is that?


Step 1:
Again, I recycled a Graphic 45 package by cutting a large tag from mixed media paper, using Graphic 45's large tag die. I wanted a really solid seal between the paper and tag since I would be applying wet media to the tag. I used my Xyron Creative Station to apply adhesive to the back of the die-cut tag and then firmly pressed it onto the tag.


Step 2:
Next I created a background on the tag by using a baby wipe to apply color to the tag. The baby wipe worked great and the best part, apply the color and throw the baby wipe away. No paint brushes etc to wash!


Step 3:
Now to create a fun little creature! I stamped these images onto mixed media paper and fussy cut them out. To give the legs some strength, I cut really narrow strips of chipboard and glued to the back.


Step 4:
Let's paint! I sprayed just a wee bit of Dylusions mist into my paint tray, really you only need a drop or two. Then I dipped a Ranger water brush in the mist and colored the adorable little guy. This works great because the mist does not color over the black stamping so you don't have to be too careful about keeping in the lines.


Step 5:
Next, I stamped flowers on the bottom of the tag and did some coloring with both Dylusions Paint Pens and waterbrush/mists. The difference between the two is that the paint pens are opaque whereas the mists are transparent. I added some pretty Little Birdie flowers to complete my garden.


Step 6:
I stamped the sentiment onto mixed media paper, colored it with mist and then doodled on the flowers and around the edge.


Time to be a Unicorn

This is a larger tag as I used a medium Etcetera tag which is 5 1/2" x 10". Sometimes I get so engrossed in what I am doing that I forget to take the pictures. Opps, I am sorry but I think you can see what I did.

The background is paper from Graphic 45 Kaleidoscope Collection. I think it looks just grand together. The blue "waves" are left from the first tag, I just thought they looked fun on the unicorn's back!


To create the Unicorn's dress, again I used mixed media paper that I dabbed with white and pink Dylusions paints. After it dried, I stamped the dress image and cut it out. Dylusions Paint Pens were perfect for coloring. I love how they are opaque and work perfectly over top each other without creating a muddy color. (Be sure the paint underneath is dry though) I used a waterbrush and mists on the head and mane.


The leaves are die-cut and I just used my Dylusions Paint Pens to doodle on them. Doodling is fun and addictive. AND easy!! Try it, there is no wrong way to do it.


The sentiment is from the Dylusions Stickers - White Chat Large. I think we all feel this way sometimes! I used a white pen for the edge doodling and black pen around the sentiment.


Thanks so much for joining me today! It's a good day to try something new, get out your vibrant colors and create!

Links to the products used on these tags and available from The Funkie Junkie Boutique:

Dylusions Stamp Set - Nuts In MayDylusions Stamp Set - Just Breathe
Dylusions Paint Pens Black Marble/White Linen
Graphic 45 - Kaleidoscope - 12x12" Collection
Graphic 45 - Staples - Large Tag and Flowers Dies