Welcome to this week's Saturday "Step X Step" in which I am using Perfect Pearls with Perfect Medium for stamping and on embossing folders! When Linda mentioned carrying these luscious and beautiful powders, I was so thrilled and hope you will be as well! For today I made up a couple of Christmas cards and some ornaments, which I may use for gift tags!
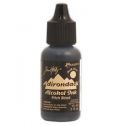
I inked up applicator with Black Alcohol Ink (4 to 6 drops) and a good size drop of Gold Mixative, with a little squirt of blending solution! Color was pounced on starting from the center and working out in a twisting motion onto glossy paper (4 1/4 X 5 1/4)to fit the embossing folder. For this I wanted a darker background with touches of gold. Once I was happy with the color, I did use the heat tool to completely dry the background. If you don't have a dry surface and add the Perfect Pearls, it will adhere where you don't want it!! Try to keep the PP as contained as possible.
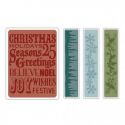
Now we place the inked background into the folder for embossing. Cover the raised areas with the Perfect Medium, being careful to not press too hard. You can work in segments, but the ink will stay wet long enough to cover all areas.
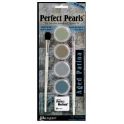
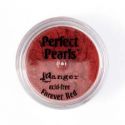
From there pick up the color you want to use. For this panel, I used red, green and gold Perfect Pearls. Once colored, turn the panel upside down to tap off excess and then lightly brush off remaining powder. I am always careful to brush away from each color as much as possible, because I would not want red to catch in a green area. Think glitters! I do use a cotton swab to pick up unwanted powder.
 |
| Pearled, Excess Brushed Off and Sealed |
Once I was done with my Perfect Pearls panel, all additional panels were cut 1/4 inch larger and a little trim was added here and there. I was so excited with this, that I went and did a second panel, cut off the lower embossed section (which is MIA) and added some additional edge embossing, sanded and inked this up and colored with Green and added a few Stickle berries! Fun stuff! This really goes quicker than you might think!

Because I was having so much fun, I decided to play with the Carved Ornament Die, which I was never quite sure what I would use it for! The idea of gift tags came to mind and I had a blast! Tried using the Perfect Pearls a couple of different ways. One I stamped on a foil sheet, which was adhered to card stock prior to cutting. A couple I used Dyan's new and fabulous snowflake stencil with Deco Art Decorating Paste, let it set a little and then added my colors (gold and blue). When I was finished, I gave the entire lot a spray with sealer. It worked perfectly and even on the foil, which I was not sure about! I wanted to test before showing this! I did not want any PP rubbing off and some of these surfaces are quite slick!


Things to know: You can use embossing ink, but I really prefer the Perfect Medium as it is thicker and not as wet! Even though there is a binder in the Perfect Pearls, I will always give a quick spray of Krylon Matt Sealer over the surface and especially on a slick material such as glossy, foil or alcohol inked papers. I have also given a quick spray with water out of the misting bottle when inked on regular card stock. Don't over load your brush when you are doing lettering as you risk it falling off and adhering to places unwanted! I like to start with the lighter colors and work toward the dark. Keep a paper towel handy to wipe between colors or wear some jeans!! Before brushing off excess, I will turn my piece upside down and tap off and then brush off excess away from other inked areas if possible. Just try to avoid contamination! I do keep colors as separate as possible, but when I know that is next to impossible or too time consuming, I have a container that I use for Perfect Pearls Dump. Will use that when I don't care about a particular color!
I sure thank you for stopping by and visiting on this Saturday. If there is anything I did not cover or you have a question, please don't hesitate to ask! Have a wonderful rest of the weekend!









You covered everything perfectly (sorry could not resist). That embossed piece at the top is absolutely gorgeous and looks amazing with the addition of the PPs, love your tags too, such a great idea.
ReplyDeleteWow...wonderful! I love the vintage metallic the Perfect Pearls give to this ! Gonna try it!
ReplyDeleteStunning vintage metal effects with the embossing - all gorgeous techniques which I'm looking forward to playing with. Thank you so much for this... and it's also great to hear how much you were enjoying yourself too!
ReplyDeleteAlison x
What a wonderful tutorial, Terry. I am totally new to using Perfect Pearls so this was so educational for me. Now I can't wait to give them a try. Your pieces came out absolutely gorgeous! Thanks so much for the beautiful examples!
ReplyDeleteHugs,
Linda
This is incredible, Terry!! I love the way you used that folder with the Perfect Pearls. Brilliant!
ReplyDeleteBeautiful metal effects Terry
ReplyDeleteThe cards and ornaments are really great.
thanks for sharing this with use.
Greetings Janny
Between Linda's Halloween card and your amazing tutorial with Christmas items...I can't decide which holiday I'm more excited to decorate for!
ReplyDeleteGreat job Terry..very inspirational.
Gorgeous projects Terry! I love that you used a sealer...genius! Beautiful work!
ReplyDeleteThese pieces are gorgeous! I love how you used Perfect Pearls with the folder. I have to try this out.
ReplyDeleteOh Yes... I too love this technique and I have been working with foil and A.I. this past week with great success I might add. To see this tutorial was wonderful as I now know to dry off before adding the pearls!
ReplyDeleteThank you Terry, this was a great tutorial.
Smiles:)
Sue
Oh, Terry, these are so rich and elegant, especially the words panels... amazing creations with the PPs!
ReplyDeleteVery very kewl GF, I can't wait to try this, Great tech! hugs
ReplyDeleteSoooo gorgeous!!! Thanks for hsairn this great technique. xxx
ReplyDeleteHi Terry, these are all gorgeous, and a wonderful technique, thanks for explaining everything so well.
ReplyDeleteAvril xx
This is a great tutorial! Thank you so much! I wondered about sealing the PP and you answered my question :)
ReplyDelete