
Welcome everyone to another edition of Saturday Step by Step here at Frilly and Funkie. 'Buttons' here to show you an idea for using your embossing folders in a slightly different way. Many of you are now being tempted to use moulding paste and texture paste, usually through masks. Me being me I had another 'what if' moment and decided to try out using my collection of Tim Holtz/Sizzix Texture Fades with these pastes. In a shortened version, this is what I did...

Spread on the paste fairly thin and evenly (in this case Viva Decor Ferro - Graphite) using the tweezers to stop the card from moving around. Don't worry about going over the edges; no need to be precise.

Before moving anywhere blast it with a heat tool just enough to seal the top layer, then set aside to dry thoroughly. I tried using it semi-dry but the results weren't as good and I got very mucky!

When dry place inside your embossing folder - yes, you can use a diffuser plate too!

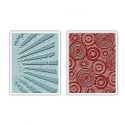
Here are a couple of examples using different folders/diffusers (the lighter one is Viva Decor Ferro - Silver).

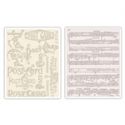
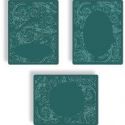
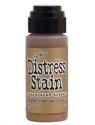
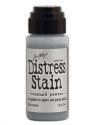
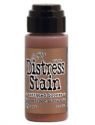
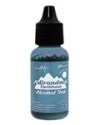
You can also apply paste to shapes/frames. If they are small it can be easier to use a brush to apply the paste and the drying time will obviously be shorter. Once dry, you can add more colour to them using Distress Stains (especially the metallic ones) Distress Ink, Archival Ink, gesso, paint, wax highlighter (like Treasure Gold) and even Alcohol Ink (yes, this works too!) Don't worry about using a heat tool on them either; once dry and embossed they become fairly indestructible and will take lots of layering.

And here are the results using these various media over the Graphite...

over the Gold...

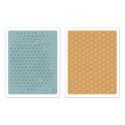
over the Silver...

and over white modelling paste.
Hope this has given you some ideas to try for yourselves and even more reasons to stock up on those embossing folders and diffusers. There are some more close up shots over on my blog (link in the sidebar) and if you have any questions or need futher help with this please leave a comment and I'll get back to you (did I just sound like a Customer Services rep?!) Thanks for stopping by, hugs Jenny x
 |  |  |  | |
 |  |  |  |  |
 |  |  |  |  |
 |  |  |  |  |
 |

Ooh, Ferro and embossing folders - two of my favourite things! Hadn't thought to combine them...what a great idea! XXX Keren
ReplyDeleteHey there sweetie, love the tutorial, thank you so much for sharing Hugs Terry xxxx
ReplyDeleteA great idea Buttons, love all the various combinations and looks that can be created here...a fab step by step....will have a play and let younknow!!! Great variety too! Hugs trace x
ReplyDeleteFabulous idea!
ReplyDeleteSuzi B :)
Wow Jenny, love what you have done with the paste and the embossing folders - would never have thought to do that! Your results are fabulous and your tutorial is excellent! Thanks so much for the inspiration. Hugs, Anne x
ReplyDeleteohhhh, something I don't own and have been seeing a lot of is that ferro paste...I wonder if it's in the boutique? I REALLY the graphite. I want to touch it, lol. I must find some to play with
ReplyDeleteA great tutorial with amazing results, Alison!
ReplyDeletegreetings, Alie :-)
What a fabulous "what if" with great results! A brilliant step-by-step: clear, concise and full of inspiration - thanks so much, Jenny!
ReplyDeleteAlison xx
What a wonderful idea, I'm definitely trying this, thanks!!
ReplyDeleteWhat great results, Jenny, these look divine, I would never have thought you could do this with ferro and embossing folders. I got some the other day, will have to give this a go, looks fantastic.
ReplyDeleteBecause I have never seen anything like this before - when I first started reading your instructions, I stupidly thought you were spreading the ferro onto the embossing folder ha ha, it's an 'age thing' you know ha ha.
Lots of love from Patricia xx
fantasic! Thank you very much!
ReplyDeleteAmazing results, must try it. Thank so so much, Jenny
ReplyDeleteWow, that's a cool idea and the results are wonderful.
ReplyDeleteA fabulous tutorial Jenny and great results. TFS.
ReplyDeletehugs {brenda} x0x
I love this look- how cool! I cannot wait to try it out....and experiment : )
ReplyDeleteExcellent tutorial Jenny, and wow fabulous results, I can feel a ferro purchase coming on. Hugs Mo x
ReplyDeleteHi Jenny thanks for sharing this technique.....very inspirational. Love all the texture.
ReplyDeleteCrafty hugs
Annie x
Fantastic textures Jenny with amazing results! Thanks for sharing this great technique, very inspirational!!
ReplyDeleteOh my goodness, this is incredible and I can't wait to try it! Thank you for the step by step instructions and pictures!
ReplyDeleteLoving those results. The texture and colors are just amazing as is your tutorial! Thanks so much and have a great weekend!
ReplyDeleteAwsome results Jenny !!!
ReplyDeleteVon ♥
I love the results of this cool technique. TFS
ReplyDeleteBravo Jenny! You really hit a home run with your very first post here on Frilly and Funkie. Sensational tutorial and totally amazing results from your technique. Thank you so much for sharing such valuable information with our readers!
ReplyDeleteHugs,
Linda
Wow, your "what if" moments are "amazing"! But then that's why you're the customer service rep...hehehe! Great idea and tutorial! Thanks!
ReplyDeleteHugs,
Pendra
Wow Jenny ! Absolutely fantastic tutorial, I'll definitely be have a go at this technique ! Sue C x
ReplyDeleteWow I love how these turned out,the ones in the second and third pictures look just like metal!
ReplyDeleteWonderful Jenny!! I have all the ingredients for this so will be having a play very shortly. So pleased to see your success here - so deserved.
ReplyDeleteJuliaxx
I cannot get over how truly fabulous these are. I'm new to embossing paste, but am going to have to add it to my wish list. Looks like fun!
ReplyDeleteWhat a great idea, the results are brilliant.
ReplyDeleteRemarkable technique, TFS. Thanks for visiting and leaving the sweet luv.
ReplyDeleteHugs
Berni
berni46blogspot.
I was just making a comment on a blog that I really must get my texture paste out that I bought at NEC in November. What with Christmas I did not get much chance to give it a go! Thanks for the motivation and inspiration.
ReplyDeletegreat idea. I've got a jar of Ferro knocking around. now I've got a new use for it.
ReplyDeleteHi Jenny, your timing is perfect! I'm only just getting my hands on my first embossing folders now. Thank-you for such a fabulous tutorial that gives a yummy alternative way to use the folders. Your results look fabulous. You are wayyy talented! Nicola x
ReplyDeleteWhat wonderful inspiration !!!! I'm going to have to try this ! Thank you
ReplyDeleteI have to try this!! Fantastic technique and tutorial. Thank you!
ReplyDeleteWhat a fabulous tutorial! I keep seeing those embossing/texture pastes and wondered what to do with them other than smear them over a stencil! Now I know! Great job!
ReplyDelete