

This little project began with a free download of the 2014 calendar. This is how it prints. You can find it HERE...

They have a really fun vintage shape! After printing the page onto cream card stock, I cut each month out and inked the cut edges with some black distress ink...

After covering the cut edges in black, I used some 'Old Paper' distress ink to give the look of oxidized papers...

The months were then clamped together and a bead of quick drying glue was applied to the top edge. It helps to get a round bead of glue, but without so much that it runs down. This is fairly easy to achieve since this particular glue isn't runny...

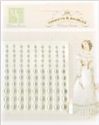
Give the glue a few hours to really dry. Once fully 'cured', I added a row of half pearls that I colored a warm grey (W1) with a Copic marker...

While the glue was curing, I die cut a square, decorative mat, hand cut the center square out and adhered a printed, vintage image behind the frame. A friend gave me the image and my scanner is wonky. I'm sorry I couldn't include it in this post. The blue floral paper panel was also die cut, but of course you could always cut a rectangle and use a corner punch...

A larger panel was cut to support the blue panel from lightweight chipboard. A decorative paper from the same gorgeous paper collection was also cut to the same size and the two were glued together. Some white acrylic paint on a craft mat, was lightly loaded by spreading the paint on the mat, with a foam brush. Foam brushes give me good control of the paint and I like to add an irregular edge with the side of the foam brush...not too perfect works just great!...

It's also good to paint the side edges of the mounted paper and chipboard for a more finished appearance...

A line of distinctive lace across the bottom really appealed to me, but the white wasn't quite right and the cream laces were far too yellow. The solution was Copic marker, this time in a slightly darker warm grey (W3). I used the broader chisel end to color the white to just the right shade and glued the trim to the back of the lower edge of chipboard. The photo above shows the lace before I customized it...

To get something a little different for the hanger and the bow I wanted to add, I found an old background stamp in a swirly script. Any elegant writing will give a good effect. I ironed some hand dyed seam binding, inked just a portion of this stamp and on my craft mat, stamped across the ribbon. You can see above, that I anchored the ribbon in a straight position with some objects on my play table...

My first try was with a brown die ink. The result was pretty, but I decided I wanted black lettering instead to repeat the black on the calendar...

Scraps of vintage lace were adhered down the center of the entire panel and then the triple bow was added. Two jump rings were inserted into the top corners. If you don't know how to use jump rings, there are loads of tutorials on 'You Tube'. It is so handy to know how to use them!...

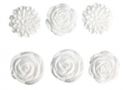
The calendar was adhered over the vintage ribbon and mother-of-pearl buttons were added to each corner cut-out. I used one of the gorgeous Melissa Frances rose embellishments and found some old fabric leaves to tuck underneath...

You can see above how the lace trim adds a nice finishing touch. I hope you are feeling encouraged to take out your supplies and spend some time creating!
My wish for us all is for a little time each day to feed our souls with something creative~
With ((hugs)) and blessings, Rebecca
 |  |  |  |  |
 |  |  |  |  |
 |

This is absolutely gorgeous Rebecca, love all the delicate details and gorgeous touches that make this so beautiful! A really great step x step x hugs xTrace x
ReplyDeleteWhat a beautiful calendar Rebecca. Loving the lace and stamped ribbon. Jenny x
ReplyDeleteYour completed calendar is so beautiful, love the vintage looking calendar months and the pearl topping is the perfect finishing touch. Thank you for the step by step and also the link. Anne x
ReplyDeletethis is stunning - I will definitely have to download that little calendar - perfect - the step by step is very helpful - hugs Rachel xx
ReplyDeleteA Lady's Calendar - very nice Trace. I love the bow and that ribbon. Bravo!
ReplyDeleteSandy
Gorgeous!!! Thanks for the inspiration!
ReplyDeleteThis is beautiful! I love the calendar and all the texture.
ReplyDeleteFabulous !
ReplyDeleteCorrie x
What stamp did you use for the text on the binding? Gorgous font.
ReplyDeleteThis is fabulous, thank you for sharing.
ReplyDeleteYour shabby vintage calendar is delightful, Rebecca. Sweet image, lovely framing and that stamped seam binding is fabulous. That calendar is wonderful too - thanks for sharing that link with us. The pears along the top of the calendar are the perfect finishing touch!
ReplyDeleteHugs,
Linda
Beautiful calendar Rebecca ! The pearls along the top of the dates is perfect ! Sue C x
ReplyDelete