Linda asked me to concentrate my efforts on Wendy Vecchi Archival Inks and Distress Inks - who can refuse an offer like that! Anyone who follows my blog regularly knows I've been just a little excited by the way Wendy has used Archival Reinkers to create amazing backgrounds (here is her Ranger VIDEO DEMONSTRATION from Winter 2014 CHA). So you've given it a whirl and got your background, but where do you go from there? Here's how I created this card;
Start with your inky background. Trim off the parts you are unhappy with (if there are any!)
I sit my background on a card blank to work out where to put it and layer die cuts on to figure out the basis of a design. In this case I went for white and vellum foliage pieces, but if you have a stash of die cuts now's the time to play and see what works for you.
I stick with similar colours to create other embellishments. Stamping the flowers in Archival Ink means I can play with Distress Ink and water without fear of losing the image. To finish these white gel pen dots were added to the centre before they were coated in clear embossing powder.
You can use Distress Inks or Archival Inks through your stencils and on your stamps. Make sure you dry each layer thoroughly to allow the Specialty stamping paper to 'lock in' the colours. By doing this you also prevent the ink bleeding into your white embossing paste (stencilled on top of the stamping).
Having stuck a couple of the base die cuts in place, I created another layer by stamping the dot background onto white card with the Red Geranium Archival Ink. Having cut around the edge I also cut through the middle of this background to allow it to be 'extended' as a rectangular shape behind the top layer.
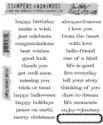
To add a little extra detail I splattered on a few dots of White Linen Dylusions spray. Finally the remaining die cuts, glossy flowers, net roses, stamped sentiment strip and some of those divine pieces of dyed seam binding you get when you order embellishments from The Funkie Junkie Boutique were added.
And here's a few close ups to show you the finished card in more detail.
Combining all these different textures makes such a difference to the completed design.
Hope that has given you a few ideas for creating your own cards from these amazing Archival Ink backgrounds. The products used are listed below, and don't forget, those inks have an extra 15% discount for this coming week over at The Funkie Junkie Boutique. Enjoy!
Take care of yourselves,
Jenny xxx








Love how you've used this fabulous technique of Wendy's and designed a gorgeous card. xx
ReplyDeleteMarvelous card. I love it!
ReplyDeleteMonique
Fabulous Jenny - the colour combination is just stunning and your grouping of embellishments is just wonderful.
ReplyDeleteYou really have mastered Wendy's wonderful technique to perfection Jenny! I love that you show us how you achieved the end result on this gorgeous card. Anne xx
ReplyDeleteApologies! That should be Jenny. Anne xx
ReplyDeleteA great card using Wendy a fab technique x hugs x still love that flourish stencil! X
ReplyDeleteGlorious card - absolutely love the colours and the inky panel is wonderful. The spray of mixed die-cuts, texture paste and ribbons is sheer perfection - brilliant!
ReplyDeleteAlison x
What a fantastic card! I love the flowers and the dimensional stenciling over the inked stenciling. The panel with Wendy's technique, and the colors you used, is fantastic!
ReplyDeleteBeautiful colours, I love the swirly bg xx
ReplyDeletethis is soooo pretty! the colors are fabulous!
ReplyDeleteBeautiful as always Jenny. Love how you include so many layers!
ReplyDeleteBeautiful!
ReplyDeleteGorgeous card. Annette x
ReplyDeleteFabulous tutorial Jenny and the finished card is a stunning. Hugs Rita xxx
ReplyDeleteSuch a pretty happy birthday card! Love the flowers and all the inky loveliness! Great SxS! Happy Weekend!
ReplyDeleteSuch a beautiful card, the colours are just wonderful :o) x
ReplyDeleteFabulous card Jenny, love how you used Wendi's technique here. Bright and cheerful and full of special touches!
ReplyDeleteAbsolutely gorgeous. Love the colours and the layout with all the dimension.
ReplyDeleteHugs!
Cec
Great card! Love the mixed elements!
ReplyDeleteFabulous card - all those gorgeous colours with the fantastic white to emphasise them! Love it! Chrisx
ReplyDeleteBeautiful!
ReplyDeletesandy
A gorgeous card and such a great tutorial full of fabulous ideas for inking techniques, Jenny!! Whoever receives this for their birthday will have a card to treasure for a lifetime!
ReplyDeleteHugs,
Nancy
Great Friday Focus, Jenny. Your card is lovely. The colors are gorgeous and your flower cluster so beautiful. Love that polls dot background too".
ReplyDeleteHugs,
Linda