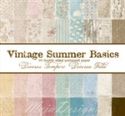
Hello Frilly and Funkie friends. Linda here this week with our Saturday StepxStep post, sharing a shabby chic card. Since our Friday Focus 15% off product week is gorgeous Maja Design paper, I decided to use that for my project.
Sorry this post is running a bit late but I have been packing and shipping order like crazy. Lots of restocking going on at The Funkie Junkie Boutique plus a large shipment from Stampers Anonymous is coming in on Monday with the new Stamp It, Stencil It (SISI) sets, some Brett Weldele stamp sets and from Ranger...wait for it...FINALLY the Mini Ink Blending Tool. I will have enough to fill all your pre-orders, but will have to wait for the next shipment before you will see it up for sale as a in-stock product in the boutique.
Okay, enough of the shop updates, let's get to the StepxStep. When I pulled out my package of Maja Design Summer Vintage collection, I found this card base cut, distressed, inked and ready to go. It seemed like the perfect starting point, but became a bit of a problem at the end (you will have to read all the way to the end to find out why).
I have used all sorts of edge distressing methods, changing and evolving over time, from Tim Holtz's edge distressing tool to scissors to my fingernail. Right now, it's the fingernail. The edges were all sponged with Vintage Photo, my go-to pad for aging/edging paper.
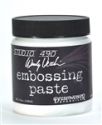
I can't seem to make anything lately without some sort of stenciling, either with inks or embossing paste. (I haven't gotten into spray inks just yet, but I feel that coming on soon :) I wanted some embossing texture but didn't want to cover up the lovely Maja paper so I just edged the corners with a bit of paste using a Prima mask.
This time I applied it with my finger to give it sort of a smudged look. When I took the stencil off, I smudged the straight edge a bit more to give it less of an abrupt transition.
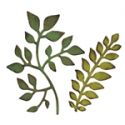
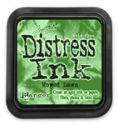
For my embellishments, I decided I wanted to die cut some foliage from felt. I used the new Garden Greens Bigz die to cut the leaf spray from the irony felt. I forgot to snap a pic of it, but I dyed it with Mowed Lawn Distress Stain. It was way too bright so I softened it by misting it with water and then blotting the excess moisture out with a paper towel until I got it to a shade that pleased me.
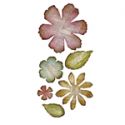
Next I cut two flowers. The larger one was cut with the Jumbo Tattered Florals die. I like that size flower - it's not the really jumbo one on the die. The smaller of the two was cut with the Tattered Florals Bigz die. When I layered the two together, the smaller one sort of faded into the larger one. To give it some definition, I painted it with a bit of reinker mixture. I call it my Perfect Baby Pink. Here's my little recipe - I take a mini mister and do 3 or 4 pumps of mist into a small cup, then add 4 drops of Tattered Rose reinker and 1 drop of Victorian Velvet reinker. I lightly dotted it on around the petal edges and then misted it with water and blotted out the excess. That gave it just a hint of pink to make it stand out against the layer behind it.
I also cut a piece of white Venise lace and applied my Perfect Baby Pink with a few strokes of the brush. I did the same with another piece of Venise lace to be used at the bottom of the card as well as one of my sweet Venise lace butterflies.
Next I started laying out all my embellishments to figure out how I wanted them arranged. I grabbed one of my little vintage hearts that I made and sent out with orders around Valentine's Day. They were cut with an older Sizzix die, stamped with Wendy Vecchi's script stamp from Live and Make Art with Potting Soil archival ink, edges inked with Frayed Burlap and misted with Heirloom Gold Perfect Pearls. I added a sweet little sentiment (Verve Thankful Hearts set) stamped with Jet Black archival, fussy cut and sponged with Victoria Velvet.
Next I started gluing the pieces to the base. I use Claudine Hellmuth's Multi Medium Matte, which has now been discontinued and replaced with Ranger's Multi Medium Matte, which I assume is the same product. I like it because it dries completely clear, but you have to watch out that you don't get it on an area where you have used distress ink because it will remove the color. I also use the multi medium matte to glue down the filigree metals when I use them.
Because the heart was going to be partially layered over another element, to give it stability I added a piece of craft to foam to the section that wasn't layered.
Now that all the elements had been affixed to the base layer, it was time to create the actual card shell and that's where the problem using an existing piece that wasn't cut specifically for the shell came in. I normally would have used another card stock layer between the front base and the card shell, but my front base was just a tad too large.
For my shell, I cut a 11x5.5" piece of plain white card stock and scored the 11" side at 5.5" and folded it to get a 5.5x5.5" square. I sponged the edges with Mowed Lawn DI and then toned it down a bit by going over it lightly with Vintage Photo DI. When I laid my card face over it, it was boring so I grabbed a new Speckles stencil and stenciled on Picket Fence Distress Paint. I really like the look of that and you will be seeing lots more of the Speckles stencil in my work!
Here's the finished card. I really wish the card front was a little smaller so you could see more of the shell. I would have trimmed the card front down a quarter of an inch if I had realized it sooner, but it was all finished and it would have messed up the placements of the embellishments if I had started trimming the sides at that point. Live and learn - LOL!
Thanks so much for stopping by Frilly and Funkie. Wishing you a sunny spring weekend!

These products used to make the above project can be purchased at The Funkie Junkie Boutique where most name brand products are always 20% below MSRP.








So many useful hints and tips here Linda. Love the use of translucent embossing paste so the paper remains visible and now the secret to your 'perfect baby pink' die is out there! You'll be seeing lots of that from now on I suspect. So much exciting news with The Funkie Junkie Boutique too. Love it! Jenny x
ReplyDeleteSo elegant and beautiful! Thank you for the great tutorial. :-)
ReplyDeleteThis is so beautiful Linda :-) I love the background and the texture on the corners. The layout is amazing and I adore the felt flower TFS
ReplyDeleteHave a great weekend
Hugs Annie x
what a totally gorgeous make Linda x love the colours you have used here, really gorgeous x hugs x trace x
ReplyDeletePerfect shabby chic - so tempted to add to your packing and shipping burden with these papers at such bargain prices - but I'm supposed to have given up crafty spending for Lent - eek!!
ReplyDeleteAlison xx
Oh my! The papers are stunning, the felt flower is so beautiful, the leaf, the heart, the butterfly - all wonderful. I love this card - wow! Anne x
ReplyDeleteLinda this card is "shabbilicious". Thanks for sharing so many helpful hints. I think the color of the leaves came out great. P.S. I love the little gifts you send out with shipping. I so look forward to the Step by Step tutorials every weekend.
ReplyDeleteOh I was pulled right into this Shabby Chic card and it is beautiful! Love the stencil texture and what a pretty flower! Love this, Linda! I won't apologize for giving you extra packing to do, but go ahead and take a little break in between! Hugs!
ReplyDeleteThe texture of the clear paste is gorgeous, letting the pretty background show through. I love the soft colours you've used and the contrasting fabric textures are fabulous together.
ReplyDeleteThis is a wonderful Shabby Chic card! Alexandra x