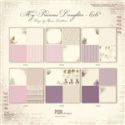
This sweet little box measures 2-3/4" in every dimension. I designed it to use only 8-1/2 x 11" card stock papers for the bases. I used the 6 x 6" collection of 'My Precious Daughter', but there is also a 12 x 12" version for larger projects and scrapbooking. Since this one fits in the palm of your hand, the reduced images found on the 6 x 6" version, were perfect. The die cut doily used on the lit of this box used one of the subtle damask patterned papers...

The rim of the lid is wrapped with some lacy trim and a thin band of ribbon. The die cut on each of the sides of the box was also cut from the same damask paper and accented with colored rhinestones...

You can see the beautiful damask paper used for the doily and topped with a narrow velvet bow that sits on two velvety, millinery leaves and topped with a paper rose that I colored to work for this project...

When the lid is removed, the layers folded inside open up, revealing a dimensional mound of flowers and a flutterby...

For the center of the box, I adhered some die cut flourishes, then a die cut doily and a half of a 1-1/2" styrofoam ball covered it with velvety violets, die cut leaves and a butterfly. I used patterned papers for each inside panel. There are also some small tags that are supplied on the embellishment sheets in the Pion Design paper collection. They are just so enchanting!

The largest, outer layer of the box walls use some more patterned paper, punched butterflies, die cut leaf vines and paper flowers. There is one inner section that I left blank to hold a personal sentiment. Here are the dimensions for each layer of the box and the lid. You can use all three layers as I originally thought I would, or just two as I did for this box. Because the center embellishment takes up space and I edged each side of the smallest layer with lace and the next layer with dimensional flowers… I ran out of room! Perhaps you will choose less exuberant embellishments and use all three layers! I used 4 sheets of 8-1/2 x 11" card stock and assorted sheets of the Pion paper collection for embellishing. The card stock is cut as follows;
- 7-1/2" square (to be divided into 9, 2-1/2" sections)
- 7-7/8" square (to be divided into 9, 2-5/8"sections)
- 8-1/4" square (to be divided into 9, 2-3/4" sections)
- 4-1/8" square (for lid)
- Cut out (remove) a section of the size specified above, from each corner of the (first) 3 squares.
- Score along the edges of the center square.
- Use a 1/4" corner rounder to shape the outside corners.
- Cut 4 panels of each of the following sizes (2-1/4", 2-5/8" and 2-1/2") to mat the four 'walls' of each layer. I have stacked the 4 panels on the base of each size for the photo below.

Here is what the squares will look like after you do that. Make sure you don't adhere the layers yet. It's easier to embellish each layer separately and then assemble them. Here is what a single layer might look like before the layers are assembled (it's the layer I made for this project, but didn't include ;))...

To make the lid, cut a square 4-1/8". Score 5/8" from each edge...

Cut along a single side of each corner square, stopping the cut when you reach another score line. Keep all of these cut lines going in the same direction. For display purposes, I am showing the cuts shown vertically. After you make these 4 small cuts, make another snip, towards the outside of first snip to create a small triangle...

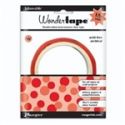
Fold along each scored line and then apply Wonder Tape to each of the X'd corners...

Peel off the protective film from the tape and carefully tuck that corner to the inside of the lid, burnishing from the inside with your finger or a bone folder. This tape is the strongest, quickest adhesive I have found for creating 3-D projects such as this...

Now it's time to flip the lid over and decorate!! I hope you will give this little 3-D carrier of good wishes and enjoy another way to send your love.
And as this is a Friday Focus post it means that all Pion Design papers will be discounted by 15% at The Funkie Junkie Boutique through Thursday, August 7th. With the 'A Day in May' and 'Shoreline Treasures' collections also in stock it's a great time to grab a bargain.
Sending you blessings and ((hugs)),


What a fabulous project Rebecca! Love the way you've used these beautiful papers and the huge surprise any recipient would get when they opened their box. Jenny x
ReplyDeleteThank you Jenny~ You are so exceptional in the wonderful way you keep this fabulous blogsite running and the support you give the entire DT, along with amazing creativity!!! Big hugs, Rebecca
DeleteI love this project! Thank you for the tutorial, I've wanted to make an exploding box for a long time. Now I can use your info to make one!
ReplyDeleteThank you Maryanne and you are so very welcome! Let me know how it turns out. ((hugs)), Rebecca
DeleteThis is very pretty and someone very special is going to LOVE THIS with all their heart... so very nice...Love the colors and the flowers... thanks for sharing it, Rebecca. Love ,Light and Peace...Bonnie
ReplyDeleteThank you Bonnie~ I appreciate your sweet comment! ((hugs)), Rebecca
DeleteThank you for the instructions but even more so for the photographs. I plan to make time this weekend to try one myself!
ReplyDeleteThank you Dodie! I hope you have lots of fun with it and I would LOVE to see your project if you take a photo~ ((hugs)) Rebecca
DeleteThis is beautiful Rebecca and thanks for tutorial.
ReplyDeleteJulie x
Thank you Julie~ so kind of you to leave this comment! ((hugs)) Rebecca
DeleteOh my, Rebecca, you are amazing! Every project you create is more beautiful than the last, if that's even possible because they are are so special in their own way. Your tutorial is so clear and well done that I'm excited to try one of these lovely boxes myself. Thank you so much!!
DeleteHugs,
Nancy