

Hi everyone, Linda here this week with our Friday Focus, only a week late. My apologies for dropping the ball. I have been super busy with my little boutique plus I was dragged out of town last week (kicking and screaming 'cause I didn't have my Friday Focus done) for a family event. But I'm back and have managed to pull together a little spotlight on ribbon for our Friday Focus this week. And the best thing about it is that all our ribbon, especially the gorgeous May Arts ribbon is our Friday Focus product and will be 15% off my already low prices for the next week. It's a great time to stock up on all that yummy ribbon!
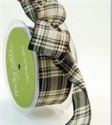
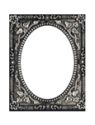
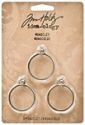
I wanted to do something fun with ribbon for this focus. I could have done a card with a bow, but wanted to take it up a notch. So I made this fast but cute wall hanging with a length of plaid ribbon and the wonderful new Foundry Frames from Tim Holtz's Idea-ology line. I am in love with these darling little frames. And they are tiny - just about 2x2.75 inches - good solid metal with a flat back.
 |
| Double click on any image to zoom in for details |
To start with, I cut a piece of chipboard narrow enough to glue the ribbon to. I trimmed the ribbon ends and brushed Multi Medium Matte onto the chipboard, then centered it under the ribbon and burnished it so it would glue without bubbles or wrinkles. Then I gathered each end and tied on some red dyed crinkled seam binding.

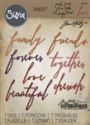
Multi Medium Matte was again used to glue down the frames. I could have filled in the frames with a photo or a stamped sentiment or message, but because I was spotlighting the ribbon, I wanted to leave it as open as possible so the gorgeous ribbon showed through. The tiny die cuts that come from the Handwritten Love die set were the perfect size for this project, plus I love the sweet sentiment expressed.

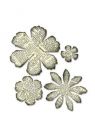
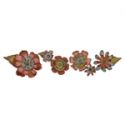
I used red so the message would really pop. The project was finished off with a flower handmade from coffee filters and book pages using a couple of the Tattered Florals dies.
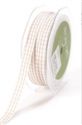
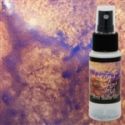
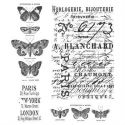
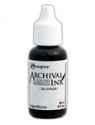
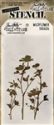
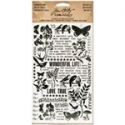
Here is one more sample using the narrow checked ribbon. Another quick and easy piece...I stamped the large script stamp from Papillon in black archive and then inked the tag with Vintage Photo, followed by a few mists with Lindy's Stamp Gang Van Dyke Sepia. Once dry, using the Wildflower stencil, I embossed with Ranger's white Texture Paste. I love the look of this and wanted to leave as much of the design open as possible.
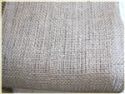
A woven design was created with the burlap strip and narrow ribbon by snipping a few threads of the burlap in measured sections to allow the ribbon to be woven through.

Botanical Remanat Rubs were used on the monocle and I blended a bit of Latte alcohol ink on the back to simulate aging.

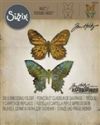
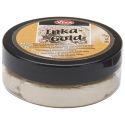
The butterfly was cut from acrylic packaging using the new Butterfly Duo Bigz die and then embossed with the accompanying texture fade. It was colored using Meadow and Pool alcohol inks with Pearl with a bit of Pearl mixative blended in. That was a bit too bright as I was going for a more vintage appearance so I dabbed a bit of Espresso alcohol ink on the back. Wanting a bit more shine, I dabbed some Treasure gold in Old Silver over the high points of the embossing. The butterfly was finished off with micro beads for the body.

There you have it. Two quick little projects using some of our yummy May Arts ribbon. Thanks so much for stopping by. I hope you will stop by The Funkie Junkie Boutique and check out our Friday Focus page to see our new ribbon stocks and take advantage of a total of 35% off MSRP this week through next Thursday night.
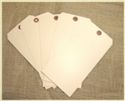
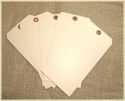
Below are the thumbnail links to The Funkie Junkie Boutique for all the products used in these two projects. Don't forget, we sell at 20% off MSRP for almost all our products. And we have most of the latest releases from Tim Holtz and Wendy Vecchi as well as Graphic 45. Definitely worth doing some window shopping :)
 |  |  |  |  |
 |  |  |  |  |
 |  |  |  |  |
 |  |  |  |  |
 |  |  |  |  |
 |  |  |  |  |
 |

I love the wall hanging! It gives me so many ideas for using my collection of vintage bits. The frames and plaid ribbon are fab!
ReplyDeleteI am SERIOUSLY in love with both of these Linda!!! Such clever ideas and wonderful makes. Who knew ribbon could be so versatile!!! Jenny x
ReplyDeleteWow Linda, what an amazing idea with your wall hanging, I just love the thick ribbon you used and a great colour choice to go with the frames. Gorgeous tag and what a creative way to combine the ribbon with the burlap! Love them both! hugs :)
ReplyDeleteYou have used the ribbon beautifully, the wall hanging is stunning and I love the embossing on your lovely tag too. Anne x
ReplyDeleteAwesome projects, Linda! Love the tag!
ReplyDeleteTwo great projects! The ribbon wall hanging is a lovely idea and thanks for the how to.
ReplyDeleteLove the black-white-red - what a fabulous hanging, really showcasing that wonderful ribbon as well as the brilliant thinlits. Love that tag too!
ReplyDeleteAlison xx
Wonderful Linda, what an inventive use of the foundry frames! Love the woven burlap too, great idea. Thanks so much for sharing.
ReplyDelete