

The cogs started to whir, I reached for some Distress Paints and Tim Holtz' Ledger Script stamp set, and came up with this...

So how did I do it? Start with a cheap box (I got a papier-mâché one from a craft shop). Cover it in an initial layer of Ground Espresso Distress Paint.

Add Industrious Frames strips to the edge of the lid and cover with more of the paint allowing it to dry.

Rub a wax candle over every surface, working in one direction (apply plenty of wax).

Paint a light coat of white gesso over every surface and allow to dry naturally - don't use a heat tool as you will disturb the wax.
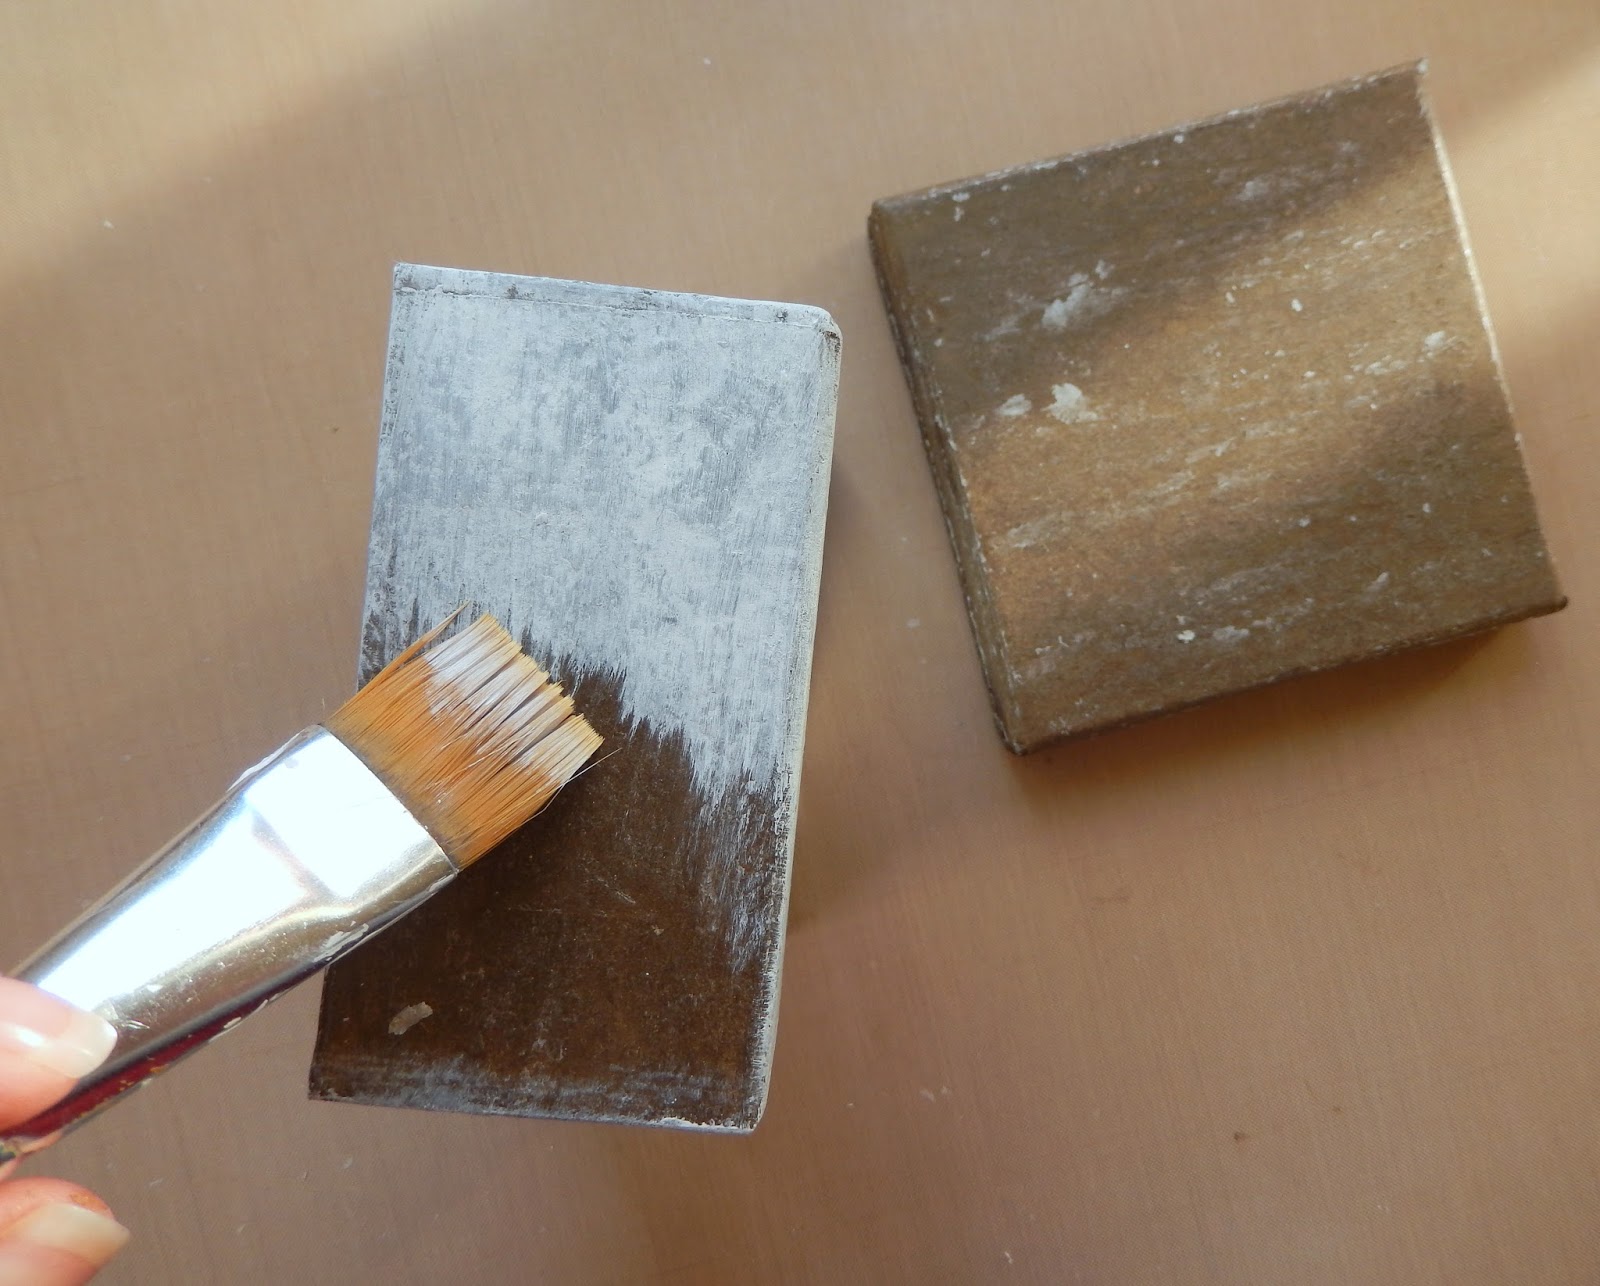
Rub over the dry gesso with a paper towel to remove some of the white layer, paying particular attention to the edges. You can use a sanding block to remove more if you want to.

Add more wax before dry brushing a little Walnut Stain Distress Paint over random parts and allow it to dry naturally again.

Once again rub over the surface to remove some of the fresh paint.

Use the Ledger Script stamps with black archival ink to apply some random stamping to the surfaces of the box.

Apply Ground Espresso Distress Paint to the brass clasp and allow it to dry.

Rub over the clasp with the wax candle again before applying a coat of Weathered Wood Distress Paint.

When dry, rub over the clasp with a paper towel to remove some of the paint layers, then stamp with the Ledger Script stamp as before.

Finally splash some Picket Fence Distress Paint over the sides of the box and the clasp. When dry attach the clasp to the side of the box and lid with Long Fasteners.

And it's done!!! Here's a couple of close ups so you can see more of the finished look...


Now you've got something special to give a gift in (or to keep for yourself!) Hope you'll give it a try.
That's it for this weekend. We'll be back on Monday with our latest challenge winners and on Wednesday you'll get to see more projects from the Funkie side of the team for our current challenge 'Autumn Splendor!' Hope you can join us for those and in the meantime have a great weekend.
Jenny x
Amazing result!
ReplyDeleteThank you Helene! x
DeleteIt's SO PRETTY!!!
ReplyDeleteThank you Lisa! x
DeleteOMG, Jenny, this is crazy amazing! I absolutely LOVE the outcome. You are a genius. Thank you so much for this outstanding tutorial. Wish I had time to run into my craft room to make about a dozen of these to store craft supplies in. How cool would that be?
ReplyDeleteHugs,
Linda
Thank you Linda! That would be cool indeed :) x
DeleteWow, is this ever fantastic. Love the wax technique and can't wait to try it.
ReplyDeleteHugs!
Cec
Thank you Cec! Can't wait to see the results x
DeleteI love this Jenny! I am so using that wax idea on the metal! Brilliant!
ReplyDeleteThank you Nicole! Can't wait to see what you create x
DeleteGorgeous little box Jenny, I love using wax to get a distressed look and it looks fabulous here. Love how you used the industrial stickers . Tracy x
ReplyDeleteThanks Tracy! Fun isn't it! x
Deleteamazing jenny - just with paint and a little know how - wonderful xx
ReplyDeleteThank you Rachel! x
DeleteInspiring! Great old look without the expensive price. Turned out fantastic. Makes me want to make one of these. Thank you for the tutorial.
ReplyDeleteThank you Marci! x
DeleteAwesome! Love all the layers Jennie! the text is what takes it over the top for me...(it's always the text). What a great piece!
ReplyDeleteThank you so much Paula! x
DeleteWhat a wonderful little box! I've got to try this wax technique. TFS Jenny!
ReplyDeleteThank you Deb! x
DeleteOh wow Jenny, it is hard to believe that this was a paper mache box! A fabulous transformation. Love the candle technique and the way you did the clasp - love, love this!! Anne xx
ReplyDeleteThank you so much Anne! x
DeleteA wonderful project! Thanks for the step by step, I always keep boxes to transfom them one day... Great inspiration, thanks!
ReplyDeleteThank you Lys! x
DeleteJenny - you are so creative and you know so many techniques. Paper mache - well you sure could have fooled me. You had to be mighty patient while making this box. It truly looks like it came out of my grandmother's trunk! Wonderful!!!!
ReplyDeleteSandy xx
Thank you Sandy! I'm so glad you like it. x
DeleteFabulous result with the wax distress! I love your little box and it really looks like a vintage treasure! Thank you for sharing your wonderful idea with us and for all your hard work preparing this post. But, I do note you have SUNSHINE pouring over your craft table--lucky lady! Hugs!
ReplyDeleteThank you Sara! And yes, you're right, it appeared in fits and starts throughout the morning x
DeleteFantabulous, Jenny!! Love, love, love the clasp finish..... your talent is amazing and so inspiring! xxx Lynn
ReplyDeleteThank you Lynn! Linda has the most gorgeous clasps and box corners in stock and I've been saving this one x
DeleteStunning Jenny! Looks like something you picked up from an flee market. Love Love Love it! <3
ReplyDeleteThank you Zoe! That was exactly the look I was going for so I'm glad it worked x
DeleteFabulous idea and tutorial! What a great idea to use a candle to act as a resist!
ReplyDeleteThank you Susan! The idea isn't original but using that new Ground Espresso works a treat for a look of aged wood x
DeleteGorgeous Jenny, looks like you found it at a fabulous antique shop! Thanks for sharing your techniques, Deb xo
ReplyDeleteThank you Deb! x
DeleteAbsolutely beautiful, Jenny!!
ReplyDeleteThank you Nancy! x
DeleteFabulous distressing. Great tutorial Jenny. Am definitely trying this.
ReplyDeleteThank you Rupa! Would love to see what you create too x
DeleteVery cool little distressed box, Jenny. Love the wax resist look you'r achieved on it. So random and fun! Your use of the industrial stickers is wonderful and the finished box is amazing...especially considering it was just a plain paper mâché box to begin with.
ReplyDeleteThank you Candy! x
DeleteGosh, Jenny!! This is INCREDIBLE! I'm feeling so inspired right now, you have done an amazing job with the transformation. It looks like it has always been a wooden vintage box xx
ReplyDeleteThank you Georgie! I was pleased with the end result. Just got to work out what to put in it!!! x
DeleteOh wow, Jenny this is incredible!! That wax candle resist just looks fantastic! Stunning effect on both the box and the metal closure thingy!! Adore the colours you chose too! Utterly brilliant! Off to pin to remember!!
ReplyDeleteThank you Astrid! x
DeleteJenny your altered box looks amazing !!! It looks genuine vintage. You made a fantastic job with this project. And your tutorial is so fantastic. Easy understandable and with the most amazing result.
ReplyDeleteThank you so much for sharing how you achieved this fabulous result. LOVE your work.
Hugs from Monica...... Spain
Thank you Monica! So glad you found the tutorial easy to follow x
DeleteAn amazing box and a brilliant technique! I would be keeping this for myself! !Chrisx
ReplyDeleteThank you Chris! I am for a while :) x
Deletewhat a great look you achieved on your little box! Really simple steps to get this wonderful aged look - SO creative Jenny!
ReplyDeleteThank you Julia! x
Delete