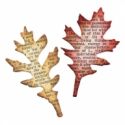
(Don't worry about uneven or faded stamping it works very well as a background.)
Tip: I used a manila tag but this involves a lot of water. Watercolor paper or a mixed media paper would have worked better in absorbing the water.
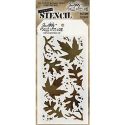
2. Place the leaf stencil over the stamped tag. Rub on glue from a glue stick in the openings. Repeat until entire tag is covered with leaves. Make sure to clean off your stencil thoroughly after you are finished with the glue stick. Baby Wipes or warm water will clean it up quickly.
3. Squirt puffs of color randomly over the surface of the tag. The colors on this tag are Merlot, Burnt Orange, and Yellow Ochre.
Tip: Do this in a box or contained space. The color bursts are gift that keep on giving. I have picked up the tiniest speck of a color burst on other projects because I didn't get them all off my crafting mat.
4. Take a brush and spread the color burst powder over the stenciled images. This doesn't need to be perfect as the colors will spread.
5. Shake of excess powder from tag into your container or garbage.
6. Spritz water over the entire tag. Ensure that all the powder/crystals are activated.
Tip: Move to a craft sheet, piece of acetate, or something that you can wipe down after you are completed.
7. Remove excess ink and water by dabbing up water with a paper towel.
8. Repeat water and dabbing off excess ink until desired color is achieved.
10. Sprinkle tag with glitter. Shake off excess glitter.
11. Optional: Spray tag with glossy finish. (This will seal the color and glitter.)
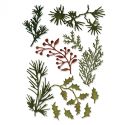
12. Die cut leaves and branches. Sprinkle color bursts onto slick surface. (I used a cool whip container top). Spritz with water. Die ribbon, leaves with various colors. Apply glue stick to branches and dip in glitter.
Here is a second tag with a lighter mix of the same colors. Each time you do this process you will end up with a different look.
I hope you enjoyed the tutorial as much as I enjoyed playing with my toys. The products are available in the store including the new leaf stencil and dies. The Funkie Junkie Boutique
Have a lovely weekend!
Suzz
Products:


Such a brilliant idea Suzz!!! I love the way of getting those colours combined and applied and the glitter really takes it to another level. Love it! xx
ReplyDeleteWell, you just blew my mind! What a clever idea, and what an amazing result! This tag is gorgeous with all those warm autumn colors and dimensional leaves. The glitter makes me think of frost...which is so very cool! Thanks for wonderful tutorial. I'm going to get out my glue stick and give this a go! xo
ReplyDeleteAbsolutely gorgeous. I don't usually like to work with glitter but am definitely a fan of this so I am going to try it too.
ReplyDeleteHugs!
Cec
This is a great tutorial Suzz and I just love the finished result - definitely want to try this technique! Anne xx
ReplyDeleteSuzz this is absolutely gorgeous. I love this technique. I've never used the color bursts and now they are on the top of my crafting wish list. Super tutorial and gorgeous tag! -- Mary Elizabeth
ReplyDeleteAbsolutely love how you used the Color bursts for this background! It's beautiful!
ReplyDeleteHi,
ReplyDeleteWhat a wonderful and very super design tag.
I love the wonderful way you have glittered it also.
Lots of crafty love. Jenny L.
Beautiful end look and you made it look easy too! TFS Karen x
ReplyDelete