

Hello friends and welcome, Zoe here and I'm delighted to be hosting this Saturday step by step. With Valentine's day just days away and our current challenge theme "BE MY VALENTINE" I thought I would share a card that I made for my sweet valentine.

(click on each set of images for a closer look)
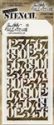
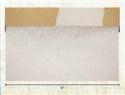
Step 2: Spritz the back of stencil with water, lay over the inked surface, place a piece of kitchen paper (paper towel) over the top to soak up any excess water. Smooth with your hand being careful not to move the stencil.
Step 3: Lift the kitchen paper and stencil, then dry with a heat tool.
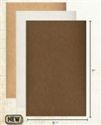
Step 4: Run a paper distressing tool, followed by potting soil archival ink, along the edges of the distress watercolor cardstock.

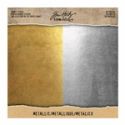
Step 6: Using a sanding grip, sand the classic and metallic kraft stock and blend in a little vintage photo distress ink.
Step 7: I used a little piece of the now discontinued copper metallic kraft core and as you can see, I'm a bit
Step 8: Layer up the cardstock and adhere with strips of scor-tape.

Step 9: Die cut hearts from scraps of cardboard using the heartfelt bigz die.
Step 10: Adhere tissue wrap to the top of the hearts with collage matte medium.
Step 11: Once dry cut roughly around the hearts.
Step 12: Using a sanding grip, sand the excess tissue wrap, it comes away really easily leaving you a nice neat edge.

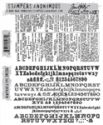
Step 13: Ink up a background stamp, place the heart face down onto the inked up stamp and press firmly with your finger.
Step 14: Carefully lift off by the edges with your fingers or you could use a craft pick to help lift and flip the heart over and dry with a heat tool.
Step 15: Cover the hearts with collage matte medium and set aside to dry, (it's fast)!
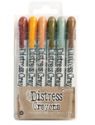
Step 16: Scribble a little mahogany distress crayon into the hearts and blend with your finger.

Step 17: Run gathered twigs distress crayon around the edge of each heart, blending into the sides with your finger.
Step 18: Cover the hearts with a layer of glossy accents.
Step 19: Set aside to dry.
Step 20: Stamp the bowler hat and bow tie onto distress watercolor cardstock with black soot distress archival ink and fussy cut. Blend in vintage photo distress ink.


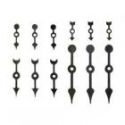
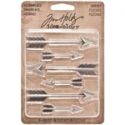
Step 22: Stain an adornment arrow with potting soil archival ink to age. Place on top of the 3 mini hearts and secure in place with glossy accents.

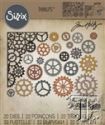
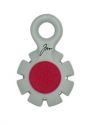
Step 23: Die cut gears from metallic kraft stock using the gear head thinlits die set... remember that piece of metallic copper kraft core cardstock I saved?
Step 24: Once you have a nice pile of gears, run each one over your sanding grip. Press the gear between your thumb and the base of the sanding grip and move it gently back and forth. I find there is less chance of the gear ripping. Blend in vintage photo distress ink to the exposed kraft core.
Step 25: Adhere the gears in layers using glossy acents. Try to just adhere the center of the gears where possible to give a more dimensional layer.
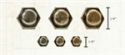
Step 26: Using the same die set, cut some larger gear heads from white substrate. Blend in vintage photo and walnut stain distress ink.

Step 27: Add the substrate gear heads over the top of the metallic layer attaching with a hex fastener. Add a thin layer of glossy accents to random parts of the gear heads to give a faux rust effect. The glossy accents make the distress ink pop.

Step 28: Blend in a little old paper distress ink over an idea-ology quote chip and edge with potting soil archival ink. Adhere the quote chip and mini gears with glossy accents. Add a game spinner to one of the mini gears with a hex fastener.
You could punch a hole in the top corners and add ribbon for a wall hanging or add to a card... there are no rules. ;)

I hope you have enjoyed the step by step. If this has you in the mood for some valentine themed inspiration, pop over and take a look at the current "BE MY VALENTINE" challenge.
Have a great weekend.
Zoe x
 |  |  |  |  |
 |  |  |  |  |
 |  |  |  |  |
 |  |  |  |  |
 |  |  |  |  |
 |  |  |  |  |

A fantastic tutorial with some great tips and your card is just fabulous Zoe!
ReplyDeleteThanks so much Anne.
DeleteA totally wonderful card, your sweetheart is going to love it, - and what a great step out!! Thanks for the inspiration. (Just letting you know also that the link from your own blog is not working again)...
ReplyDeleteThanks so much Astrid, and I've fixed the link, thanks for letting me know.
DeleteThis is so fabulously Funkie! Thank you for the excellent tutorial and for sharing all those wonderful techniques. Happy Valentines Day, Zoe!
ReplyDeleteThanks Kathy :)
DeleteLovely card Zoe, love the hearts and the arrow nested on top . Great design. Tracy x
ReplyDeleteThanks so much Tracy
DeleteI love everything about this, Zoe, especially his heart face!
ReplyDeleteThank you Marjie :)
DeleteWow! Awesome Valentine and great tutorial!
ReplyDeleteThanks Susie
DeleteZoe, what an amazing Valentine, and Thank you for this fabulous tutorial! I am going to try some of your steps! Now all I need is every single one of those products! Ughhh, the wallet! Your sweetie is going to treasure this!
ReplyDeleteLooking forward to seeing what you create Sara. :)
DeleteAbsolutely amazing project and a brilliant tutorial, thanks so much for sharing it Zoe! Deb xo
ReplyDeleteThanks a lot Deb, my pleasure. :)
DeleteFabulous tutorial and wonderful card!
ReplyDeleteThanks so much Suzz :)
ReplyDeleteZoe,
ReplyDeleteThis is a great step by step! I love your card and all of the elements that elevate paper to a new level!
Hugs,
Nancy
This is gorgeous 💕💕💕
ReplyDelete